Back when I was starting out, I thought window installation was straightforward. That illusion ended the day a mis-measured opening forced us to reorder frames. It was a costly mistake.
That mistake pushed me to pay closer attention to every detail of the process.
Now, after years of being on projects and working with experienced installers, I know what works and what doesn’t. And that is what makes this guide worth your time.
You’ll find a step-by-step walkthrough of commercial window installation here. Each stage is explained clearly so you can avoid errors and finish strong.
It’s the kind of advice I wish someone had given me early on.
So, let’s get started!
Quick Process Table
Here’s a clean step-by-step table that pulls together all 9 steps from your commercial window installation guide. A quick glance at this table gives you the entire process in order. Use it as a checklist to confirm each stage is complete before moving on.
| Step | Task | Key Focus | Quick Reminder |
| 1 | Site Assessment & Measurement | Walk site, check structure, measure accurately | Treat every site as new |
| 2 | Select Window & Specs | Match use, pick frame/glass, confirm codes | Don’t assume past specs apply |
| 3 | Order & Prep Site | Order early, plan delivery, prep access | Site ready before windows arrive |
| 4 | Remove Old Windows | Protect area, remove carefully, check opening | Fix hidden damage right away |
| 5 | Prep Rough Opening | Clean, square, repair, flash | Solid base = lasting fit |
| 6 | Dry Fit Window | Test placement, reveals, sill, operation | One chance to set it right |
| 7 | Anchor Frame | Shim, drill, fasten, balance, level | Wrong anchors = weak frame |
| 8 | Seal & Waterproof | Backer rod, sealant, flashing, cure | Gaps = leaks later |
| 9 | Finish Trim | Interior trim, caulk, exterior cover, inspect | Clean lines leave the best impression |
Step#1 Site Assessment and Measurement
Most window installations go wrong not because of the glass or the frame, but because someone rushed through the basics. Drawings might look perfect, but buildings don’t always match what’s on paper. That’s why I always say: slow down, walk the site, and measure everything as if it’s brand new.
Walk the Site and Spot Problems Early
- Start With a Fresh Walk-Through: Don’t assume you know the building. Check both inside and outside, paying attention to walls, vents, and any wiring that could interfere with the install.
- Look for Structural Details: If a wall is load-bearing, you can’t just cut or adjust the opening. That’s something to flag before anyone grabs a saw.
- Notice Red Flags Right Away: Water stains, sagging headers, or patchwork repairs won’t magically disappear. The sooner you plan for fixes, the fewer surprises later.
Measure and Confirm What You’re Working With
- Measure Every Opening, Top to Bottom: Take numbers from the top, middle, and bottom. Openings are rarely perfect, so stick with the smallest measurement as your guide.
- Check Level and Plumb: Even frames that look square can be off. A half-inch out of level may not seem like much—until the window doesn’t fit.
- Understand the Wall Build: Steel framing, brick, or CMU with hidden insulation all change how you set depth and mounting. Knowing this now avoids rework later.

Step#2 Select Window Type and Finalize Specifications
I’ve seen too many projects trip up here because someone just grabbed a “standard” unit without thinking it through. The result? Windows that didn’t meet code or didn’t perform the way the client expected.
This step isn’t just about looks. It’s about performance, compliance, and durability. What you decide now will shape how smooth the install goes and how well those windows last over time.
Match Design to Building Needs
- Start With the Space’s Function: Offices, gyms, clinics, and retail spaces all demand different things. Consider airflow, light, security, and even aesthetics before choosing.
- Choose the Right Frame Material: Aluminum works well for strength and low maintenance. If thermal performance matters, thermally broken or composite frames may be the smarter call.
- Dial In the Glazing Specs: Double-pane, triple-pane, Low-E coatings, or safety glass. Your decision depends on climate, energy goals, and safety needs.
Confirm Compliance and Avoid Surprises
- Check Mechanical and Structural Drawings: Make sure windows don’t clash with HVAC layouts, fire safety systems, or key supports. A quick review here saves headaches later.
- Review Codes and Energy Standards: Do not assume what worked on your last project will fly here. Every location has its own requirements, and missing one could mean a failed inspection.
Step#3 Order Windows and Prepare Site
Once the specifications are locked in, timing becomes everything. I’ve seen schedules collapse because someone delayed the order or forgot to get the site ready while waiting for delivery. Both mistakes can stall an otherwise smooth project.
The goal here is to stay one step ahead. Window lead times can stretch depending on the design, and by the time the units arrive, the site should already be ready for installation.
Stay Ahead on Ordering and Delivery
- Place Your Window Order Early: As soon as specs are finalized, submit the order without delay. Specialty glazing or frame types often take several weeks, and waiting too long can throw off your entire schedule.
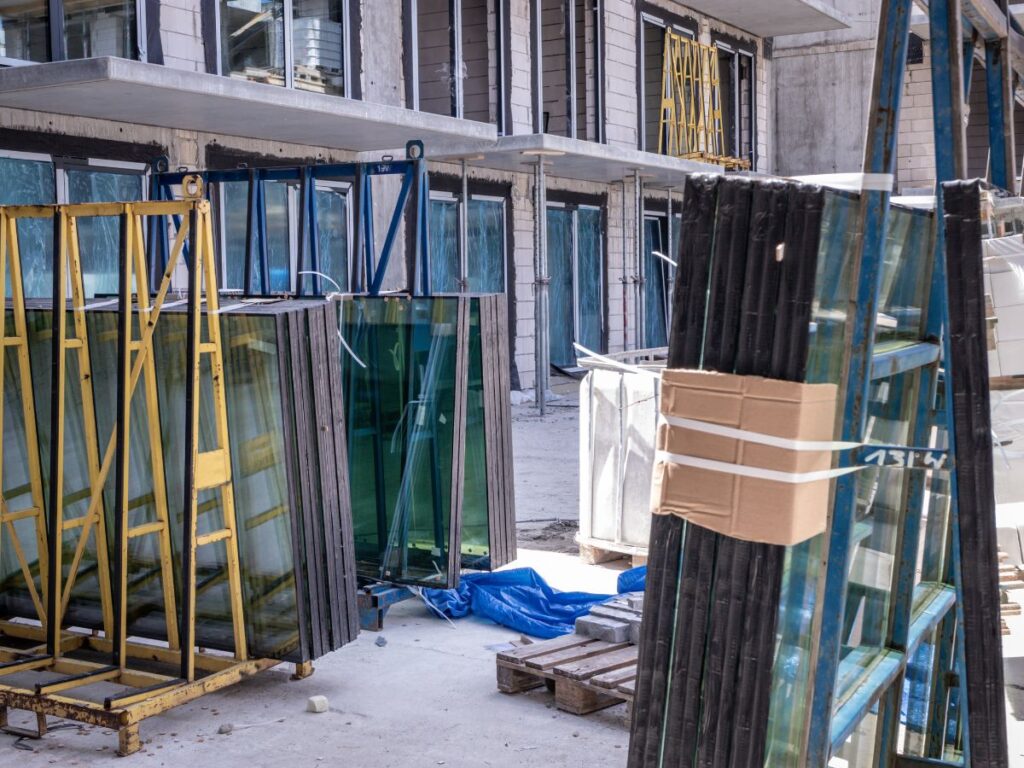
- Confirm Delivery Details with the Supplier: Vallisco provides clear delivery schedules and packaging details so you know exactly what to expect. Whether the windows arrive boxed, on racks, or require a forklift, you’ll be prepared ahead of time.
- Set Up a Clean and Safe Storage Area: If the windows arrive before installation, plan for proper storage. Keep them upright, dry, and out of high-traffic areas to prevent damage and delays.
Prepare the Site Before Delivery
- Clear Obstacles and Pathways: Walk the site and remove anything that could get in the crew’s way. An open, clutter-free work area makes installation faster and safer.
- Arrange Equipment in Advance: Have scaffolding, lifts, or staging in place before the windows show up. This way, your crew can get straight to work without wasting time.
- Ensure Easy Access to Rough Openings: Check that every opening is ready and accessible before delivery day. When the units arrive, your team should be able to begin installation right away.

Step#4 Remove Old Windows (If Applicable)
If you’re dealing with a replacement job, this step can get messy fast. Removing old windows in a commercial building is about more than tearing out frames. It’s about working carefully so you don’t damage the structure that still needs to support the new installation.
Plan and Protect Before Removal
- Start by Inspecting from Inside and Out: Check how the window is mounted and secured. Look for screws, nails, welds, or hidden fasteners and sealants that could complicate removal.
- Protect the Surrounding Area: Lay down floor protection and cover nearby finishes before work begins. Many commercial interiors use costly materials, and preventing damage saves money and time.
Remove and Inspect the Opening
- Cut Sealants and Release Fasteners Carefully: Use the proper tools instead of prying aggressively. This reduces the risk of damaging the wall or bending frames that may need later review.
- Check the Rough Opening Once the Frame Is Out: Look for cracks, water damage, or rotted areas inside the opening. If problems are found, stop and repair them before moving forward with installation.
- Dispose of Old Units Properly: Plan ahead for safe removal since commercial windows are large and heavy. Coordinate recycling or disposal so nothing gets left in the way of progress.

Step#5 Prep the Rough Opening
I’ve lost count of how many times I’ve walked onto a site where crews tried to force a window into an opening that wasn’t square or was still full of debris. If you want a window to fit right, seal tight, and last for years, the rough opening has to be clean, level, and ready before the unit even comes out of the crate.
Clean and Check the Opening
- Clean Out the Opening Completely: Remove every old shim, nail, or bit of sealant left behind. A clear surface ensures the new frame has solid contact and won’t shift during install.
- Check the Opening for Squareness: Measure both diagonals to confirm accuracy. If they don’t match, the window will never sit properly no matter how careful you are.
- Verify Level and Plumb: Place a level across the sill and up both sides of the opening. If adjustments are needed, shim or trim before continuing to avoid headaches later.
Reinforce and Prepare for Installation
- Inspect Framing for Damage: Look closely for cracks, rot, or weak spots in the surrounding structure. Anchor points must be solid, so reinforce or repair any compromised areas.
- Add Backer Rod or Foam if Needed: Some openings may not match the exact frame size. Building out or filling space ensures a snug fit that supports performance.
- Apply Flashing Tape or Pan Flashing: This step is essential for managing water. A properly sealed sill with waterproofing tape or pan flashing protects the installation from future leaks.
Step#6 Dry Fit and Position the New Window
Before fastening anything in place, it’s important to stop and check the fit. Skipping this step can lead to misalignments, uneven gaps, or twisted frames that are difficult to correct once secured. Think of this stage as a test run. It allows you to confirm fit, spacing, and alignment before committing, which helps avoid costly adjustments later.
Place the Window Carefully
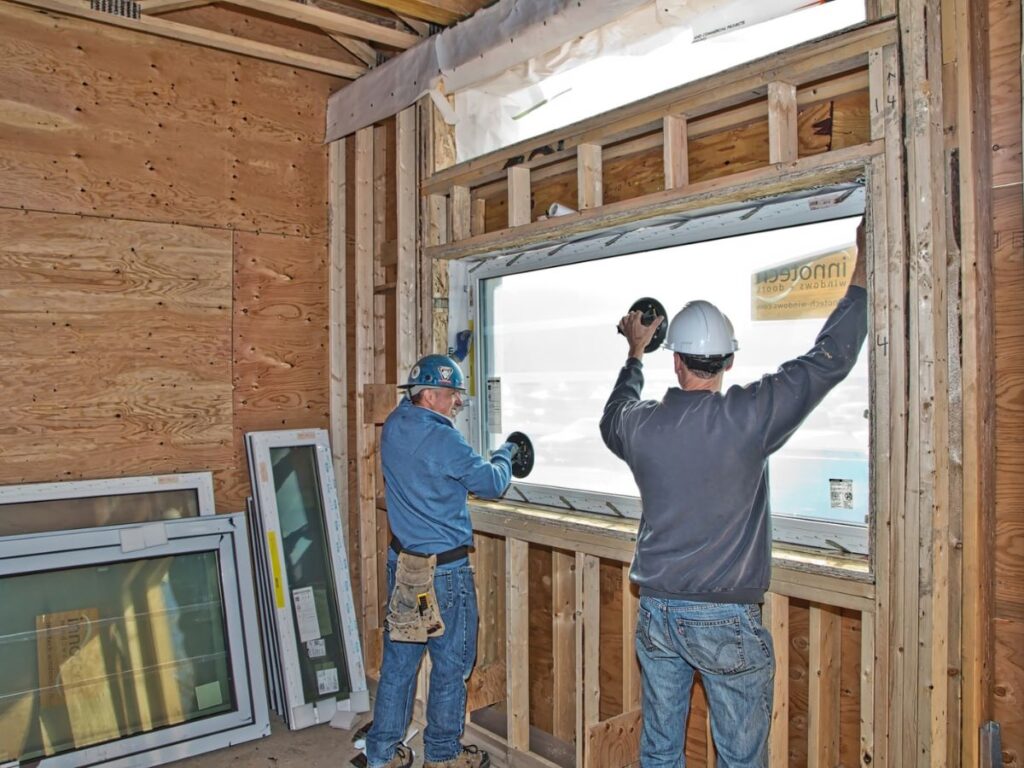
- Carefully Set the Window into the Opening: Lower the unit slowly and with control. Use a lift or extra crew members for larger frames, and never force it into place.
- Check Reveal and Clearance on All Sides: Inspect the spacing around the window to make sure it’s even. You’ll need a small, consistent gap for shims and sealants to work properly.
Confirm Alignment and Operation
- Verify Sill Alignment: Place a level across the bottom of the frame. The sill should rest flat without a crown or dip, and adjust immediately if it’s off.
- Test Window Operation if It Opens: Vallisco windows are designed for smooth, reliable movement, but it’s still important to test. Open and close the unit to confirm it operates without rubbing or binding before you anchor it.
Step#7 Anchor the Window Frame
This is the step where the installation is locked into place. A frame that isn’t anchored correctly may look fine at first, but it will fail under stress, leading to rattling, leaks, or long-term damage.
Anchoring is about more than just holding the unit steady. It ensures the frame stays square, performs under pressure, and lasts for the life of the building.
Prepare and Position the Frame
- Start with Shims at Key Points: Place shims at the sill corners and midpoint to keep the frame aligned. They should be snug enough to hold position without bending the material.
- Drill Pilot Holes if Required: Some wall and frame materials benefit from pre-drilling. This reduces stress, prevents cracks, and helps the anchor seat properly.
Secure and Confirm Alignment
- Use the Right Anchors for the Wall Type: Choose fasteners based on whether the opening is concrete, wood, or metal framing. The anchor must be suited to the wall for maximum stability.
- Anchor Opposite Corners First: Secure the frame at diagonal corners before moving on. This keeps it balanced while you tighten the rest of the anchors around the perimeter.
- Check for Racking or Twist as You Tighten: Keep a level on hand to watch for shifts. If the frame starts to twist, adjust your shims immediately before continuing.

Step#8 Seal and Waterproof
This is the step that can make or break an installation. I’ve seen perfectly installed windows turn into problem jobs simply because the sealant wasn’t applied right, and one small gap was enough to let water in.
No matter how square or solid the frame is, moisture will find its way through a weak seal. Taking the time to do this carefully is what keeps the building dry and your work from turning into a callback.
Apply the Right Materials
- Apply Backer Rod in Gaps Over 1/4 Inch: This controls the sealant depth and creates a solid backing. It also prevents wasted material and ensures stronger adhesion.
- Use Commercial-Grade Sealant: Select a sealant rated for the specific cladding type and climate. Lower-grade products may fail early, leading to costly repairs.
- Run Continuous Beads Around the Frame: Apply one uninterrupted line along all four sides. Smooth the bead to create full coverage and eliminate weak spots.
Ensure Complete Protection
- Seal Flashing Overlaps: Every joint should be watertight and pressed tightly in the right direction. Overlapping correctly directs water away instead of into the wall system.
- Check for Missed Spots or Voids: Walk the perimeter slowly once the sealant is in place. Any gap, dent, or visible daylight needs to be addressed immediately.
- Let the Sealant Cure Properly: Follow the manufacturer’s cure times based on site conditions. Rushing this step can weaken the bond and shorten the life of the seal.
Step#9 Finish Interior and Exterior Trim
This is the part everyone notices, even if they don’t understand the details of window installation. I’ve had building owners walk through a project and ignore the structural work, only to point out a crooked trim return or messy caulk line. A good finish work does more than looks nice. It protects the opening, hides the anchors, and gives the project the polished look that clients expect at the end.
Interior Finish Work
- Install Interior Trim Flush and Clean: Choose materials that match the wall finish and set them in straight. Even small gaps or uneven joints will stand out immediately.
- Seal Interior Gaps Lightly: Apply a thin bead of paintable caulk around the trim edges. This improves appearance while also adding a bit of extra air sealing.
Exterior Finish Work
- Apply Exterior Trim or Cladding: Match the trim to the exterior system and ensure it’s compatible with flashing. It should cover exposed frame edges while helping to shed water effectively.
- Inspect All Transitions for Clean Lines: Step back and view the trim from multiple angles. Wavy cuts, rough joints, or mismatched materials should be corrected before the final walkthrough.

Conclusion
We started with a costly mistake, and we’re ending with a solution. The mis-measured opening that once set me back is the exact reason this guide exists.
Now you know the steps that prevent delays, save money, and deliver quality installs every time.
From planning to finishing touches, you have the process to get it right.
For dependable doors and windows that match your standards, contact Vallisco today and build with confidence.
Explore Related Resources
Want to see more? We’ve gathered additional product choices to give you even more variety:
Still haven’t found what you’re looking for? Don’t hesitate to contact us. We’re available around the clock to assist you.


