A villa owner once told me he bought doors that looked fine at first but warped within 2 seasons. His renovation costs doubled because the supplier never explained how the doors were made.
That story is all too common, and it shows why knowing the metal door manufacturing process matters for any property project.
Over the years, I’ve helped many clients avoid the same mistake by explaining how doors are built and tested. This gives them confidence before they invest.
In this article, you’ll see a full step-by-step guide on the process. It will give you the clarity you need to choose the right doors for villas, hotels, or even greenhouses.
Think of this as a practical guide written from real experience, not just theory.
So, let’s get started!
Quick Overview Chart
Before going into the full details, here’s a quick look at the main steps in making a metal door. Each step has its own role, from picking materials to the final tests. This overview will give you a clear picture before we go deeper.
| Step | What Happens | Why It Matters |
| 1. Selection of Raw Materials | Choose steel, stainless steel, or aluminum. Thickness and grade are decided here. | Strong materials create doors that last and resist damage. |
| 2. Design & Customization Planning | CAD drawings are made with exact size, patterns, and options. | Makes sure the door fits the property’s needs and style. |
| 3. Cutting and Shaping Metal | Sheets are cut and shaped using laser or CNC machines. | Accurate cuts help doors fit properly and seal well. |
| 4. Welding & Assembly | Frames, panels, and reinforcements are joined together. | Solid welding gives the door strength and stability. |
| 5. Surface Treatment & Anti-Corrosion Coating | Galvanizing, priming, and powder coating are applied. | Protects against rust, scratches, and weather damage. |
| 6. Finishing Touches & Aesthetic Enhancements | Grinding, polishing, and adding decorative designs. | Improves appearance while keeping the door smooth. |
| 7. Hardware Installation | Locks, hinges, and handles are attached. | Good hardware adds security and ease of use. |
| 8. Quality Control & Testing | Doors are tested for strength, weather, and fire resistance. | Confirms the door meets safety and performance standards. |
Each of these steps plays a role in producing a strong, safe, and good-looking door. Read more below to see the full process explained step by step.
Step#1 Selection of Raw Materials
Before a metal door takes shape, everything starts with the materials. I’ve seen over and over again that the right choice here makes the biggest difference in how long a door lasts. If you’re buying for your property, this is the part you want to understand well.
Choosing the Right Metal
- Steel: Strong and widely used, steel is the go-to for security doors in hotels, villas, and commercial sites. It’s heavy and resists impact, which makes it reliable in high-traffic areas.
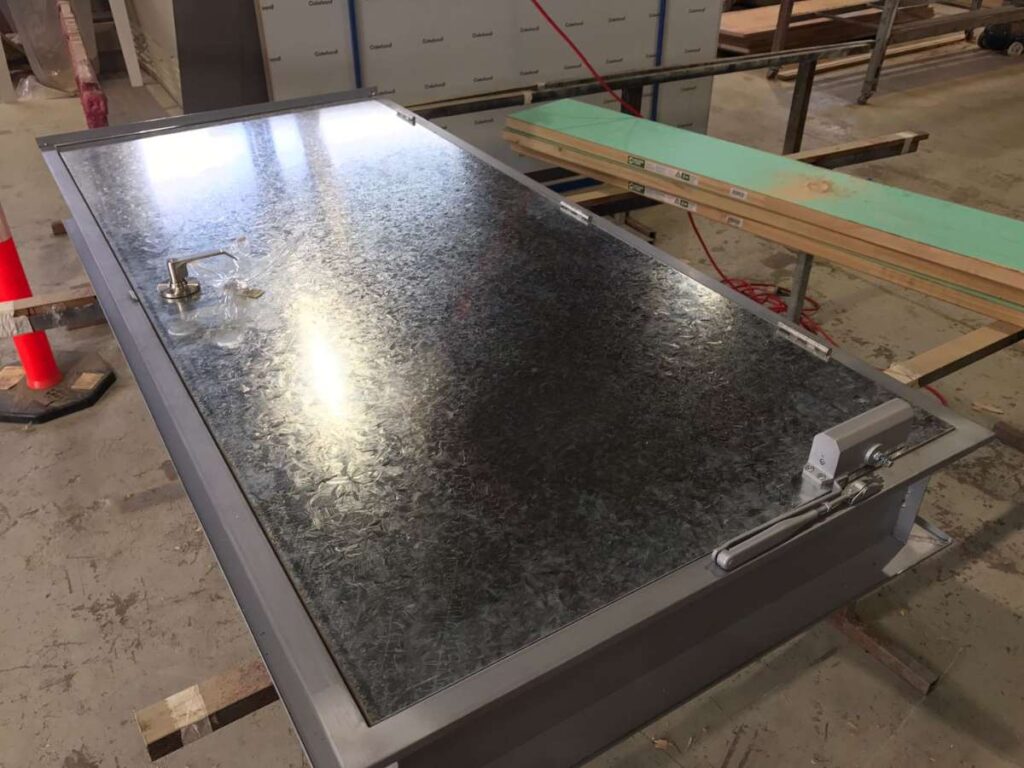
- Galvanized Steel: This is steel coated with zinc, which makes it more resistant to rust. If your property is in a humid or coastal area, galvanized steel is often the safer bet.
- Stainless Steel: Sleek and resistant to corrosion, it works well in both modern villas and business settings. It costs more, but it offers long service with less maintenance.
- Aluminum: Lightweight and easier to shape, aluminum is often chosen for greenhouse doors or light-use areas. It may not be as strong as steel, but it performs well in spaces where weight matters.
Deciding Thickness and Grade
- Material Thickness: The thickness of the sheet affects durability and security. A hotel or inn may need thicker sheets for safety, while a house project might use medium thickness for balance.
- Metal Grade: Higher-grade steel or stainless steel brings better strength and resistance. I usually suggest confirming grade standards with your supplier before buying.
- Matching Use to Property Type: A greenhouse won’t need the same level of strength as a villa’s main entrance. Think about daily use and the environment before choosing.
- Cost vs. Performance: The thicker and higher the grade, the higher the cost. But it’s not always about buying the strongest, it’s about buying the right material for your situation.
Step#2 Design & Customization Planning
Once the raw materials are chosen, the next step is design. I’ve often seen this stage make or break a project because it’s where function and style come together. If you want doors that fit your property well, this is the part you’ll want to pay close attention to.
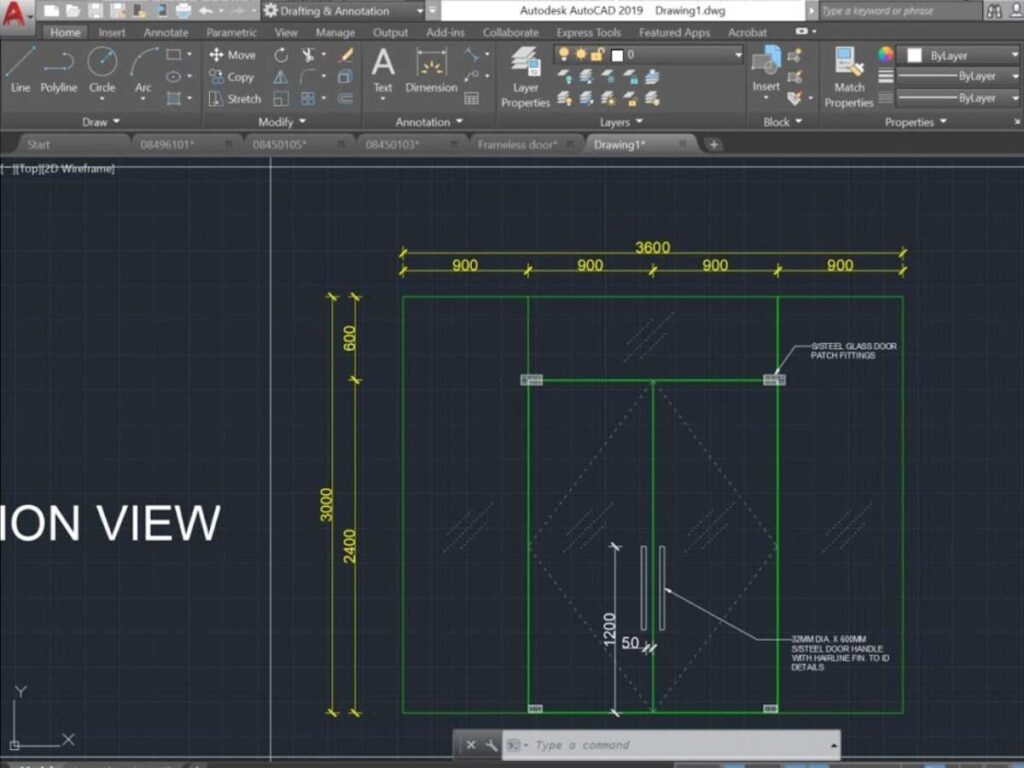
Planning With CAD Drawings
- Accurate Measurements: Vallisco uses computer-aided Design (CAD) software to create precise drawings. This makes sure the final door fits your frame without gaps or adjustment problems.
- Visual Previews: CAD drawings let you see the door layout before production. You can confirm patterns, openings, and overall look.
- Fewer Errors: With digital plans, mistakes are reduced compared to manual drafting. That saves time and cost in large orders.
- Custom Adjustments: Changes can be made quickly on screen. This flexibility helps when a property needs different designs for different areas.
Options for Customization
- Size and Shape: Large hotel entrances may need double doors, while villas often choose single doors. Your project will determine the best size.
- Surface Patterns: Panels, grooves, or embossed shapes can be added for a refined look. These details help match the door to the style of your property.
- Glass Inserts or Louvers: Openings for glass or vents can be designed into the door. They add light or air flow without losing strength.
- Special Features: Extra layers for fire resistance or soundproofing are common requests in hotels and inns. This is easier to build in at the design stage.
Matching Design to Property Needs
- Residential Projects: Homeowners may care more about design variety and finishes. Security is still key, but appearance plays a bigger role.
- Hospitality Projects: Hotels and B&Bs often need a balance between strength, noise control, and a welcoming look. Consistency across many doors is also important.
- Greenhouse or Utility Spaces: For these, weight and ventilation may matter more than decoration. Aluminum or simpler styles may be chosen.
- Long-Term Value: By matching the design to the property’s use, you avoid future replacement costs. I’ve seen projects go wrong when design choices didn’t match real needs.
Step#3 Cutting and Shaping Metal
After the design is finalized, the raw sheets are cut and shaped into the actual door parts. I’ve seen that this stage often decides how well the door will fit and operate later. If you want fewer problems during installation, the cutting process is one you should care about.
Cutting With Precision
- Laser Cutting: Laser machines are often used for exact cuts. They make clean edges and reduce the need for extra grinding.
- CNC Machining: Computer-controlled machines can cut complex designs and shapes. This is useful when doors need patterns or non-standard sizes.
- Consistency Across Orders: With digital machines, every door in a bulk order matches the same measurements. That’s important if you are fitting dozens of doors in one project.
- Less Waste: Accurate cutting uses up less material. That helps keep costs in check when ordering in larger quantities.
Shaping Into Frames and Panels
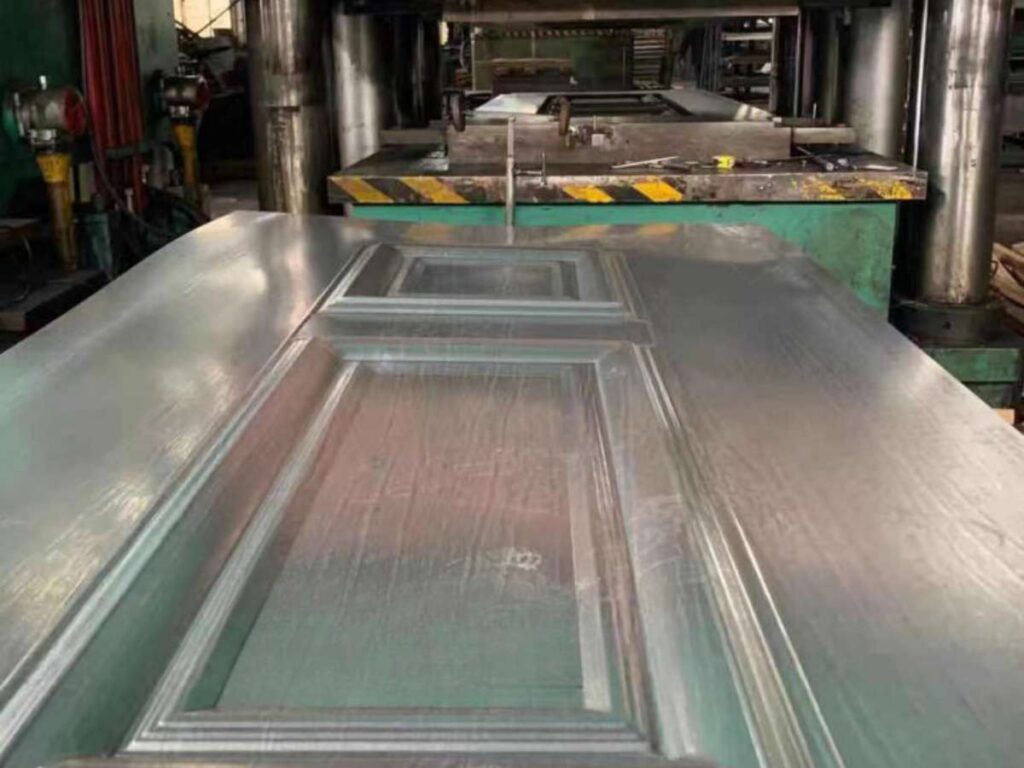
- Forming the Door Leaf: Sheets are bent and shaped into the main door surface. This creates the strength and structure for the door.
- Building the Frame: Frames are shaped to hold the door leaf and hardware. A strong frame helps prevent sagging or misalignment.
- Adjusting to Design Needs: Some doors may require deeper folds, embossing, or other shaping to match the CAD drawings.
- Testing for Fit: Parts are checked against the design at this stage. If changes are needed, they are easier to make before welding.
Step#4 Welding & Assembly
Once the metal sheets are cut and shaped, the parts need to come together. This stage is where the door starts looking like a door. From what I’ve seen, the way the pieces are welded and assembled affects both the strength and how long the door will serve your property.
Welding for Strength
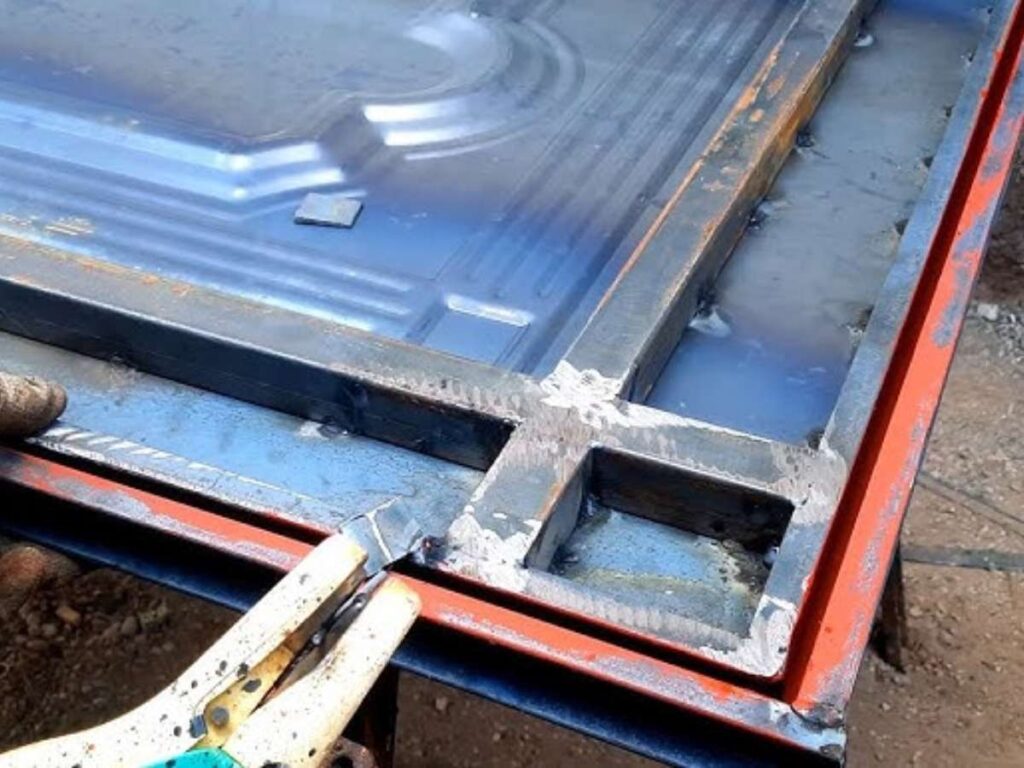
- Joining Corners and Edges: Welds at the edges and corners give the door its solid frame. A clean weld here means fewer weak points.
- Adding Reinforcements: For doors used in hotels or high-security areas, steel bars or inner supports are welded inside. This makes it harder to break or bend the door.
- Maintaining Alignment: Skilled welders keep the panels straight while working. If alignment shifts during welding, the door may not close properly later.
- Smooth Finishing on Welds: Extra grinding may be done to keep welds neat. A smoother surface is easier to finish in later steps.
Assembling the Main Structure
- Attaching Panels to the Frame: The door leaf is fixed to the frame, creating the main body. This sets the shape that will hold all other parts.
- Adding Inner Components: If insulation, honeycomb, or fireproof material is required, it is placed inside during assembly.
- Securing Hinges and Supports: Hinge points are reinforced at this stage, since they carry the door’s weight during daily use.
- Checking Dimensions: After welding and assembly, the door is checked against the design drawings. Corrections here save trouble during installation.
Step#5 Surface Treatment & Anti-Corrosion Coating
After welding and assembly, the door still isn’t ready. Bare metal can rust, fade, or wear out quickly if it’s not treated. I’ve seen projects where skipping this step caused problems in just a few years, so this stage is one you’ll want to understand.
Preparing the Surface
- Cleaning the Metal: Dirt, oil, or welding residue is removed before coating. If this step is rushed, the finish won’t stick well and may peel later.
- Grinding Rough Spots: Weld marks or sharp edges are smoothed out. A clean surface makes the door look better and helps coatings last longer.
- Checking for Imperfections: Small dents or flaws are fixed now. Once the coating is applied, fixing mistakes becomes harder.
- Base Layer Application: Sometimes a primer layer is added as a base. This improves adhesion for the next treatments.
Applying Protective Coatings
- Galvanization: A zinc layer is applied to steel doors for rust resistance. This is especially helpful in humid or coastal areas.
- Powder Coating: Dry powder is sprayed on and baked to form a hard finish. It’s durable, colorful, and resists scratches.
- Painting Options: Traditional painting may also be used, though powder coating often lasts longer. Paint can still work well for custom colors or small batches.
- Layer Thickness: The thickness of the coating affects performance. Thicker coatings give more protection but may cost a bit more.
Enhancing Durability and Appearance
- Weather Resistance: With the right coating, the door can handle rain, heat, or cold without damage. This reduces maintenance over time.
- Color and Style Choices: Coatings allow a wide range of colors and finishes. A hotel might prefer a warm tone, while a modern villa may go for sleek metallic shades.
- Corrosion Protection: Coated doors stay free of rust for much longer. This is one of the main reasons businesses choose treated metal doors.
- Long-Term Value: A properly treated surface extends the life of the door. In my experience, this is one of the best returns on investment in the whole process.
Step#6 Finishing Touches & Aesthetic Enhancements
After the protective coatings are applied, the door moves into its finishing stage. This is where the small details make a big difference. I’ve found that many business owners care about this step because it affects both how the door looks and how it feels to use.
Surface Improvements
- Polishing and Grinding: Any rough spots left after coating are polished smooth. This helps the door look clean and professional.
- Sanding for Texture: Some finishes call for a textured look. Sanding can add that extra touch and improve the grip of the coating.
- Seam Smoothing: Joints and welded areas are blended in. This gives the door a uniform appearance that’s easier to paint or finish.
- Quality Check Before Decoration: A quick review is done to make sure the surface is ready for decorative work. Fixing flaws later is costly and time-consuming.
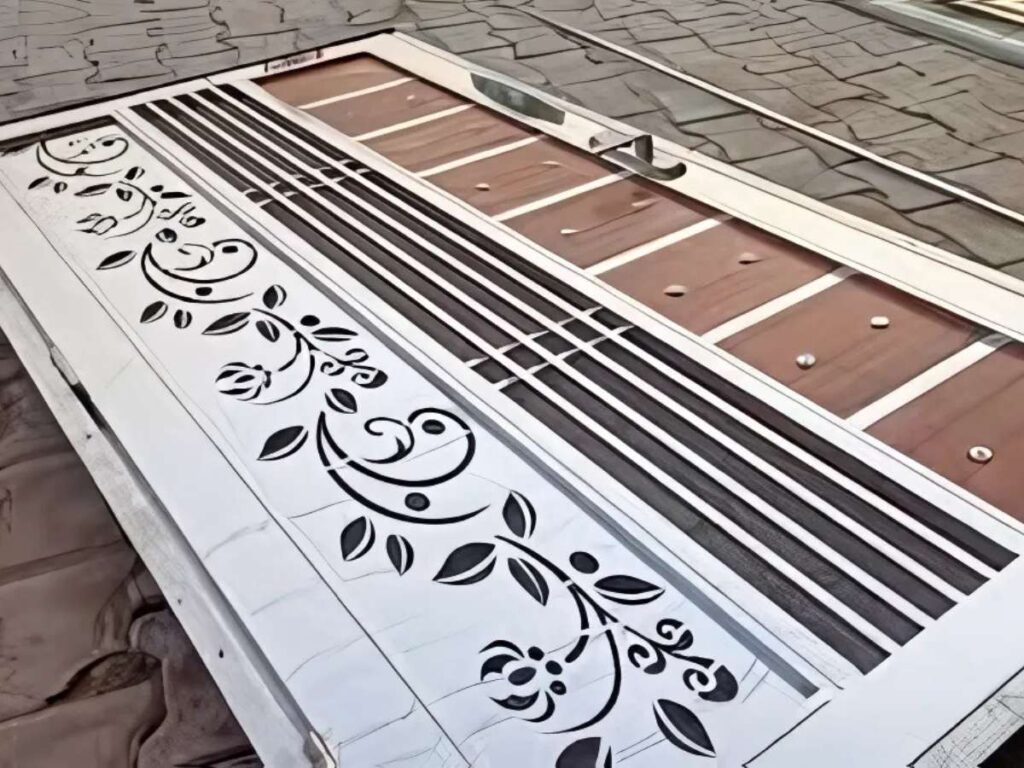
Adding Decorative Features
- Panels and Grooves: Decorative panels or embossed lines are added for style. Villas and hotels often choose these to match architecture.
- Wood-Like Finishes: Metal can be finished to look like wood. This is popular in residential and hospitality projects where design matters.
- Glass or Vent Inserts: Openings for glass or air vents are set in place during this stage. They provide light, style, or airflow depending on your needs.
- Brand or Custom Designs: Some clients add custom patterns or logos. It’s a simple way to combine security with branding.
Step#7 Hardware Installation
Even the best-made door won’t work well without the right hardware. I’ve noticed that many problems in daily use come not from the door itself, but from poor hardware choices. If you want reliable performance, this is the part to pay close attention to.
Choosing and Fitting Hardware
- Locks: Strong locks are fitted depending on the property’s needs. Hotels may use card systems, while houses often prefer deadbolts or multi-point locks.
- Hinges: Heavy-duty hinges are selected to carry the door’s weight. If hinges are weak, the door may sag or wear unevenly.
- Handles and Knobs: These are chosen for both function and appearance. For commercial use, they need to stand up to frequent handling.
- Closers and Stoppers: Automatic closers or stoppers may be added. These keep doors from slamming and improve safety in high-traffic areas.
Ensuring Security and Usability
- Precise Alignment: Hardware is installed in line with the frame and leaf. Misaligned hardware makes the door harder to use and weakens security.
- Compatibility With Design: Hardware is matched with the overall design chosen earlier. This creates a consistent look across a property.
- Smart Options: Modern projects may include smart locks, keypads, or biometric systems. These are tested at this stage for smooth function.
- Durability in Daily Use: I always advise clients to think about how often a door will be used. High-traffic doors need stronger hardware than a private entrance.
Step#8 Quality Control & Testing
Before a door leaves the factory, it goes through a series of checks. From what I’ve seen, this step often gives business owners peace of mind because they know the product has been tested before installation. If you want long-term value, this is the part that confirms it.
Strength and Security Testing
- Impact Resistance: Vallisco doors are tested for how well they hold up to force. This matters for hotels, inns, and houses where security is a main concern.
- Bending and Warping: Frames and leaves are checked to make sure they don’t bend under pressure. A door that warps will be hard to close and less safe.
- Lock and Hinge Strength: Hardware is tested along with the door. Weak points are found and corrected here instead of at your property.
- Load-Bearing Checks: For larger or heavier doors, weight distribution is tested. This prevents sagging over years of use.
Environmental and Weather Testing
- Corrosion Resistance: Coated surfaces are tested against moisture and salt. This is important in Southeast Asia and coastal Europe, where humidity is high.
- Heat and Cold Tolerance: The door is checked for performance in extreme temperatures. A stable door will not expand or contract too much.
- Water Penetration: Tests confirm that rain or wind-driven water won’t pass through. This helps protect interiors from damage.
- Sound and Insulation Tests: For hotels and B&Bs, doors are often tested for soundproofing and thermal insulation.
Fire and Safety Testing
- Fire Rating: Some projects, especially commercial ones, need fire-rated doors. These are tested to confirm they meet local safety codes.
- Smoke Resistance: Tests are done to see if the door can stop smoke from passing through. This is a key safety feature in multi-room buildings.
- Emergency Operation: Doors are checked to make sure they can open quickly in an emergency. Exit doors in hotels often require this feature.
- Final Review: All results are recorded and compared against standards. This step gives you documented proof of quality.
Conclusion
I still think back to that villa owner who wished he had known more about how doors were built. He could have saved time, money, and stress.
That’s why I’ve shared this full process with you. Now you understand the materials, the design, and the testing that make a strong metal door. Every stage connects to the next, giving you confidence in what you buy.
If you’re ready to plan doors for your property, Vallisco can help guide you through each step.
Contact us today and see how we can support your next project with reliable solutions.
Explore Related Resources
Want to see more? We’ve gathered additional product choices to give you even more variety:
Still haven’t found what you’re looking for? Don’t hesitate to contact us. We’re available around the clock to assist you.


