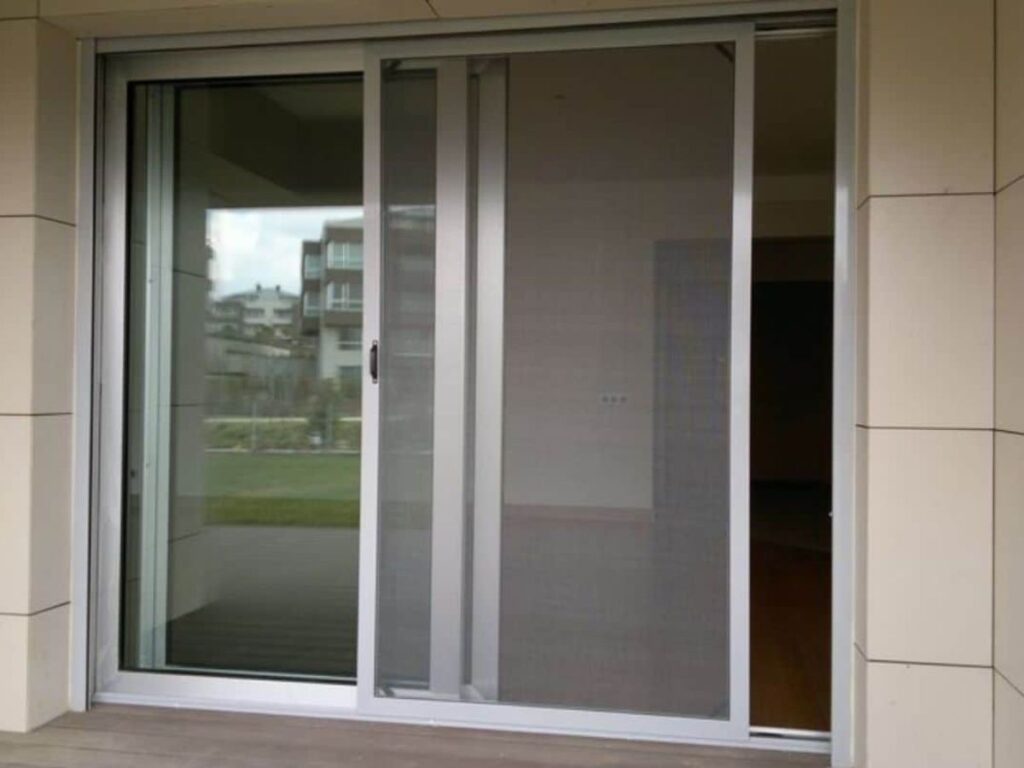
I remember watching a hotel crew struggle with a stuck screen door during a last-minute renovation. The guest was due in an hour.
That delay could have been avoided with a clear removal plan.
I’ve helped install and remove dozens of these setups across villas and resorts. What I’m sharing is built on real experience in your kind of projects.
This article breaks down what tools you need, what steps to follow, and how to avoid damage. If you’re responsible for upkeep or refits, this will answer your needs.
If you’ve ever said, “It shouldn’t be this hard,” you’re not alone.
So, let’s jump in!
Quick Guide
Before we dive into the full guide, here’s a quick look at the steps. This table gives you a simple overview to follow.
| Step | Key Actions | Why It Matters | Mistakes To Avoid |
| 1. Prepare the Area | Clear space, gather tools | Keeps job smooth and safe | Starting without setup |
| 2. Open the Glass Door | Slide fully, check track | Opens space to work easier | Forcing a stuck panel |
| 3. Unlock the Screen Door | Release all locks gently | Prevents damage while lifting | Missing a hidden latch |
| 4. Loosen Screws | Turn both sides slowly | Lowers door for clearance | Removing screws completely |
| 5. Lift the Door | Raise it into top track | Clears bottom from the frame | Tilting too early |
| 6. Tilt Bottom Out | Pull gently toward you | Preps door for removal | Swinging or forcing frame |
| 7. Remove the Door | Slide top edge out | Fully frees the door | Letting door fall sideways |
| 8. Set Aside Safely | Lay flat, bag screws | Protects door and parts | Leaning it on wall |
That was the quick version, now let’s break it down and guide you through each step.
Step#1 Prepare the Area
Removing a screen door isn’t something you want to rush into. I’ve seen crews waste time or damage parts just because they didn’t set up the work area right.
Clear the Surroundings
- Move Nearby Furniture: Slide chairs, tables, or outdoor items away from the door. This gives you and your team space to work without tripping or bumping into anything.
- Clear the Floor Area: Look for rugs, doormats, or small items on the floor. Remove them so you don’t snag or trip while handling the door.
- Make Room on Both Sides: You’ll need space inside and outside the doorway. This helps you tilt and lift the door without scratching the frame or wall.
- Notify Others in the Area: Let your team or building staff know you’re working on the door. It avoids foot traffic while you’re mid-removal.
Gather the Basic Tools
- Phillips Screwdriver or Drill: Most screen doors have screws you’ll need to loosen. A screwdriver or drill helps you adjust or remove them easily.
- Small Flathead Screwdriver: Use this for prying or loosening older frame corners. It comes in handy if the door is stuck or paint-sealed.
- Work Gloves: Gloves protect your hands from sharp edges or stuck rollers. They also give you better grip while lifting.
- Towel or Cardboard Sheet: Once the door is out, lay it down on a soft surface. This protects both the door and the floor from scratches.
This step may feel like preparation, but it sets the tone for the whole project. When the area is clear and your tools are ready, you avoid small frustrations that add up to wasted time. A clean workspace also shows professionalism, something your clients notice right away.
Step#2 Fully Open the Sliding Glass Door
Now that your work area is cleared and your tools are ready, it’s time to give yourself room to actually move the screen door. This is where a lot of people slip up. They forget about the glass panel and then wonder why the screen won’t budge.
Make Sure the Track Is Clear
- Wipe Down the Bottom Track: A quick brush or cloth clears out dirt and grit. You’ll never know how much easier the panel slides until you do this.
- Check for Obstructions: Take a second look for stray screws, gravel, or even a bit of dried caulk. These little things can stop the door cold.
- Slide the Glass Door All the Way Open: Push it fully aside so you have the widest opening. Don’t stop halfway, you need all the clearance.
- Confirm the Lock Is Off: Sounds simple, right? Yet I’ve seen crews fight a door that was still latched. Double-check yours.
Work Safely Around the Glass
- Avoid Leaning Tools on the Glass: I know it’s tempting, but a slipped drill or bar can crack a panel in seconds.
- Let Others Know the Door Is Open: If you’re in a busy space, this saves someone from walking right into the panel.
- Don’t Force It: If it won’t move, stop and figure out why. Forcing a jammed glass door only makes the problem worse.
- Slide with Steady Pressure: Hold with both hands, glide it gently. A smooth track makes this feel effortless.
You might be thinking, “Do I really need to fuss with the glass door first?” The answer is yes. Once it’s open and moving smoothly, the rest of the job feels less like a fight and more like a flow. Trust me, this is one of those simple moves that pays off the whole way through.

Step#3 Unlock the Screen Door
Now that the glass door is fully open, it’s time to unlock the screen door. I’ve seen crews skip this step and end up forcing the frame, which can damage the rollers or latch.
Locate the Locking Mechanism
- Check the Handle Area First: Most screen doors have a small latch built into the handle. Slide or press it to release the lock. Vallisco doors are built with smooth, easy-to-use latches that hold up well over time, even in high-traffic settings.
- Look for Extra Locks: Some setups have an added pin or clip at the top or bottom. If you see anything holding the door in place, remove it before going further.
- Don’t Use Excessive Force: If the lock feels stuck, wiggle it gently. Forcing it can bend internal parts or damage the frame.
Test the Door Movement
- Slide the Door a Few Inches: Once unlocked, move it slightly. If it glides, you know the latch is fully free.
- Listen for Resistance: A click or snag means something is still engaged. Double-check before going further.
- Confirm It’s Clear: Make sure the door moves without hold-ups. It saves strain on the rollers when you lift later.
Unlocking seems simple, but it’s the detail that separates a smooth removal from a frustrating one. Once the screen door slides freely, you’re in control and ready to adjust the screws that release the frame.

Step#4 Locate and Loosen the Adjustment Screws
After unlocking the screen door, I always remind crews not to rush into lifting. If you’ve ever tried pulling a door straight out without touching the screws, you know how stubborn it feels. That’s because the rollers are still tight against the track. Loosening them is the trick that makes the lift smoother, and it’s a step I never skip.
Find the Adjustment Screws
- Check the Bottom Corners First: Most doors keep them low, tucked near the edge. A flashlight helps if they’re hidden in shadows.
- Look for Small Openings: A slot or tiny hole is usually where the screw sits. Grab a Phillips or flathead depending on the design.
- Test as You Go: If the door lowers slightly when you turn, you’ve found the right one. That small shift means you’re on track.
Loosen the Screws Evenly
- Turn Counterclockwise: This lowers the rollers, giving you breathing room between the frame and the track.
- Work Both Sides: I like to give each screw a few turns, then match it on the other side. Keeping things even makes the lift less awkward.
- Stop Before They Fall Out: Don’t back them all the way. You only need the frame to drop a bit, not fall apart in your hands.
This step is about setting the door up to cooperate. When the rollers are lowered, the frame feels lighter, the lift feels natural, and the whole process runs smoother. Skip it, and you’re wrestling with the door instead of working with it.
Step#5 Lift the Screen Door Upward
With the screws loosened and the rollers dropped, now comes the moment where the screen door finally starts to come free. I’ve been on projects where crews skipped this prep and ended up forcing the lift and all it did was bend the frame and waste time. When you take a steady approach here, the door actually works with you instead of against you.
Get Into Position
- Stand in Front: Plant your feet firmly and face the door. Balance is everything when you’re handling something this size.
- Hands on Each Side: I grip the frame halfway up on both sides. It gives me leverage and keeps the door steady.
- Check Your Clearance: Make sure the top track has enough space. If it feels tight, drop the rollers a bit more before lifting.
Lift With Control
- Push Up Into the Top Track: The goal is to raise the bottom rollers clear of the track. It doesn’t take much height.
- Keep It Steady: Lift slowly and evenly. A wobbling frame is how rollers get damaged.
- Pause if It Feels Stuck: Don’t fight it. If the door resists, something’s still holding, check the latch or screws again.
When the lift is clean, you feel the door release and the hard work pays off. It’s not about muscle, it’s about balance, control, and knowing you’ve set it up the right way.

Step#6 Tilt the Bottom Edge Outward
With the door lifted and clear of the bottom track, now’s the time to tilt the bottom outward. I’ve seen this step go smooth when done slowly and with good hand control.
Tilt the Frame Carefully
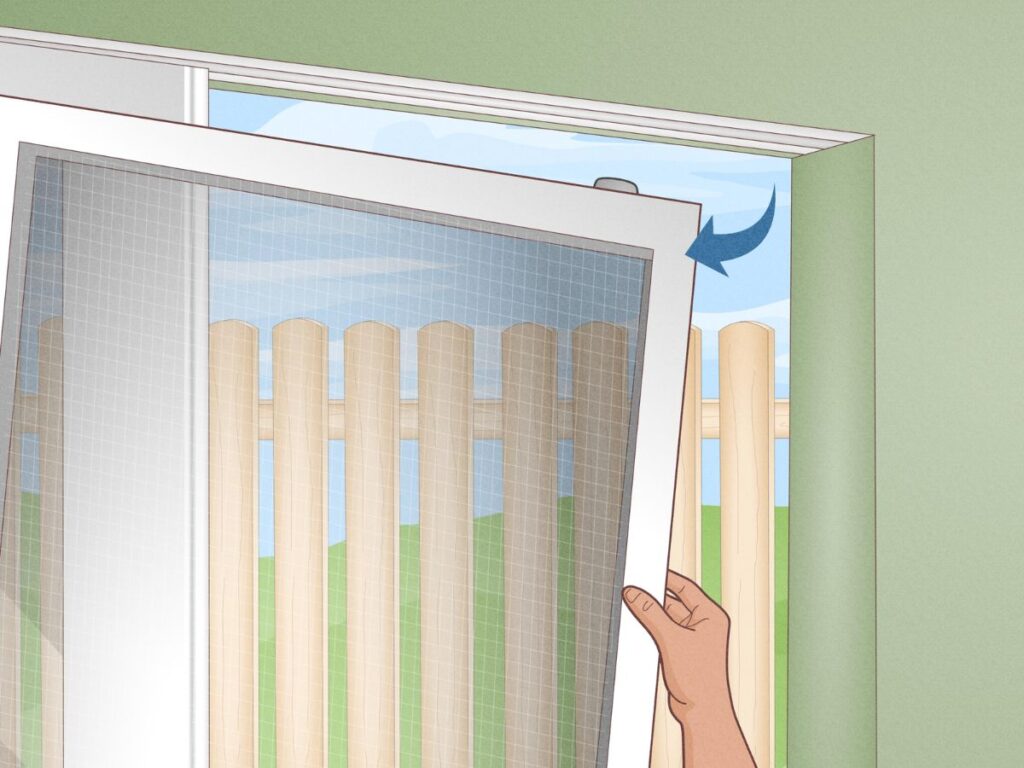
- Pull the Bottom Edge Toward You: Just a slight angle is enough. The top should stay in the upper track while the bottom clears.
- Keep Both Hands Firm: I hold the frame on each side, halfway up, so I feel in control of the pivot.
- Don’t Over-Tilt: Too much angle puts stress on the frame. You’re guiding the door out, not wrestling it.
Watch for Snags or Drag
- Check the Top Track: If it feels like the top is sticking, pause and adjust instead of forcing.
- Feel for Uneven Resistance: Sometimes one side catches first. Shift your grip slightly to balance it out.
- Stay Upright: Keep the door as vertical as possible. Leaning too far risks the whole frame tipping.
When the bottom edge tilts out smoothly, you know the rest will follow with less effort. It’s one of those moments where the difference between rushing and working smart becomes crystal clear.
Step#7 Remove the Door from the Frame
Now that the bottom edge is tilted outward, you’re ready to pull the door out of the frame. I’ve helped teams do this in tight spots, and steady hands always make the difference.
Pull the Door Free from the Top Track
- Lower the Door Slightly While Tilting: With the bottom already out, gently lower the door just enough for the top edge to clear the upper track.
- Slide the Top Edge Out Slowly: Guide the top of the frame out of the track with steady pressure. You should feel it released with minimal resistance.
- Keep the Door Vertical While Lifting Out: Avoid tilting the whole frame sideways. Keeping it upright helps protect the rollers and surrounding structure.
Watch for Last-Minute Snags
- Check for Remaining Track Contact: Sometimes one corner hangs up due to uneven tilt. Wiggle slightly if needed, but don’t yank.
- Look for Any Obstructions: If the top edge won’t budge, make sure there’s no leftover screw, debris, or paint buildup.
- Stay in Control of the Weight: I’ve seen doors tip unexpectedly once they’re loose. Keep your grip firm and balanced to avoid drops or damage.
I like this part because it’s the payoff. After all the prep, lifting, and tilting, the door finally comes loose in your hands. That moment always feels satisfying, but it also reminds me why steady work beats rushing every time.
Step#8 Set the Screen Door Aside Safely
Once the screen door is out of the frame, your job’s not done yet. I want you to know that how you store it matters just as much as how you removed it.
Pick a Safe Spot for the Door
- Lay It Flat on a Soft Surface: Use a towel, blanket, or cardboard. This prevents scratches on both the door and the floor.
- Avoid Propping It Against a Wall: Standing it up might seem quick, but it can easily fall or warp if bumped.
- Keep It Away from High-Traffic Areas: Choose a quiet corner or unused space. You don’t want someone walking by to knock it over.
Check the Door Before Walking Away
- Inspect the Frame and Rollers: Look for any damaged or loose parts. It’s easier to fix things now than later during reinstallation. And if you’re going to install a new one, choose Vallisco doors for a smoother install and better long-term fit. They’re made for real job site conditions and built to last.
- Clean Off Dust or Debris: A quick wipe keeps the screen clean and saves time when putting it back.
- Store Any Screws or Clips Nearby: If you remove any hardware, bag it and set it next to the door. I always keep it within reach for reassembly.
And that’s it, the screen door is out, safely set aside, and your space is ready for what’s next.
Conclusion
That stuck door during the hotel rush could have been a quick fix. Now you know how. This article walked you through every step, from setup to safe storage.
If you’re part of a property team, this guide helps avoid delays and mistakes.
Come back to it anytime. Doing it right means less hassle and better results.
If you’re planning a replacement, Vallisco offers screen doors built to handle daily use without hassle.
Contact us today to keep your projects moving!
Explore Related Resources
If you enjoyed this read, here are a few more articles packed with helpful information:
Still haven’t found what you’re looking for? Don’t hesitate to contact us. We’re available around the clock to assist you.


