A few years ago, I visited a villa construction site where the owner asked if the fire doors met the rating promised. The supplier’s vague answer made the whole team uneasy.
That conversation stayed with me, and it showed me how important it is to have clarity on how fire doors are built.
Over the years, I’ve worked closely with manufacturers and project teams across Southeast Asia and Europe. This work has taught me what separates a well-made fire door from one that only looks good on the outside.
In this article, you will see:
- How a fire door is planned, built, and tested.
- The role of each material and component.
- Why process transparency protects your project.
You’ll have the knowledge to review a manufacturer’s process with confidence.
So, let’s begin!
If you want a simple view of how a fire door is made from start to finish, here’s a step-by-step chart. This version also shows the main output of each stage so you and your team can see exactly what’s achieved before moving to the next step.
| Step | Process | Key Focus | Main Output |
| 1 | Design & Specification | Project needs, size, fire rating, compliance | Approved design plan |
| 2 | Material Selection | Core material, finishes, sustainability | Materials ready for production |
| 3 | Preparing the Core | Cutting, shaping, adding reinforcements | Core ready for assembly |
| 4 | Assembly of Frame & Leaf | Building frame, fitting leaf, securing assembly | Door structure in place |
| 5 | Incorporating Fire-Resistant Glass | Glass type, cut-out prep, sealing | Glazed door leaf |
| 6 | Applying Fire-Resistant Coatings or Veneers | Surface finish, bonding, edge sealing | Finished surface ready for hardware |
| 7 | Hardware Fitting | Certified hinges, closers, locks | Fully functional door unit |
| 8 | Quality Control & Fire Testing | Inspection, fire tests, certification | Certified fire-rated door |
| 9 | Finishing Touches & Packaging | Final checks, cleaning, protective wrapping | Ready-to-ship packaged door |
Each step in this process plays a role in making sure the fire door performs well when it matters most. If you want full details with examples and insights from real projects, go through the complete guide below.
Step#1 Design & Specification
Before a fire door is built, the plan has to be clear. I’ve seen projects get delayed because the specs were vague or incomplete. You and your team need to lock down every important detail at this stage, so the rest of the process runs smoothly.
Understanding Project Needs
- Gathering Project Requirements: This is where you define the purpose of the door and its fire rating needs, 30 minutes, 60 minutes, or more. I always ask clients about traffic levels, safety rules, and design preferences right away. It saves time and avoids changes later.
- Measuring and Sizing: Accurate measurements are critical for fit and safety. A small error here can mean the door won’t meet standards or will require costly adjustments on-site.
- Choosing the Fire Rating: Fire ratings depend on the building’s use and code requirements. Your engineer or safety consultant can match the right rating to the project’s legal and operational needs.
- Selecting Design Features: This includes panel styles, glass inserts, and surface finishes. I’ve found that deciding these early keeps the production schedule on track and avoids material shortages.
Confirming Safety and Compliance
- Compliance Review: Every design must follow national or regional fire safety regulations. This step confirms that the planned door meets both safety and aesthetic goals before any materials are ordered.
- Coordination With Engineers: Your design should be reviewed with your engineering team to spot potential conflicts with other building elements. It’s much easier to adjust on paper than during installation.
- Supplier Capability Check: Make sure your chosen supplier can meet the technical specs you’ve set. I’ve seen projects face delays when suppliers agreed to specs they couldn’t deliver.
- Documenting the Final Plan: Put every measurement, feature, and compliance note into a formal design file. This will serve as the reference point for the entire manufacturing process.
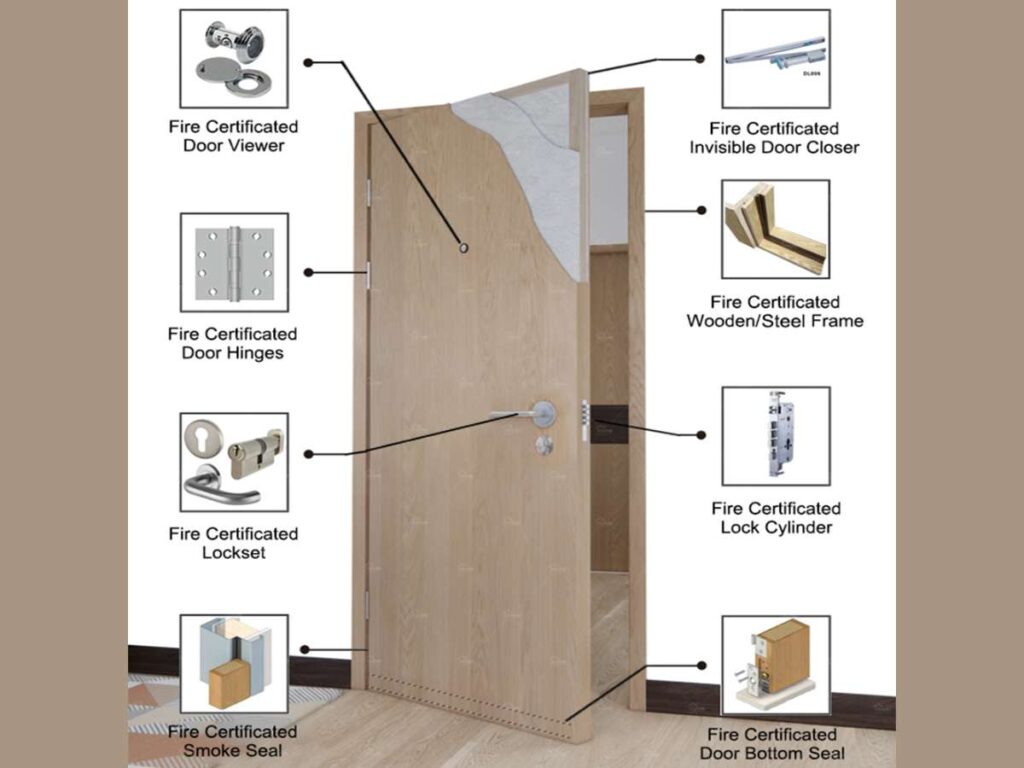
Step#2 Material Selection
Before production starts, you and your team need to decide on the right materials. I’ve seen how the wrong choice can cause problems later, shorter lifespan, lower safety rating, or issues with inspections. The right decision here helps the rest of the manufacturing process run smoothly.
Materials Needed
Below is a quick look at common fire door materials and where they’re often used.
| Material | Fire Resistance | Common Use | Notes |
| Solid Timber | 30–60 minutes | Villas, hotels, B&Bs, residential | Needs fire-resistant treatment |
| Steel | 60–120 minutes | Hotels, commercial spaces | Strong, durable, but heavier |
| Mineral Core | 60–120 minutes | Large-scale projects, industrial use | High resistance to heat |
| Glass (Fire-Rated) | 30–120 minutes | Doors with viewing panels | Must be certified for fire safety |
| Composite Materials | 30–120 minutes | Various property types | Combines features of multiple materials |
Choosing The Right Core Material
- Solid Timber: Offers a warm, natural look while still meeting fire safety standards with proper treatment. Works well for villas or hospitality spaces where appearance matters alongside safety.
- Steel: Delivers high fire resistance and long-term durability. I often recommend steel cores for projects where security is also a priority.
- Mineral Core: Built to resist extreme heat and maintain structural integrity. It’s common in industrial or large-scale public buildings that need higher ratings.
- Composite Options: Combines timber, steel, or mineral layers for a balance of strength and weight. This can be useful if you want performance without making the door too heavy.
Considering Other Material Factors
- Surface Finishes: Veneers, laminates, or paint can change the look while still meeting fire safety needs. Decide early so it matches your project’s style.
- Hardware Compatibility: Some materials work better with certain hinges, locks, or closers. This should be checked before ordering large quantities.
- Sustainability Goals: If your project needs eco-friendly certification, look for FSC-certified timber or recyclable metal. It’s easier to source them at the start.
- Cost vs. Lifespan: Lower-cost options might save money now, but can require replacement sooner. I’ve seen this happen in hospitality projects with heavy door use.
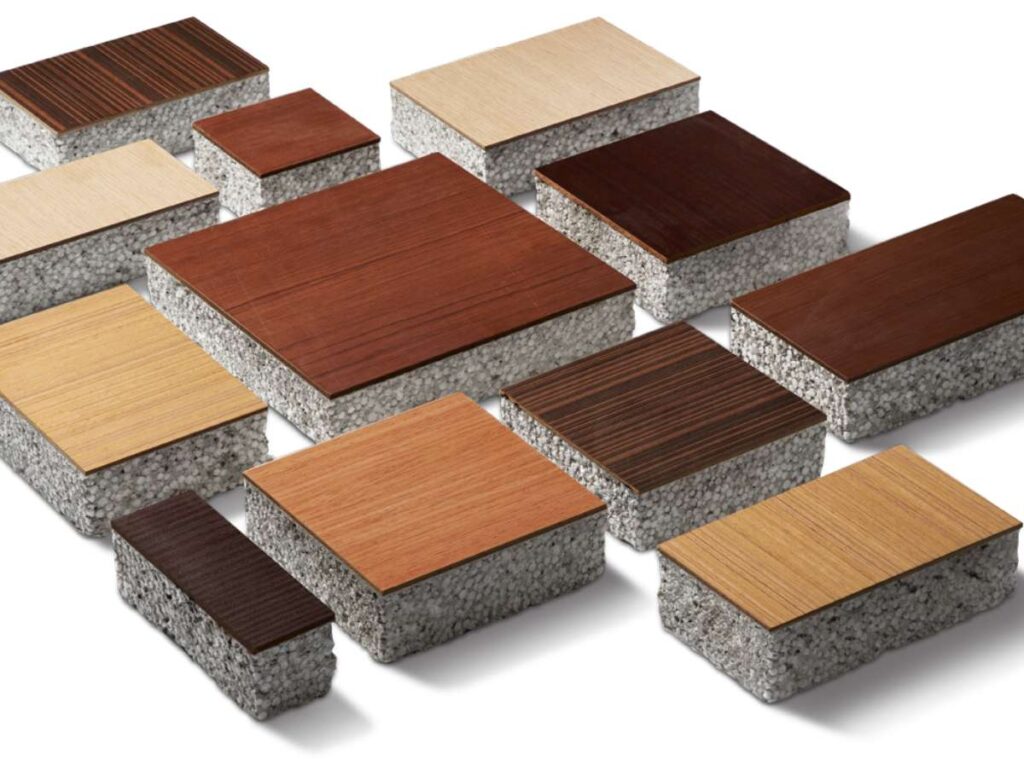
Step#3 Preparing the Core
Once the design is final and materials are ready, it’s time to shape the heart of the fire door—the core. This is where the real fire resistance is built in. I’ve seen projects run into trouble when the core isn’t prepared with care, so it’s worth paying attention to the details here.
Shaping And Cutting The Core
- Measuring For Precision: The core is cut to match the exact door dimensions. Even a small error can cause gaps that affect both performance and appearance.
- Using The Right Tools: Industrial saws and cutters keep the edges clean and straight. This helps when the facing materials are added later.
- Checking Material Integrity: Before moving to the next step, the material is checked for cracks, voids, or defects. It’s better to replace a faulty core now than discover it during testing.
- Maintaining Consistent Thickness: A uniform thickness helps the core perform evenly in fire conditions. This is especially important for mineral and composite cores.
Adding Fire-Resistant Layers And Reinforcements
- Layering Insulation Sheets: Some cores get extra fireproof sheets or boards added inside. This increases the door’s resistance time during a fire.
- Installing Structural Reinforcements: Steel or composite strips may be inserted to help the door stay rigid under heat. I’ve found this essential for taller or heavier doors.
- Sealing Internal Joints: Any internal joins or seams are sealed to stop heat or smoke from passing through too quickly.
- Preparing For Hardware Installation: Openings for hinges, locks, or glazing are marked or cut at this stage. Doing it now reduces the risk of damaging the finished surface later.
Step#4 Assembly of Frame & Leaf
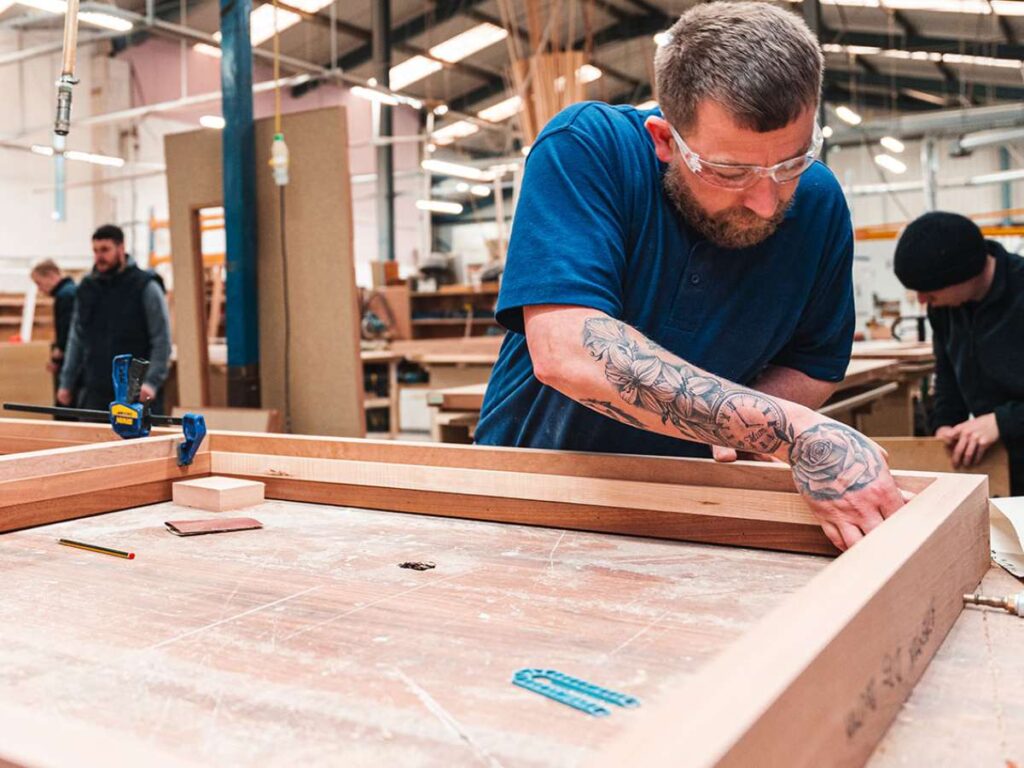
This is where the fire door starts taking shape. The core, frame, and facings are brought together so they fit as a single unit. I’ve been in workshops where this step made the difference between a smooth installation and weeks of delay. Getting the assembly right now saves a lot of trouble later.
Building The Frame
- Selecting Frame Material: Frames are usually made from timber, steel, or a fire-rated composite. The choice depends on your project’s fire rating and design needs.
- Cutting and Joining: Frame pieces are cut to exact size, then joined using strong joints that keep the shape square. This precision is key for the door to hang and seal correctly.
- Adding Fire and Smoke Seals: Intumescent strips are fitted into grooves along the frame. In a fire, these expand to block smoke and heat.
- Reinforcing Corners: Metal brackets or dowels may be added to strengthen the joints. This helps the frame hold its shape under pressure and heat.
Fitting The Door Leaf To The Frame
The leaf, the main body of the door, is carefully aligned with the frame. This is not just about making it fit; it’s about creating a perfect match so the door closes tightly and the seals work as intended.
I’ve seen installers spend extra time here, adjusting hinges and checking clearances. A gap that’s too big can fail a fire test, while a gap that’s too small can cause the door to bind and wear out faster.
This step also sets the tone for the rest of the build. If the leaf and frame aren’t aligned now, every other part, from hardware to coatings, will take more time and effort to finish.
Securing The Frame And Leaf Assembly
- Dry Fitting Components: Before anything is permanently fixed, parts are assembled to check alignment. This trial run helps spot issues early.
- Final Fastening: Once everything lines up, screws, dowels, or welds are used to lock the components in place.
- Surface Preparation: The assembled unit is smoothed, cleaned, and made ready for glazing or finishing. Any dust or residue is removed, so coatings will stick properly later.
- Storing Safely: Assembled units are placed in racks or padded areas to prevent warping or damage before the next step.
Step#5 Incorporating Fire-Resistant Glass
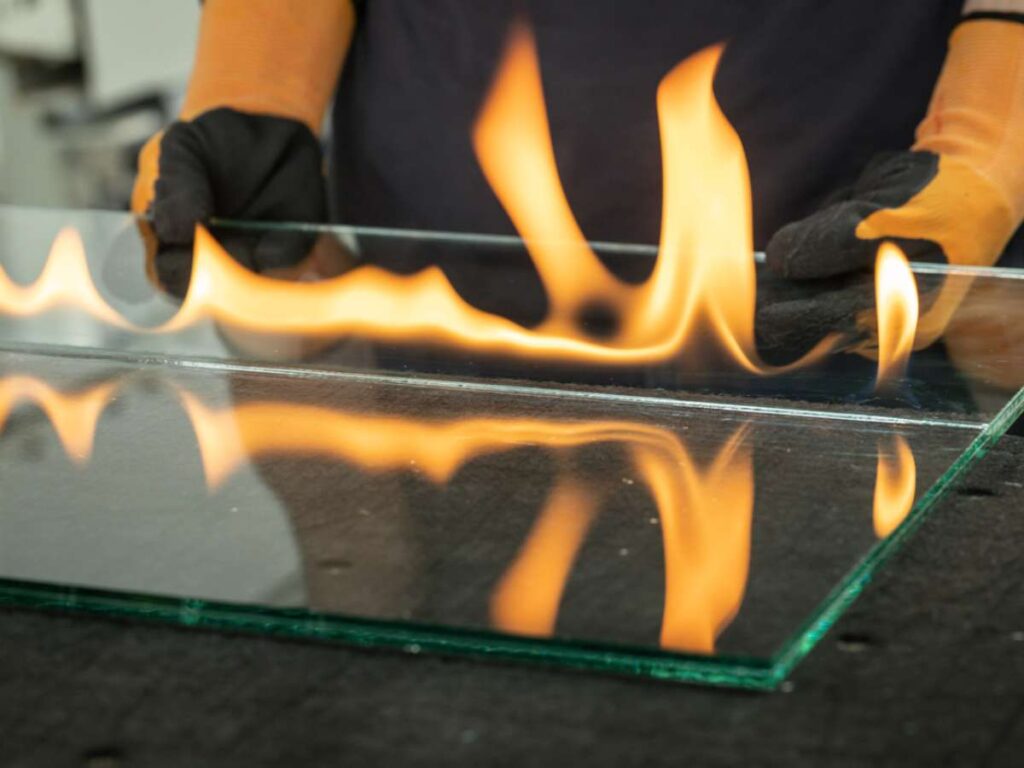
Adding fire-resistant glass is about balancing safety with visibility and style. I’ve worked with many property owners who wanted glass panels in their fire doors for light or visibility, but still needed to meet strict safety ratings. This step demands precision so the glass doesn’t weaken the door’s fire performance.
Choosing The Right Glass Type
- Clear Fire-Rated Glass: Allows visibility while holding up against fire for a set period. Works well in hotel corridors and office entry points.
- Wired Glass: Contains embedded wire mesh to hold the glass together under heat. Often used in industrial settings or high-traffic areas.
- Laminated Fire Glass: Multiple layers bonded together for both heat resistance and impact protection. A good choice when safety and security are both priorities.
- Specialty Glazing: Some projects require tinted or patterned fire glass for added privacy without losing safety compliance.
Preparing The Opening And Sealing The Glass
The door leaf is prepared with a precise cut-out for the glass. This opening has to match the glazing system’s exact dimensions, too tight and the glass may crack, too loose and the seal won’t hold under heat.
Once the opening is ready, fire-resistant glazing beads and intumescent seals are added around the edge. These components expand in high heat, locking the glass in place and slowing the spread of fire.
- Glazing Beads: Hold the glass securely within the cut-out.
- Intumescent Seals: Form a protective barrier during fire exposure.
- Setting Blocks: Keep the glass evenly supported inside the frame.
Every element here must work together. I’ve seen what happens when cheap seals are used—they fail early in tests, reducing the door’s rating.
Final Checks Before Moving To The Next Stage
- Inspecting The Glass: Any chips or scratches can weaken fire performance. These should be caught and replaced now.
- Testing The Seal Fit: A quick pressure check confirms that beads and seals are tight all around.
- Cleaning The Surface: The glass is cleaned so that no dust or adhesive residue gets sealed under the finish later.
- Documenting Compliance: Records of the glass type, supplier, and installation method are logged for certification purposes.
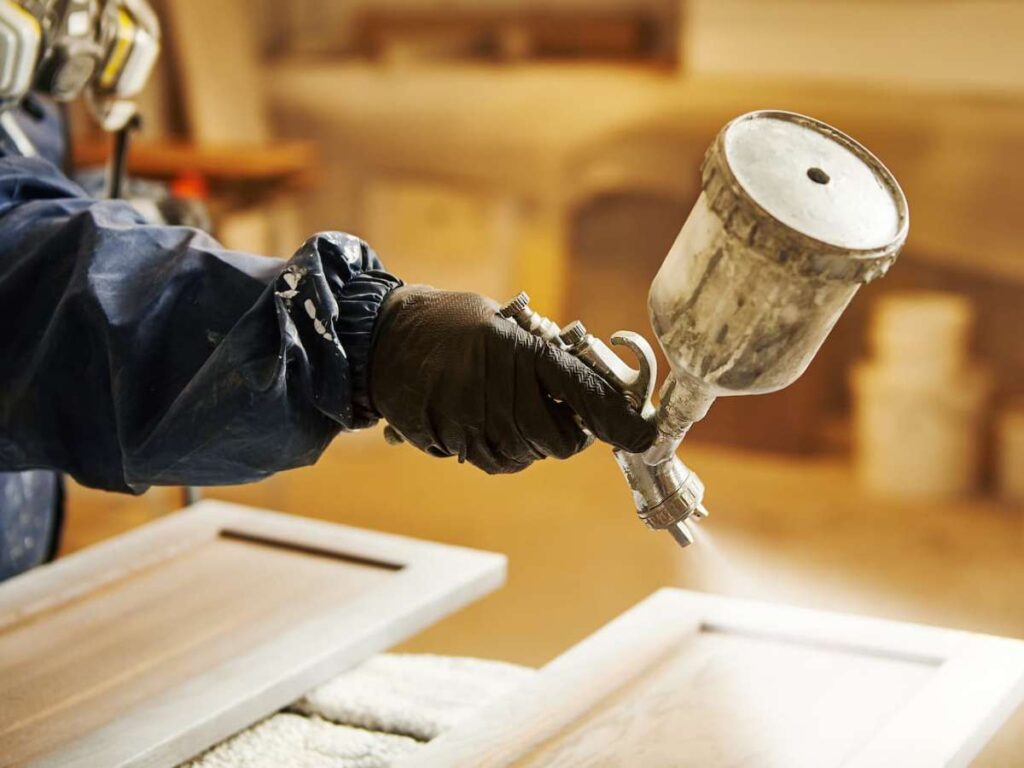
Step#6 Applying Fire-Resistant Coatings or Veneers
This stage adds the final surface layer to the fire door. I’ve been on projects where the right finish not only matched the building’s style but also protected the door for years. You and your team should think about both appearance and performance here, because the finish can affect durability and fire resistance.
Selecting The Right Surface Finish
- Fire-Retardant Paint: Special paints that slow the spread of flames and smoke. They work well for steel or timber doors that need a specific color scheme.
- High-Pressure Laminates: Durable sheets that resist scratches and moisture. These are often used in hotels or public areas where the door surface takes more wear.
- Natural Wood Veneers: Thin slices of wood bonded to the door for a warm, natural look. These require a fire-rated adhesive to keep performance intact. Vallisco produces fire doors with this type of finish for clients who need both safety and style.
- Specialty Finishes: Some projects call for textured or patterned finishes to match an architectural design. The key is to make sure these still meet fire safety rules.
Applying And Securing The Finish
- Surface Preparation: The door is sanded or cleaned to remove dust, oils, or rough edges. This helps the finish bond properly.
- Coating or Laminate Application: Paint is applied evenly, or laminates are pressed onto the surface with heat or adhesives. A consistent layer is important for both appearance and performance.
- Edge Sealing: All exposed edges are sealed to stop moisture from getting inside. This step extends the life of the door and prevents warping.
- Drying and Curing: Coatings are left to dry or cure under controlled conditions. Rushing this can cause bubbles, peeling, or weak adhesion.
Step#7 Hardware Fitting
The right hardware helps a fire door do its job in an emergency. I’ve been on projects where the door itself was well-built, but the wrong hardware lowered the overall fire rating. You and your team should match each hardware component to the door’s rating and daily use.
Choosing Certified Fire-Rated Hardware
- Fire-Rated Hinges: These are built to hold the door in place during high heat without warping or breaking. Using standard hinges will fail compliance checks.
- Door Closers: Automatic closers make sure the door shuts fully after each use. In a fire, this keeps smoke and flames from spreading.
- Locks And Latches: Only locks tested for fire doors should be used. I’ve seen teams replace uncertified locks later at extra cost when inspections failed.
- Panic Bars Or Exit Devices: In public spaces, these allow quick exits without slowing down evacuation. The hardware must still withstand heat for the required time.
Installing And Testing The Hardware
- Pre-Drilled or Marked Points: Holes for hinges, locks, and closers are drilled or marked earlier in the process to avoid damaging the finish.
- Correct Positioning: Hardware is placed according to the design plan so the door swings freely and seals properly. Even a small misalignment can cause binding.
- Tightening and Securing: Screws, bolts, and plates are fastened firmly to prevent movement over time. This is especially important in high-use doors like hotel corridors.
- Functional Test: The fitted door is opened and closed several times to check for smooth operation. This also confirms that all seals and latches engage correctly.
Step#8 Quality Control & Fire Testing
This step is where we confirm the door is ready for real-world conditions. I’ve been in factories where a single failed test meant reworking dozens of units. For you and your team, this stage is about proving that every door leaving the workshop meets both safety rules and your project’s standards.
Inspecting Build Quality
- Checking Dimensions: The finished door is measured to make sure it matches the approved design. Even small size differences can affect performance.
- Surface and Finish Review: The coating or veneer is checked for scratches, bubbles, or peeling. These flaws can shorten the door’s life and affect appearance. Vallisco’s inspection process includes this step for every fire door they manufacture.
- Seal and Hardware Check: Intumescent seals and hardware are inspected for correct placement and fit. A missing or loose seal can cause a failed inspection.
- Frame and Leaf Alignment: The door should close flush within the frame without dragging or leaving large gaps.
Conducting Fire Resistance Testing
Fire resistance tests put the door through extreme conditions. The goal is to measure how long it can resist heat and smoke while staying in place.
In certified facilities, the door is installed in a furnace that simulates real fire conditions. The temperature rises quickly, often reaching over 900°C. During the test, inspectors look for:
- Time To Failure: How long before the door allows flames or heat to pass through.
- Smoke Control: Whether smoke leaks through the seals.
- Structural Stability: If the door stays in position without bending or breaking.
Final Approval And Documentation
- Recording Test Results: All data from the test is documented for compliance records.
- Certification Labels: Doors that pass get a permanent label showing the fire rating and test date.
- Quality Control Sign-Off: A supervisor or quality manager signs off each batch before it leaves the facility.
- Packaging for Delivery: Approved doors are packaged to prevent damage during transport to the installation site.
Step#9 Finishing Touches & Packaging
Applying The Final Touches
- Edge and Surface Checks: The edges and faces of the door are inspected for chips, scratches, or marks. Any minor flaws are repaired before shipping.
- Cleaning the Door: Dust, adhesive residue, and fingerprints are removed, so the door looks clean and professional upon delivery.
- Final Hardware Tightening: Hinges, locks, and closers are given a last check to make sure they are secure and ready for installation.
- Labeling and Documentation: Permanent labels showing the fire rating, manufacturing date, and certification are attached. These records are also included in the delivery file.
Packaging For Safe Transport
- Protective Wrapping: Doors are wrapped in protective film, foam, or cardboard to prevent scratches and dents during handling.
- Corner Guards: Reinforced corner pieces are added to protect the most vulnerable edges from impact damage.
- Pallet or Rack Loading: Doors are stacked on pallets or placed in racks in a way that prevents bending or warping.
- Transport Readiness Check: Before loading onto trucks, the shipment is checked against the order list to confirm all items are present and properly packaged.
Conclusion
The hotel project I mentioned earlier stayed on track once the team understood exactly how the fire doors were made.
That’s what a clear process delivers, confidence, compliance, and fewer surprises.
In this guide, you’ve seen each step, from design to packaging, and how it all works together. With this knowledge, you can choose suppliers who match your safety and quality needs.
Vallisco builds and supplies certified fire doors using this approach for villas, hotels, and more. If you’re planning a project and need reliable fire-rated doors, contact us today.
Discover More Options
There’s so much more to discover! Check out our other products and find what fits your needs:
Still haven’t found what you’re looking for? Don’t hesitate to contact us. We’re available around the clock to assist you.


