Did you know that a sliding glass door can stall an entire project if you don’t know how to remove it? I’ve seen this firsthand on a hotel renovation where a warped frame stopped progress for hours.
Experiences like that prove the value of understanding the right method before you start.
As someone who works with owners and engineering teams on villas, hotels, and B&Bs, I have handled many door and window installations. That’s why I can walk you through this process with confidence.
In this guide, you’ll find a practical, step-by-step process here for removing a sliding glass door. By the end, you’ll have exactly what you came for.
A clear plan keeps your job moving without delays.
So, let’s get started!
Quick Guide
Before we get into the full breakdown, here’s a quick summary of each step. This table shows what we do and why it matters.
| Step | Key Actions | Why It Matters | Mistakes to Avoid |
| 1. Clear the Area | Clear 6 ft space, prep landing pad, move rugs, clear outside | Keeps the area safe and open | Leaving clutter, wet floors, or blocked exits |
| 2. Remove the Screen Door | Drop rollers, loosen frame, lift and tilt out | Avoids jamming or damage later | Skipping screw checks or forcing it out |
| 3. Take Off the Door Stopper | Find screws, remove stopper, check for clips | Frees the glass panel fully | Lifting panel with stopper still on |
| 4. Unscrew Adjustment Screws | Find holes, turn screws to drop rollers | Gives clearance for lifting | Over-turning or stripping screws |
| 5. Lift the Sliding Panel | Lift straight up, tilt bottom out, move to pad | Removes the main panel safely | Tilting too fast or uneven lifting |
| 6. Remove Stationary Panel | Unscrew clips, cut sealant, slide panel out | Finishes full panel removal | Missing hidden clips or forcing the panel |
| 7. Unscrew the Track (If Needed) | Back out screws, cut sealant, pry track off | Clears the floor for a new setup | Forgetting sealant or hidden fasteners |
| 8. Clean Up and Store Parts | Bag hardware, clean dust, pad glass | Prepares for reinstallation or storage | Losing parts or stacking glass poorly |
Now that you’ve know the full process at a glance, let’s walk through each step in more detail.
Step#1 Clear the Area
Before you even touch the door, think about the space around it. I’ve seen projects get delayed just because the crew didn’t take a few minutes to prep the work zone. Please trust me that a little effort here saves you time and headaches later.
Prep the Space Around the Door
- Move Furniture Away From the Door: Shift chairs, tables, or staging material at least a few feet back. This prevents the panels from bumping into them during removal.
- Remove Tools Near the Track: Clear out toolboxes, ladders, or equipment sitting close to the frame. It keeps your workspace open and safe.
- Check the Floor for Clutter: Pick up cords, scraps, or debris lying around. A clean floor helps your crew avoid trips while carrying glass.
Set Up for a Smooth Removal
- Cover Nearby Surfaces: Lay drop cloths over walls or furniture that can’t be moved. This prevents dust or scratches when you pull the panels out.
- Create a Clear Walkway: Make sure the path from the door to your storage spot is wide and open. Heavy glass is easier to carry when nothing blocks the way.
- Pick a Safe Storage Area: Decide where you’ll place the panels once they’re out. Having that spot ready saves time and keeps the glass protected.
Clearing the area might seem like a small step, but it sets the stage for everything else. Once the space is ready, you can move straight to the door without distractions.
Step#2 Remove the Screen Door
Now that the area is clear, the screen is the first thing in your way. Taking it off now makes the rest of the job smoother. Have you ever tried moving a heavy glass panel while the screen keeps catching on the track? It wastes time and creates problems.
Free the Screen From Its Track
- Slide It Open All the Way: Move the screen fully to one side, so you have room to grab it. With doors from Vallisco, the screen slides more smoothly, which makes this step easier and prevents unnecessary strain on the frame.
- Lift It Into the Top Track: Push the frame up so the bottom rollers come free. If it sticks, move it gently back and forth until it loosens.
- Tilt It Out Carefully: Angle the bottom edge toward you. Once it clears, the screen will come out without bending the frame.
Park the Screen in a Safe Spot
- Carry It With Both Hands: Hold the sides of the frame so it does not twist. This keeps the mesh from stretching.
- Set It Flat or Lean It Gently: Place it flat on the floor with a cloth under it or lean it against a wall. Both options protect the frame.
- Keep It Out of the Work Area: Put it far enough away, so no one steps on it or knocks it over.
With the screen out, the opening is clear and safe to work with. Now your team can focus on the glass panel without distractions.
Step#3 Take Off the Door Stopper
With the screen out of the way, you’re finally looking at the sliding panel itself. But here’s the thing: it will not move until you deal with the small strip holding it in place. I still remember the first time I missed the stopper on a hotel job. We kept pulling at the panel, wondering why it was stuck, until I noticed that thin strip at the top.
Find and Loosen the Stopper
- Look Along the Frame: The stopper hides at the top track or along the side. It is small, but without spotting it, the panel will never lift.
- Check How It’s Held: Some stoppers are fixed with screws while others snap in. Taking a moment here saves a lot of frustration later.
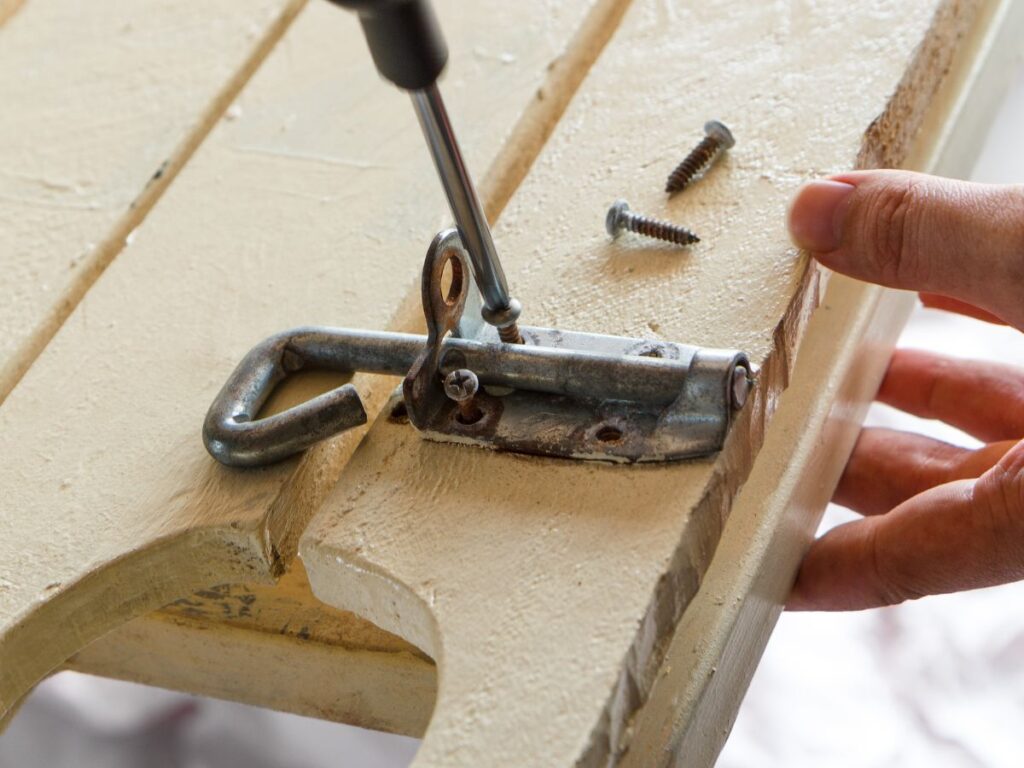
- Use the Right Tool: For screws, I use a Phillips screwdriver most of the time, but sometimes a flathead is needed. If the strip is snapped in, a flat pry bar or even a stiff putty knife works well.
Remove and Store the Stopper
- Ease It Out Slowly: I learned the hard way that rushing bends the strip. Taking your time keeps it in good shape for reuse.
- Keep It With the Screen: I like to put it right next to the screen we removed earlier. That way nothing goes missing when it’s time to reassemble.
- Save the Screws: Toss them into a small cup or bag. It is a simple habit, but it keeps the project from stalling later.
Once the stopper is out, the sliding panel is free to lift. It is one of those small steps that feels like progress, and it opens the way for handling the glass.

Step#4 Unscrew the Adjustment Screws
Now that the stopper is gone, the glass panel is almost ready to come out. But if you’ve ever tried lifting one without touching the adjustment screws, you know it feels like fighting against the frame itself.
These little screws decide how much play the rollers have, and loosening them is what makes the panel slide free.
Spot the Screws on the Bottom Edge
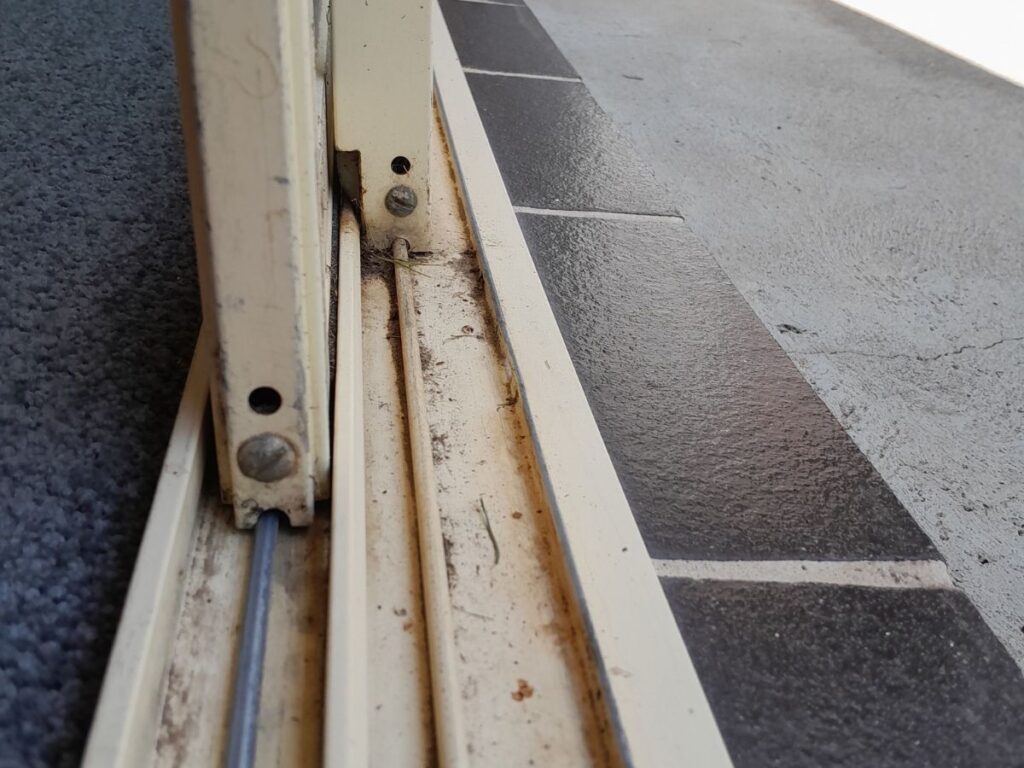
- Look Near the Rollers: The screws usually sit at the lower corners of the sliding panel. I’ve learned to check both sides because sometimes only one end is tight.
- Shine a Light if Needed: Dust and paint can hide them. A quick flashlight check has saved me from thinking there were no screws at all.
Loosen the Screws Before Lifting
- Turn a Few Times, Not All the Way: A couple of turns is usually enough to drop the rollers down. You are not removing the screw, just giving the panel room to move.
- Listen for the Panel to Settle: As you loosen, you might hear or feel the panel drop slightly. That little shift tells you it is ready to lift out.
- Keep the Screws With Your Parts: I toss them in the same cup with the stopper screws. It keeps all the small hardware together for later.
I always think of these screws as the hidden lock of the sliding door. Once they are loose, the heavy glass finally feels ready to move. Have you ever noticed how one small screw can make or break an entire job?

Step#5 Lift and Tilt the Sliding Panel
This is the moment that usually surprises people: the glass panel looks simple enough, but the weight tells a different story. I’ve been on projects where even seasoned crews underestimated how tough it can be to move one of these panels. The key is taking it slow and treating the glass with a little respect.
Getting a Grip That Works
- Hold the Vertical Edges: I like to grab both sides of the panel so the weight stays balanced. It feels safer and gives me more control.
- Ask for Extra Hands: These panels can feel like moving a wall of glass. Having someone help isn’t just easier, it keeps the panel steady.
- Stay Close to the Frame: Keeping the door close to your body makes the lift smoother. It also saves your back from extra strain.
Moving the Panel Out of Place
- Lift Up Into the Top Track: Push the panel upward until the rollers free from the bottom track. You’ll know it’s loose when it shifts slightly.
- Tilt the Bottom Toward You: A small tilt is all it takes. That angle makes the panel slide out without forcing it.
- Guide It Down Slowly: I always remind crews that rushing here risks broken glass. Taking your time is what keeps the panel safe.
For me, this is always the step that feels like progress. Once the panel is out, I know the hardest part is behind us and the project is finally moving in the right direction.
Step#6 Remove the Stationary Panel
Once the sliding panel is out, the job feels lighter already. But the fixed panel still stands in your way, and this one can be trickier than it looks. I’ve seen teams try to force it without realizing it’s usually held in place by clips or brackets. A little patience here goes a long way.
Find What Holds the Panel in Place
- Look for Brackets or Clips: Stationary panels are often secured at the top or bottom. Spotting them first keeps you from pulling against metal.
- Check Along the Sides: Some frames use screws hidden behind trim. Running your hand along the edge usually reveals them.
- Shine a Light Into the Track: Dust and paint can hide fasteners. A quick flashlight check saves time and avoids damage.
Loosen and Slide the Panel Out
- Remove the Brackets or Screws: Take them off carefully and set them aside. I usually keep them with the other hardware for easy reassembly.
- Pull the Panel Toward You: Start from the top or side and ease it forward. It may resist at first, but steady pressure works better than force.
- Carry It Out Safely: These panels are heavy too, though they don’t move as smoothly. I like to lift with a partner to keep control of the glass.
Getting the fixed panel out always feels like clearing the last big obstacle. It’s the step where I stop worrying about surprises and know the door frame is finally open.

Step#7 Unscrew the Track (If Needed)
Sometimes the track has to come out, especially in older frames where it is bent or worn. Taking it off now saves you from problems when fitting the new door. I treat this step as optional, but it often makes the reinstallation smoother and cleaner.
What to Do
- Check for Hidden Screws: Look for fasteners under paint, dirt, or sealant.
- Loosen Each One Carefully: Work along the track until it lifts free.
- Use a Pry Tool if Needed: A flat bar or putty knife helps if the track is stuck.
Taking the track off may feel like an extra task, but it clears the way for a proper fit. It is a small detail that makes the whole project easier in the end.
Step#8 Clean Up and Store the Parts
This is the part that often gets rushed, but I’ve learned it matters just as much as lifting the panels. A good cleanup is like closing the loop on the job. It leaves you with a clear frame, safe panels, and peace of mind that nothing important was left behind.
Clear the Work Area
- Sweep Out the Track Space: I always like to sweep before walking away. It feels good to see a clean base instead of dust and scraps.
- Wipe Down the Frame: Removing grime and old sealant helps the new door sit correctly and saves extra work during installation.
- Pick Up Loose Debris: Screws or scraps left on the floor can cause delays or even accidents. A quick check keeps the site professional.
Store the Removed Parts
- Keep Hardware Together: Putting screws, clips, and brackets in one container avoids the frustration of searching for them later.
- Set Panels in a Safe Spot: Store glass flat with padding or lean it carefully against a wall. This prevents cracks and chips.
- Label Each Piece if Reusing: A simple tag or marker note speeds up the reassembly process and removes guesswork.
I always find a certain satisfaction in this step. Looking at a clean space with everything stored properly feels like closing the chapter on removal and opening the door to whatever comes next.
And if you plan to replace the door, I recommend buying from a well-known supplier like Vallisco. They offer reliable, high-quality doors and windows built for commercial projects like yours.
Conclusion
That glass panel that once refused to move is now out, and the site is clear. You’ve seen how removing a sliding door isn’t one big job but a series of smaller ones done with care.
Every step matters. Follow the process, and your team can avoid costly mistakes. Keep this guide nearby for your next door project. It works.
If you’re replacing your doors and need high-quality options that fit your project, Vallisco manufacture doors and windows that get the job done!
Contact us today and start your order with confidence!
Explore More of Our Resources
If you’re searching for more choices, explore our full collection of products. We’ve picked out some great options for you:
Still haven’t found what you’re looking for? Don’t hesitate to contact us. We’re available around the clock to assist you.


