When I bought my first villa project, the garage door refused to stay open. I tried adjusting the springs myself, thinking it was straightforward. Within minutes, I realized just how wrong I was.
That failure was my turning point it showed me this task requires structure, not guesswork.
Since then, I’ve worked closely with property owners and engineering teams to learn the safe, step-by-step method. Everything I share here is drawn from those real-world lessons.
In this guide, you’ll get a clear step-by-step process for adjusting garage door springs safely. You’ll know the tools to use, the sequence to follow, and how to confirm the door is balanced.
If you’ve been looking for a reliable way to handle this, you’re in the right place.
So let’s begin!
Quick Comparison Chart
Before we dive deeper, here’s a quick comparison of every step. This gives you a clear view of what you’ll be doing, what tools you need, and how to stay safe.
| Action | Detailed Instruction | Tools Needed | Safety Note |
| Step #1 Identify Spring Type | Check if you have torsion (above door) or extension (sides of door). | Flashlight, basic inspection | Do not touch springs yet. |
| Step #2 Disconnect & Secure | Pull emergency cord, clamp door tracks below rollers. | Clamps, pliers | Door must not move during adjustment. |
| Step #3 Mark & Prepare | Mark spring’s current position and gather safety gear. | Chalk/marker, winding bars, gloves, safety glasses | Never use screwdrivers as winding bars. |
| Step #4 Make the Adjustment | Torsion: quarter-turns with winding bar. Extension: move hook for shorter or longer pull. | Wrench, winding bars | Adjust both sides equally to keep balance. |
| Step #5 Lock Back in Place | Tighten set screws and confirm hooks and brackets are firm. | Wrench, pliers | Do not overtighten set screws. |
| Step #6 Remove Clamps & Reconnect | Remove clamps, reconnect opener using release cord. | Clamps, opener cord | Stand to the side in case of sudden movement. |
| Step #7 Test the Door | Test manually halfway, then run opener through a full cycle. Fine-tune if heavy or unbalanced. | None beyond opener | Always test manually first for safety. |
Step#1 Identify Your Garage Door Spring Type
Before you adjust anything, you need to confirm the type of spring your garage door uses. I’ve seen too many people skip this step, and it usually leads to mistakes. Each spring requires a different method, so identifying it first saves both time and effort.
Torsion Springs
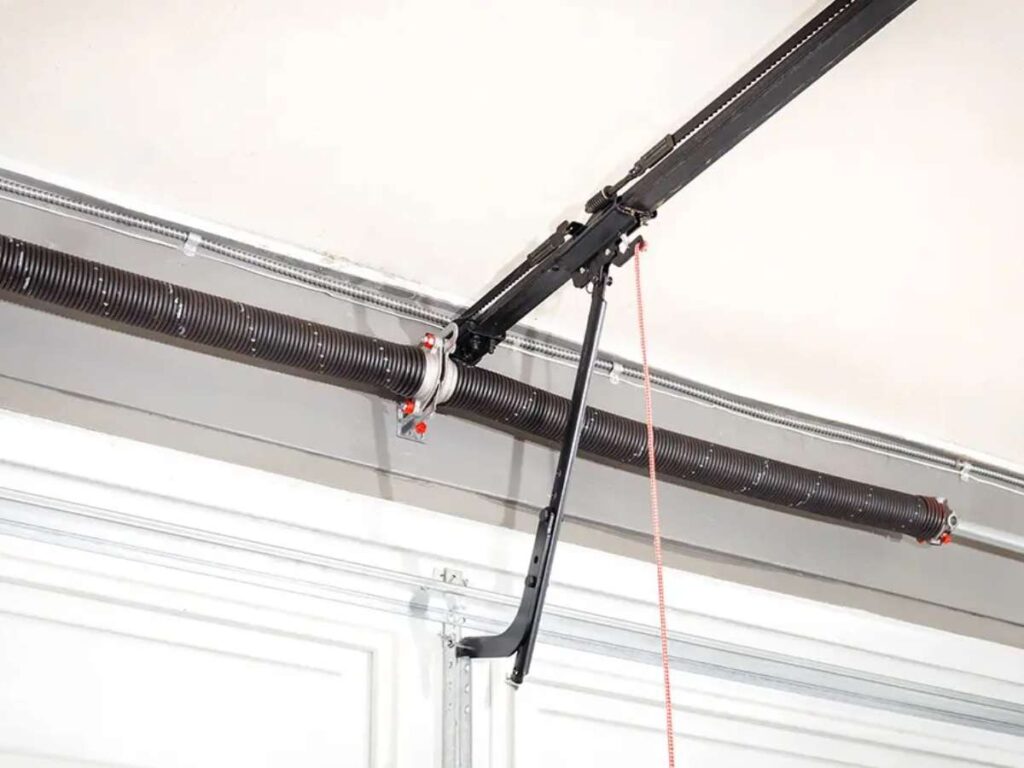
- Location: Found above the garage door, mounted on a solid metal shaft. In my experience, they are the easiest to spot if you stand inside and look directly above the door.
- Purpose: Built for heavier use, torsion springs provide strong lifting power. I often see these in modern garage doors because they last longer and handle frequent operation well.
Extension Springs
- Location: Positioned on both sides of the garage door, running along the horizontal tracks. I’ve noticed they are more common in older setups or lighter doors.
- Purpose: Extension springs are lighter duty and stretch when the door closes. Even though they look less intimidating, I know from handling them that the tension can still be dangerous.
Always confirm the spring type before starting. In my work, this single step has made every adjustment smoother and safer.
Step#2 Disconnect the Opener and Secure the Door
Before making any adjustments, the garage door must be completely under your control. If it is still connected to the opener or left unsecured, it can move suddenly. That is where accidents usually happen. Taking a few minutes here removes that risk and gives you a safer workspace.
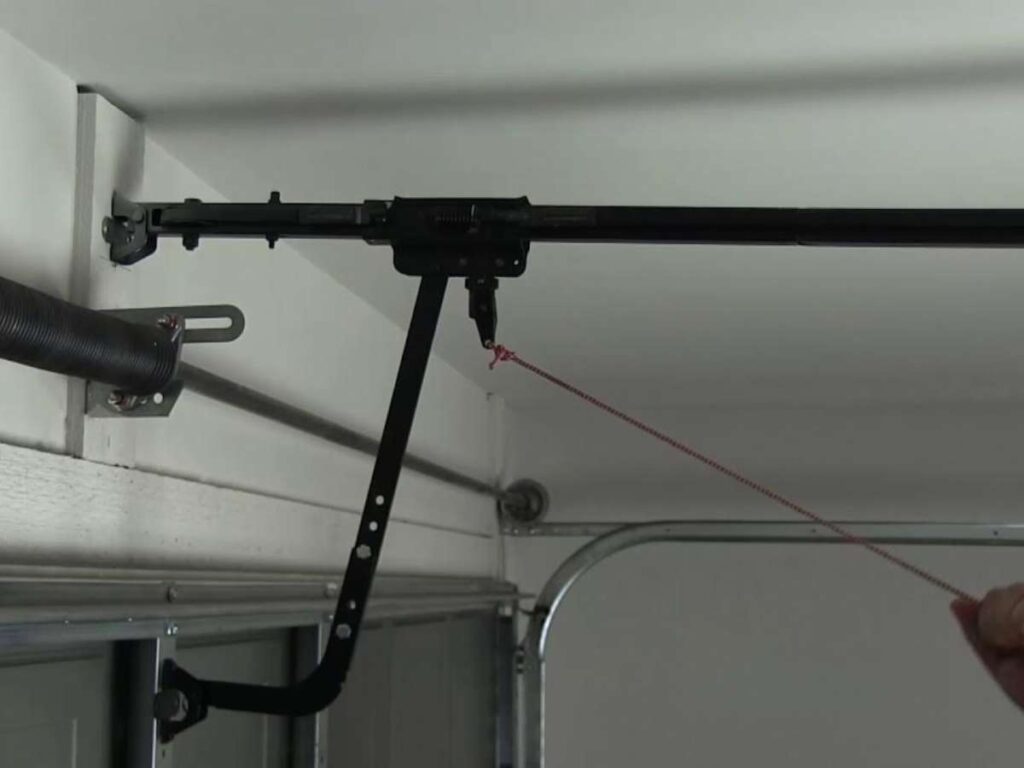
- Disconnect the Opener: Every garage door opener has an emergency release cord, usually with a red handle. Pulling it separates the opener from the door so the motor cannot move it on its own.
- Secure with Clamps or Locking Pliers: Place clamps or locking pliers on the track just below the rollers. This keeps the door steady, preventing any shifting from bumps or gravity. High-quality doors, like those supplied by Vallisco, often come with safety-tested tracks that make this step easier and safer.
Never skip this step. Adjustments should only be done on a door that is disconnected and firmly held in place. Once you make this part of your routine, it becomes second nature.

Step#3 Mark and Prepare the Springs
Once the door is disconnected and secure, the next step is to mark and prepare the springs. It may feel like a small detail, but these few minutes of preparation make the rest of the job straightforward. When everything is marked and your tools are ready, the adjustment feels more controlled.
Mark Current Tension
- Use Chalk or a Marker: Place a line on the spring’s coil where it currently sits. This gives you a clear reference to measure the number of turns.
- Why It Matters: Springs are all about precision. A simple mark lets you track progress without second-guessing yourself, and it saves time if you need to reverse an adjustment.
Chalk works well because you can wipe it away afterward, but I sometimes reach for a marker if I need the line to last longer. Either way, having that mark in place removes guesswork.
Gather Tools and Safety Gear
- Winding Bars: Use winding bars, not screwdrivers. A screwdriver can slip out of the holes, and that quick slip is enough to cause serious injury.
- Adjustable Wrench: You will need this to loosen or tighten the set screws on the spring hardware.
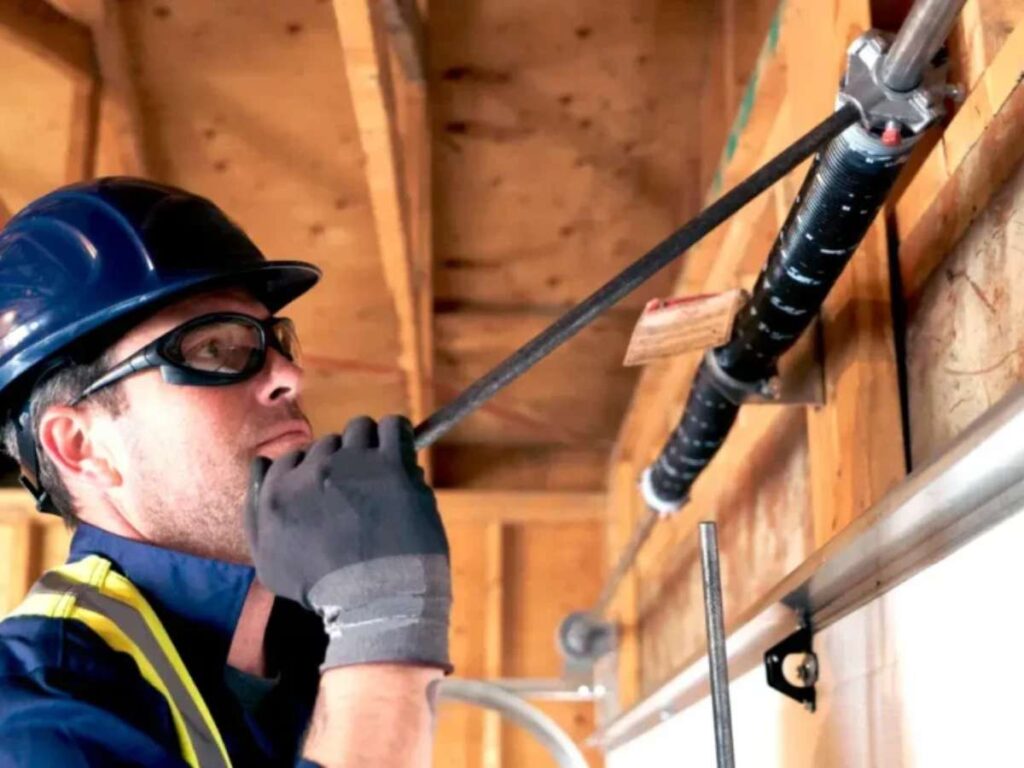
- Gloves and Safety Glasses: Gloves help with grip while protecting your hands. Safety glasses guard against small slips that could send metal or dust toward your eyes.
In my experience, the difference between a smooth adjustment and a stressful one usually comes down to preparation. When you have the right tools and the springs are clearly marked, you work with confidence instead of hesitation.

Step#4 Make the Adjustment
This step often feels like the most challenging part. Springs hold a surprising amount of power, and you notice it the moment you begin to turn them. The key is to move in small increments and give yourself time to see how the door responds. Rushing rarely works in your favor here.
Torsion Springs Adjustment
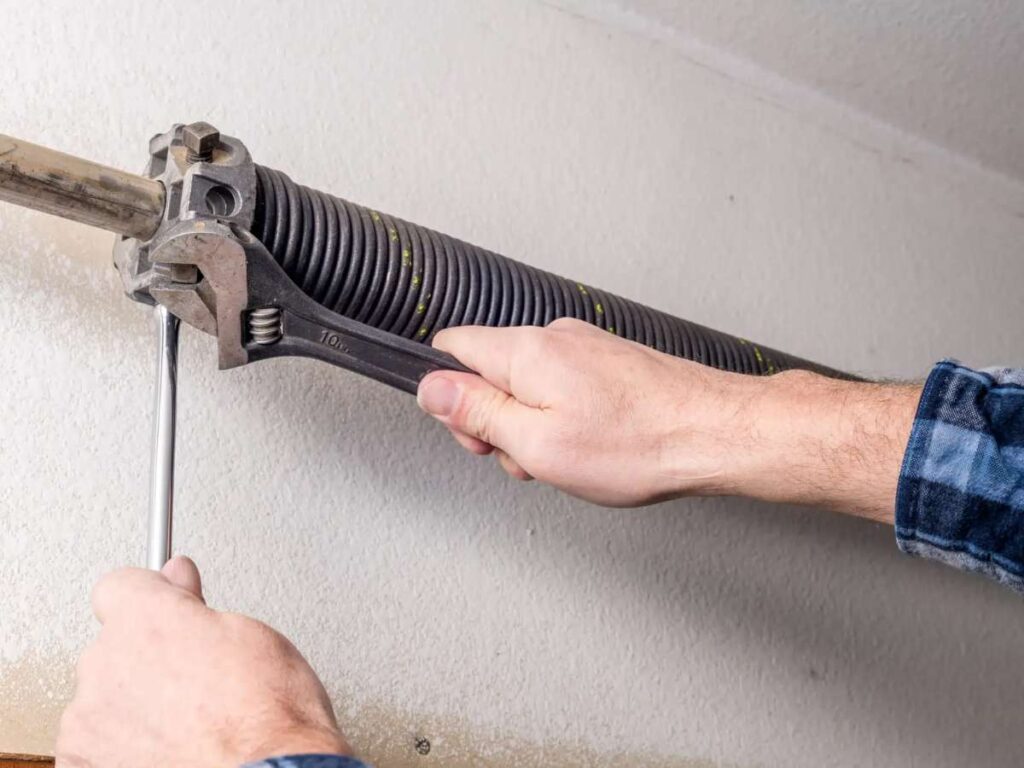
- Insert Winding Bar: Slide the winding bar firmly into the winding cone. A solid grip here gives you more confidence before making any turn.
- Quarter-Turn Increments: Work in quarter-turns instead of large rotations. I’ve found this approach keeps the adjustment predictable and easier to control.
- To Increase Tension: Turn the winding bar upward. This adds lifting strength to the spring, helping the door rise more smoothly.
- To Decrease Tension: Turn the winding bar downward. This reduces lifting force and slows down a door that rises too quickly.
Even a single quarter-turn can noticeably change how the door behaves. Small adjustments make the process both safer and more accurate.
Extension Springs Adjustment
- Relocate the Hook: Move the hook into another hole on the track bracket to change how the spring stretches.
- Shorten or Lengthen:
- Shortening creates more pull.
- Lengthening reduces the tension.
Both springs need the same treatment, otherwise the door will lean or bind. I’ve noticed that correcting an uneven setup later takes far more effort than balancing it properly from the start.
When both sides are even, the door operates smoothly, and the system feels far more reliable. Taking the extra time here always pays off.

Step#5 Lock Everything Back In Place
Once the adjustment is done, this step is about securing everything so it stays where it should. It’s not the most exciting part of the job, but I’ve learned it’s the one that decides whether the door runs smoothly or starts giving trouble again.
Torsion Springs: Tighten Set Screws
- Tighten the Screws: Use a wrench to turn the set screws until they feel firm against the shaft. You’ll notice the spring doesn’t shift once they’re snug.
- Avoid Overtightening: Cranking down too hard does more harm than good. A steady turn is all it takes to lock things in place.
Extension Springs: Secure the Hooks
- Check Hook Placement: Look closely to confirm each hook is sitting properly in its bracket hole. A loose hook will undo all the work you’ve just finished.
- Test for Stability: I like to give the spring a small pull here. Not to stress it, just enough to feel that it’s seated properly and ready for movement.
Double-Check Hardware
- Review Clamps and Brackets: Go back over the clamps and brackets holding the setup. If one feels off, fix it now rather than later.
- Final Hold: The hardware should feel steady, not forced. Pushing too hard wears down parts and makes the next adjustment more of a headache.
This step might feel routine, but it’s what gives you confidence before testing the door. Once everything is locked in place, you can move forward knowing the setup is solid.

Step#6 Remove Clamps and Reconnect the Opener
Once the springs are locked in place, the next step is to bring the garage door back to normal operation. That means taking off the clamps that held it steady and reconnecting the opener. Moving carefully here matters, since the door is about to return to full use.
Remove Clamps or Locking Pliers
- Take Off the Clamps: Remove the clamps or locking pliers you placed on the track. These were your safety stops during the adjustment, so make sure the door is clear before pulling them off.
- Why This Step Matters: Leaving them in place will stop the door from moving. I always take a second glance at both tracks to confirm everything is free before reconnecting the opener.
Reconnect the Opener
- Use the Emergency Release Cord: Pull the emergency release cord toward the door to reattach the opener. This is the same cord you pulled earlier to disconnect it.
- Stand to the Side: Position yourself slightly off to the side while reconnecting. If the door shifts suddenly, you’re not standing directly in its path.
The first time I reconnected an opener without stepping aside, the sudden jerk caught me off guard. Since then, I’ve made it a habit to stay out of line with the door. It’s a simple precaution that feels second nature once you practice it.
Bringing the opener back online marks the transition from manual work to automated operation again. With clamps removed and the opener reattached, the door is ready for testing. This is the moment where your careful adjustments start to show real results.
Step#7 Test the Door
After adjusting the springs and reconnecting the opener, the next step is to test the door. This part confirms whether everything is balanced and safe to use. Always begin with a manual test before letting the opener take over.
- Manual Test First: Disconnect the opener and lift the door halfway by hand. A correctly set spring will hold the door steady without drifting up or down.
- Check the Balance: If the door drops or pulls upward on its own, the springs need a small adjustment. This quick test tells you immediately where things stand.
- Opener Test: Reconnect the opener and let it run a full open and close cycle. Watch for jerky movement and listen for grinding sounds, as these are signs of imbalance. High-quality doors, such as those supplied by Vallisco, often make this step smoother because their components are engineered for consistent performance.
Keep yourself slightly to the side during this test. That position gives you a clear view of the tracks while staying out of harm’s way if something shifts.
- Fine-Tuning: If the door feels heavy or refuses to stay in position, return to the springs. Small quarter turns or minor hook changes are usually enough.
- Balance Both Sides: Match the adjustments evenly across both springs. Uneven tension causes tilting and adds strain to the system.
- Safety Tip: Keep people, pets, and vehicles away while testing. Springs carry high tension, and unexpected movement can happen quickly.
Thorough testing is what turns adjustments into long-term reliability. When the door passes both manual and opener checks, you can be confident the job is finished properly.
Conclusion
We began with the uncertainty of handling garage door springs. Now we end with a clear path forward. Step by step, you’ve seen how patience and preparation create safe adjustments.
When is the right time to act? The answer is now.
You don’t have to let springs intimidate you. With knowledge and the right tools, you can take control or know when to call professionals.
So what’s your next step? Will you try it yourself, or get trusted support?
Either way, we’re here for you.
Contact Vallisco today!
Explore More Helpful Resources
There’s more to explore! Check out our additional product selections to find exactly what you’re looking for:
Still haven’t found what you’re looking for? Don’t hesitate to contact us. We’re available around the clock to assist you.


