We once helped a villa owner who thought he had it all figured out. He picked beautiful doors from another company. He measured everything on his own.
He placed the order. But when the doors arrived, they didn’t fit. Some were too wide. Some were too tight. A few even opened the wrong way. He called us and said, “I followed the old door sizes. I didn’t know it could go so wrong.”
The truth is, measuring doors isn’t something you need to handle alone. It’s our job as experts to guide you through the process.
We’re here to help you measure the right spots, the right way, so you don’t waste time, money, or energy on mistakes.
That’s why we’ve created this guide.
Whether you’re replacing doors or ordering new ones, this step-by-step guide will show you how to measure properly with our help. We’ll explain what to measure, what tools you need, and what to check before placing your order.
So let’s start!
Quick Summary Chart
Before we dive into the full guide, here’s a quick overview to help you see the whole process at a glance. This will give you the big picture before we go deeper into each step.
| Step # | Measurement Type | What to Measure | Why It Matters | Key Tip |
| Step #1 | Width of the Door Opening | Measure the rough opening width across the top, middle, and bottom. | Helps make sure the door fits properly without being too tight or scraping. | Use the smallest width measurement. |
| Step #2 | Height of the Door Opening | Measure from the floor to the underside of the top frame (head jamb). | Helps the door swing freely without obstruction. | Use the shortest height if there’s a difference. |
| Step #3 | Door Frame Thickness (Wall Depth) | Measure the distance from the inside wall to the outside wall across the opening. | Helps the frame fit inside the wall correctly. | Measure both top and bottom for accuracy. |
| Step #4 | Door Swing and Hinge Side | Identify which direction the door will swing and where the hinges are placed. | Prevents doors from blocking furniture or walls. | Record whether it’s left or right-hand swing. |
| Step #5 | Obstructions and Wall Space | Check for any obstacles around the door frame, such as furniture or pipes. | Allows for smooth installation and door operation. | Make sure there’s at least 50mm (2 inches) of space around the door. |
| Step #6 | Sliding or Folding Doors | Measure the wall space, ceiling clearance, and floor space. | Necessary to make sure sliding or folding doors fit and function. | Ensure space for tracks or guides. |
| Step #7 | Clear Photos of the Area | Take photos of the door opening, side views, and ceiling/floor area. | Helps spot potential issues that numbers alone can’t show. | Use natural light and take multiple angles. |
| Step #8 | Measurement Sheet | Record all measurements, including width, height, frame thickness, and swing direction. | Keeps everything organized for easy reference. | Use a simple form or template to stay organized. |
Let’s take a closer look at each step so you can measure with confidence.
Step#1 Measure the Width of the Door Opening
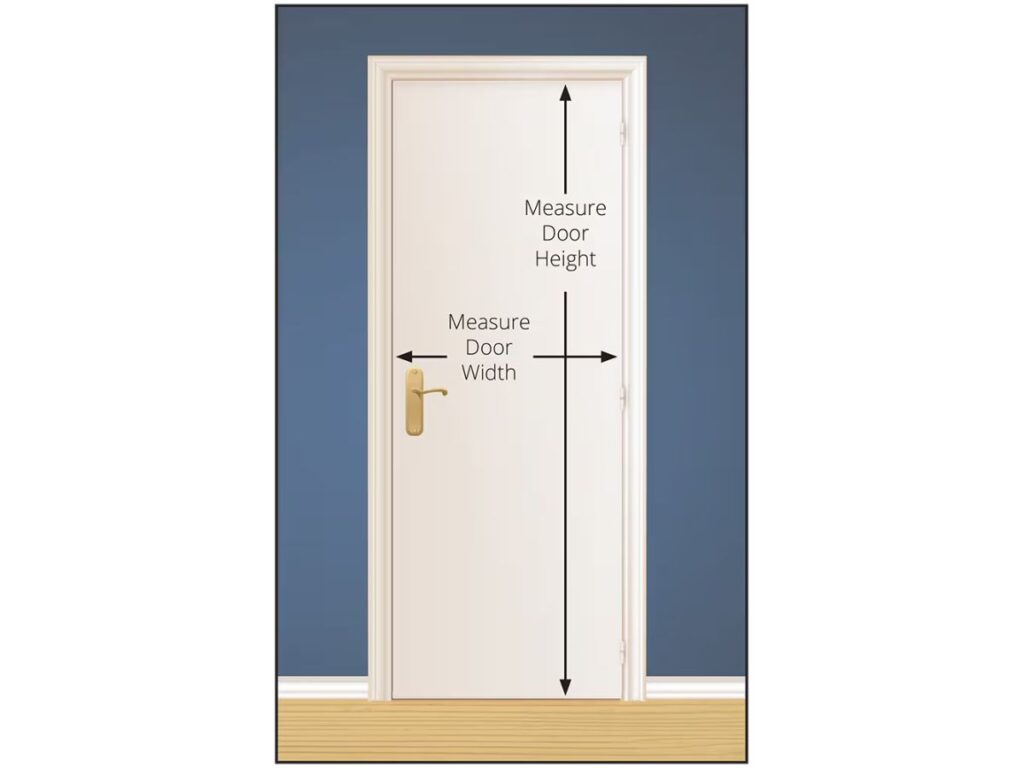
Let’s start with the width. One client replacing doors in rental units measured the old doors instead of the openings. Some were warped, others trimmed over time and none of the new ones fit. The fix is simple: measure the door opening, not the old door. Doors change, openings don’t. Here’s how to do it right:
What to Measure
You’ll be measuring the rough opening: the space inside the frame where the door sits. Don’t just take one measurement. Openings aren’t always perfect, so you need 3:
- Across the Top: Measure from one side of the opening to the other at the top.
- Across the Middle: Measure across the center to see if it differs from the top.
- Across the Bottom: Measure the bottom, as it can shift or settle differently. It may seem like overkill, but trust me: it matters.
How to Measure
- Use a Good Tape Measure: The longer, the better.
- Write Down All Three Widths: Don’t rely on memory.
- Find the Smallest Measurement: This ensures a proper fit without scraping or a tight door. Round it down to the nearest millimeter or the closest eighth of an inch.
Tips
- Never Guess: Always record your measurements immediately.
- Check for Significant Differences: If the measurements differ by more than 10mm (about ½ inch), note it down. This could mean your opening isn’t level, or the frame may need adjustments.
- Prevent Door Issues: Have you ever had a door that stuck every time you closed it? This step helps prevent that.
Take your time with this. Measuring the width correctly now saves you a lot of hassle later.
Step#2 Measure the Height of the Door Opening
After width, height comes next. And just like before, this step needs a little care. A while back, we worked with a homeowner who measured everything himself. He got the width right, but for the height, he only measured one side. The left side was fine, but the right side was slightly lower. Just enough to cause problems when the new door arrives.
That’s something we’ve seen more than once: floors aren’t always perfectly level. Even small differences can throw things off. So let’s get your height measurement done the right way.
Where to Measure
Start at the floor and measure straight up to the underside of the top frame. This part of the frame is called the head jamb. You’ll need to measure in 2 places:
- From the Left Side of the Opening: Measure from the left side to the underside of the head jamb.
- From the Right Side of the Opening: Measure from the right side to the underside of the head jamb. This will tell you if your opening is level or sloped.
What to Watch Out For
Look closely at the floor under the door: is it slanted or uneven? Also, check if there’s a threshold (that little raised part at the bottom of some doorways).
- If your new door sits on top of the threshold , include it in your measurement.
- If your door swings above it leave it out. Take a moment to picture how the door will sit. Will it clear the floor? Will it scrape?
Just like with width, use the shorter height if the two sides are different. That keeps the door from rubbing or sticking after it’s installed.
It might feel like a small step, but getting the height right helps everything else go smoothly later on.
Step#3: Measure the Door Frame Thickness (Also Called Wall Depth)
This is the part most people forget. And it’s easy to see why. You measure the width. You measure the height. So it feels like you’re done, right? But there’s one more important piece: frame thickness, also known as wall depth. That’s the space your door frame fits into from the inside wall surface to the outside wall surface.
We had a customer once who skipped this step. He ordered several doors for his guesthouse. When they arrived, the frames stuck out too far from the wall. It looked messy and unfinished. He had to redo the drywall around each one. Let’s make sure that doesn’t happen to you.
Why This Matters
The door frame sits inside your wall. If the frame is too thick or too thin, it won’t line up right. That can lead to:
- Gaps Between the Frame and the Wall: This results in an uneven fit that’s noticeable. These gaps can also compromise the stability and energy efficiency of the door.
- Extra Trim Work: If the frame doesn’t fit properly, you might need extra trim or adjustments around the frame. This extra work can add time and cost to the project.
- Delays During Installation: An incorrect frame thickness can lead to complications during installation. This could mean reworking the frame or even delaying the project timeline.
- An Uneven Look: If the frame sticks out too far or doesn’t sit flush with the wall, the overall look will feel off. A misaligned frame gives the impression of poor craftsmanship, even if everything else is perfect.
Getting this measurement right helps the door fit clean and flat.
How to Measure
Grab your tape measure. Measure the distance from the inside wall to the outside wall across the opening. This is your wall depth. Measure in two places:
- Near the Top: Measure the depth at the top of the opening. This will give you an idea of how level your wall is at the top.
- Near the Bottom: Measure at the bottom to check for any differences. Sometimes, the bottom can be slightly different due to settling or shifting.
Things to Note
- Standard Wall Depth: It’s often between 100mm to 150mm (about 4 to 6 inches). This range is common, but it’s always important to measure to confirm.
- Walls with Tile, Wood Panels, or Thick Paint: Measure from the deepest point. This will help the frame sit flush with the wall, even if the surface is uneven or has additional layers.
This step doesn’t take long, but it can save you from a lot of patching and fixing later. If you’re unsure how your wall depth affects the final fit, Vallisco can help. We’ve helped many customers avoid costly mistakes by reviewing their site conditions first and double-checking the details before you order.
Step#4 Confirm the Door Swing and Hinge Side
This step doesn’t take long but it makes a big difference. We once had a client replacing a kitchen door. He measured the height, width, and even the frame depth. Everything was right. But he forgot to check which way the door opened. The new door swung straight into a countertop. It couldn’t even open halfway.
That’s why checking the door swing and hinge side matters.
Why It Matters
The wrong swing can:
- Block Furniture: If the door swings the wrong way, it can collide with furniture, making it hard to move around. This could restrict the use of space, especially in smaller rooms.
- Hit Nearby Walls: A poorly chosen swing direction might cause the door to bang against the wall. This not only creates a sound issue but can also cause damage to both the door and the wall over time.
- Cover Light Switches: A door that swings into the wrong direction might cover essential switches, making it inconvenient for the people inside to control lighting, fans, or other utilities.
- Make the Room Feel Tight or Awkward: The way a door swings can impact how the room flows. In some cases, a door opening in a certain direction could make a room feel cramped or disrupt the natural flow of movement, even in larger spaces.
The direction of the swing affects the overall layout and usability of the space, so it’s essential to get it right.
How to Check
Start by standing outside the room or building. This is your reference point. Now, look at:
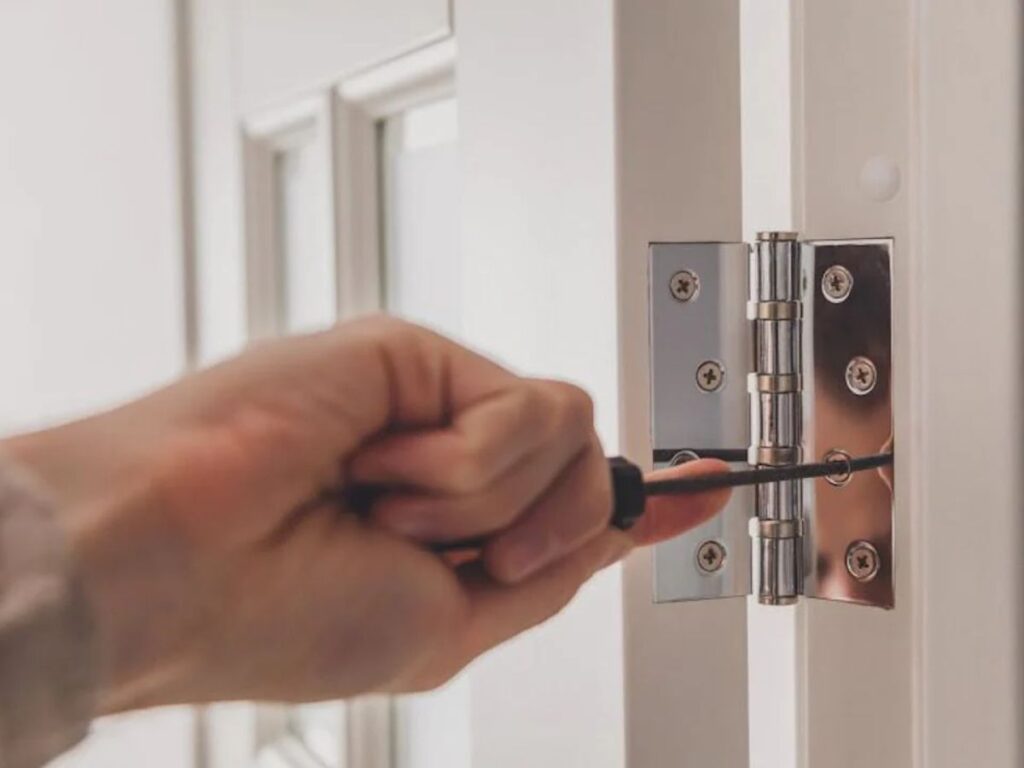
- Which Side the Hinges Are On: This determines whether the door is an inswing or outswing. If the hinges are on the left side, it will swing in a specific direction.
- Which Way the Door Opens: Does the door push in or pull out? Knowing this will help you determine whether you need a left-hand or right-hand swing, depending on the direction you want the door to open.
Take your time here. It’s easy to mix up. If the hinges are on your left, and the door swings in, it’s called a left-hand inswing. If the hinges are on your right, and the door swings out, it’s a right-hand outswing.
Here’s a simple guide:
- Left-Hand Inswing: Hinges on the left side, and the door opens inward toward the room.
- Right-Hand Inswing: Hinges on the right side, and the door opens inward toward the room.
- Left-Hand Outswing: Hinges on the left side, and the door swings outward away from the room.
- Right-Hand Outswing: Hinges on the right side, and the door swings outward away from the room.
Write it down as clearly as you can. If you’re not sure, snap a photo and mark the hinge side.
Getting this part right means your door will open the way you expect without bumping into anything. It keeps life simple later on.
Step #5 Check for Obstructions and Wall Space
This step is easy to overlook. Most people focus on the door itself: width, height, swing. All the numbers feel important. But sometimes, it’s the space around the door that causes problems.
We had a customer who ordered a wide front door. Beautiful piece. Perfect measurements. But no one checked the inside wall space. Once the door was installed, it couldn’t open all the way because it hit a light switch panel.
The door fit. But it didn’t work. So let’s slow down and look at what’s around the door opening.
What to Look For
Take a walk around your door opening. Look for anything nearby that could block the door or slow installation:
- Light Switches or Power Outlets Behind the Swing Path: These can get in the way when the door swings open. A door that hits a switch or outlet might be difficult to operate, or you might need to rearrange the electrical components.
- Furniture or Cabinets Placed Close to the Frame: Furniture that’s too close to the door could prevent it from opening fully. This is especially common in spaces where furniture is placed right against the wall.
- Tight Wall Corners That Limit Movement: If your door is too close to a wall corner, it could restrict its ability to open properly. You need enough space for the door to swing without obstruction.
- Stairs, Railings, or Pipes Nearby: These elements might be in the way, especially in narrow or awkwardly shaped rooms. The door might not open fully or could bump into these obstacles.
- Radiators or Vents Along the Floor: These fixtures are often overlooked but can interfere with a door’s swing. A radiator or vent in the way could limit how far the door can open, leading to frustration.
Even small things can get in the way.
What to Do
Grab your tape measure again. Check for space around the entire door frame: side to side, top and bottom. You want at least 50mm (2 inches) of clear space on each side. This helps the installer fit the frame properly and gives the door room to swing freely.
This step doesn’t take much time, but it can save you from a bad surprise. And once you spot a problem early, it’s much easier to fix.
Step#6 Special Notes for Sliding or Folding Doors
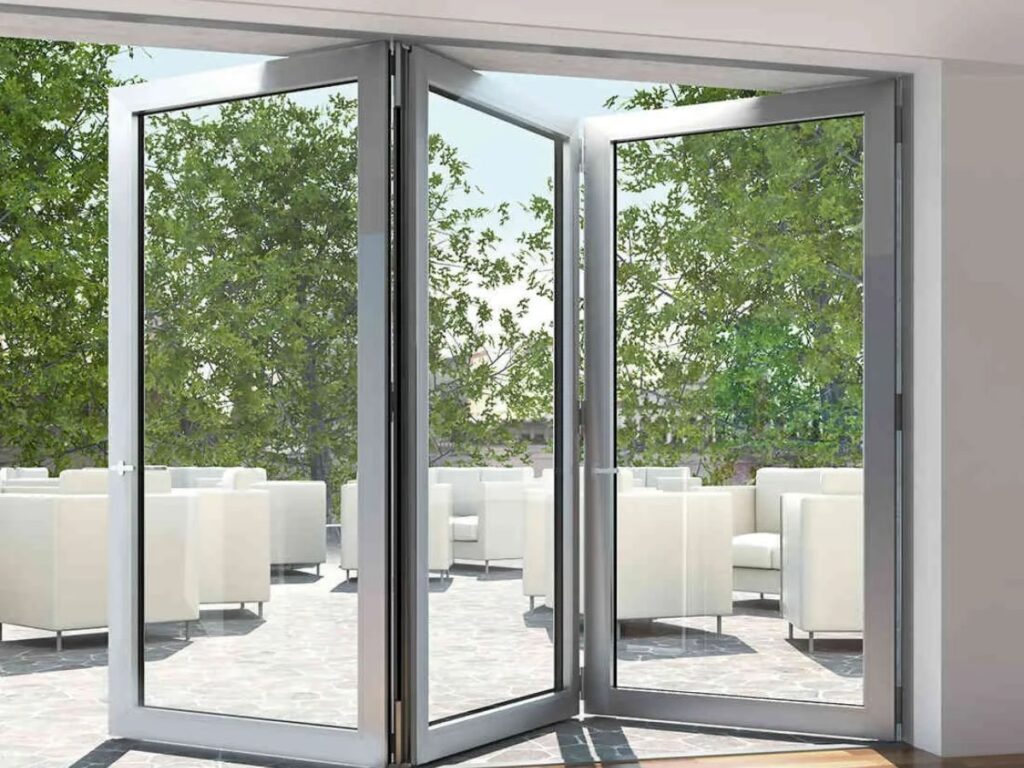
If you’re using a sliding, bi-fold, or pocket door, read this. Many people are used to swing doors, so they’re unsure what to measure for other types. A hotel client once ordered sliding doors for every suite, but some walls had columns or AC vents meaning the doors couldn’t slide open. We had to change two of them. To avoid that, here’s what to check.
Only Use This Step If
You’re planning to install any of the following:
- Sliding Door: A door that moves horizontally along a track.
- Pocket Door: A door that slides into the wall when opened.
- Bi-Fold Door: A door that folds open like an accordion, usually made of multiple panels.
What to Measure
- The Full Width of the Wall Next to the Opening: This is where the door will slide or fold. Make sure the wall is wide enough and clear of obstructions. Sliding and folding doors need ample space to operate properly, so double-check that the area beside the opening is free from any permanent fixtures.
- The Space Above the Opening: You’ll need room for a top track. Measure the clearance between the opening and the ceiling. Without proper clearance, the track may not fit or the door might not operate smoothly.
- The Floor Space: Some doors use a bottom guide to help keep them in place. Check if your flooring allows for one. Ensure there’s no obstruction on the floor that could interfere with the guide or wheels of the door.
Extra Tips
- Look for Cabinets, Shelves, Switches, or Pipes: If there are any of these near the opening, take extra care. They could interfere with the movement of the door or block the track.
- Snap Clear Photos: Take front, side, and ceiling views if possible. This will help you clearly communicate the space to your supplier or manufacturer.
- Not Sure About an Obstruction?: Send the photos to your manufacturer before ordering. They can help spot potential issues you might have missed.
Sliding and folding doors can work beautifully if the space allows for it. A little planning here will help everything move smoothly later.
If you’re thinking about sliding or folding doors but aren’t sure if your space works, Vallisco can review your layout and help you pick the best option before you commit.
Step#7 Take Clear Photos of the Door Area
You’ve measured everything. That’s great. But there’s one more step that can save you from confusion later: take photos.
We once had a customer who measured a back door perfectly. But when the installer arrived, they noticed a pipe running right along the ceiling. The top track wouldn’t fit. The issue? We hadn’t seen it in the drawings and no photos were sent.
A few pictures would’ve helped catch that right away. Photos show what numbers can’t. They help us spot small things that might cause big problems.
Why This Helps
When you send pictures along with your measurements, we can:
- Double-Check Tricky Areas: Photos allow us to verify hard-to-see spots, like the top of the door frame or areas with potential obstructions, ensuring we have all the details we need.
- Spot Anything Unusual Around the Frame: Sometimes, small irregularities in the frame or wall might not be obvious in measurements, but a photo can highlight those issues.
- Confirm Your Swing and Hinge Direction: Visual confirmation of the door’s swing direction and hinge side helps avoid any surprises.
- Plan Better for Delivery and Installation: With photos, we can assess the space and prepare for any potential challenges, making the delivery and installation process smoother. It’s like giving us your view of the space, helping us understand it better than just numbers alone.
What to Capture
Take 3 types of photos. All simple. All helpful.
- The Full Door Opening: Step back a few feet and capture the entire door frame, so we can see the whole opening and assess the space.
- A Side View: This shows how thick the wall is and what’s beside it, helping us understand potential space constraints.
- The Floor and Ceiling Near the Door: This is important to check for any pipes, vents, or steps that might interfere with installation or the door’s swing.
You don’t need a fancy camera. A phone works just fine.
How to Take Them
- Use Natural Light: If possible, open windows or turn on nearby lights to get the clearest photo.
- Don’t Zoom In: Step back and take a wide shot so we can see the full context.
- Keep Your Hands Steady: Make sure the camera is steady and the frame level, so the photos are clear and accurate.
Photos don’t take long, but they make a big difference. They help us build exactly what you need without guessing.
Step#8 Record All Details in a Measurement Sheet
You’ve taken your measurements. You’ve double-checked. You’ve taken photos. Now it’s time to put everything in one place.
We once worked with a builder who had measurements scribbled on scrap wood, a few sticky notes, and one crumpled napkin. No joke. He meant well, but it took hours to figure out which notes matched which room.
So here’s what we always tell people: use a measurement sheet. A simple form printed or digital can save time, money, and confusion later.
What to Include
Here’s what you should write down:
- Door Width and Height: Include both measurements in millimeters or inches, based on your tape. This ensures your door fits perfectly in the frame.
- Frame Thickness: Also called wall depth, this measurement is essential for the door to sit correctly in the wall.
- Hinge Side and Swing Direction: Note whether it’s a left-hand inswing, right-hand outswing, or another configuration. This helps avoid mistakes during installation.
- Obstruction Notes: Any furniture, switches, or other items near the door that could interfere with its swing or frame placement. This saves time when confirming your space.
- Photos: Either attach them or label which ones correspond to each door. This ensures the installer has a clear visual reference.
This sheet becomes your reference. And if you’re sending it to us, it helps us do our job right the first time.
Pro Tip
Use a form or template to stay organized. You can create one in Excel, Google Sheets, or even draw a table by hand.
Label each door clearly:
- Front Door
- Kitchen Entry
- Guest Bedroom
- Back Patio
Clear names make it easier for everyone, especially if you’re ordering multiple doors. Taking the time to fill this out now can save you a lot of back-and-forth later.
Once everything’s recorded, you’re ready to order. And more importantly, you’re ready with confidence.
Conclusion
So, you’ve gathered the measurements and double-checked everything. Now, it’s time to act!
Whether you’re installing a standard door or something unique like a sliding one, you’ve learned the essential steps to measure properly and avoid errors.
By taking clear photos and keeping your notes organized, you’re already ahead of the game. Don’t wait start today! Have you already begun measuring your doors, or do you need some guidance?
Contact Vallisco today, and we’ll make sure your measurements are spot on.
Explore Related Resources
If you enjoyed this read, here are a few more articles packed with helpful information:
Still haven’t found what you’re looking for? Don’t hesitate to contact us. We’re available around the clock to assist you.


