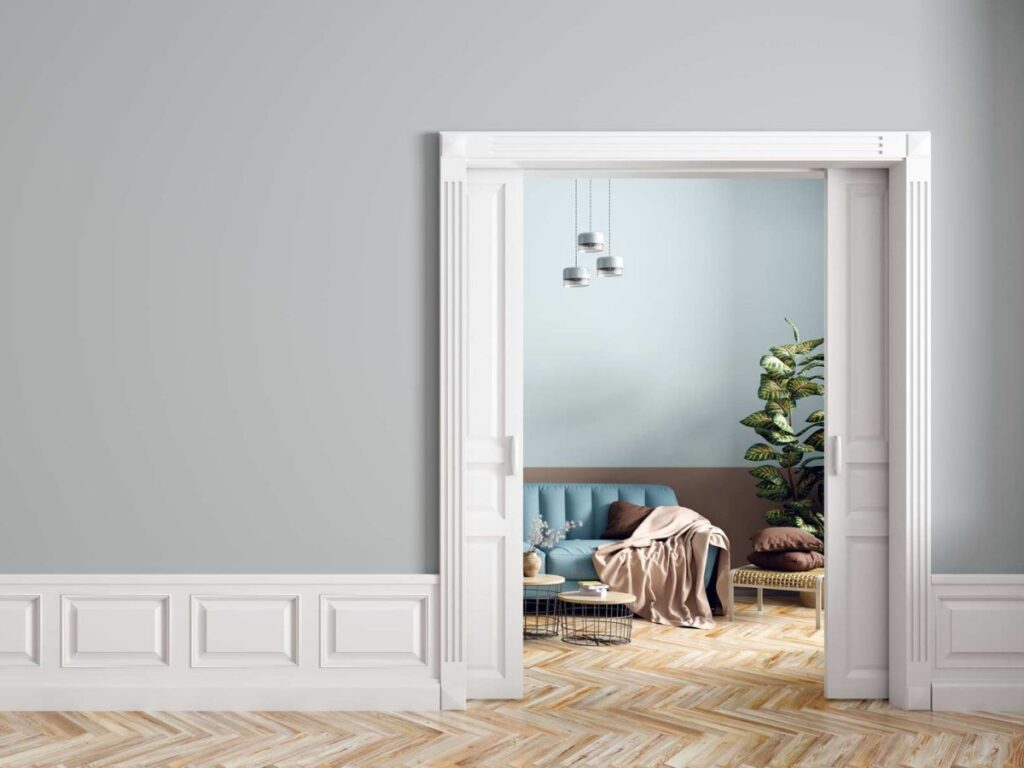
The first time I installed a pocket door, I thought it’d be quick. It turned into a three-day mess because I didn’t account for wall studs or frame size.
That taught me a tough lesson. Pocket doors need a different mindset than regular ones.
Since then, I’ve guided dozens of commercial teams through successful installs without repeat mistakes. What I’m sharing here is based on real-world fixes, not textbook theory.
In this guide, you’ll find everything from prep to finishing touches, broken down into doable steps. If you’re here to get the job done right, you’re in the right place.
If your project’s tight on space or time, this is the door solution you’ve been waiting for.
Alright, let’s dive in!
Quick Process Chart
Here’s a process table summarizing your pocket door installation steps. Each row includes the step number, title, objective, main actions, and a pro tip. This quick-view format gives your readers an easy way to follow the workflow or reference key steps at a glance.
| Step | Title | Objective | Main Actions | Pro Tip |
| 1 | Gather Tools & Materials | Get everything ready | Collect tools, pocket kit, door, wood, drywall | Prep everything to avoid mid-job delays |
| 2 | Choose Wall & Door Type | Ensure proper fit | Check wall depth, structure, and pick a lightweight door | Always inspect inside the wall before cutting |
| 3 | Remove Studs & Clear Opening | Make space for frame | Shut power, cut drywall, remove studs, clear cavity | Watch for wires and pipes |
| 4 | Install Frame & Track | Build structure for door | Set studs, install header, mount track, clean pocket path | Use a level to prevent misalignment |
| 5 | Hang the Door | Mount door onto track | Attach rollers, lift door, adjust height and movement | Get help lifting to avoid damaging the door |
| 6 | Add Guides & Stops | Control door slide | Install bottom guide and top stops, test door range | Adjust spacing for smooth, quiet movement |
| 7 | Refinish the Wall | Patch and seal wall | Add drywall, mud, sand, prime, and paint | Avoid screws above the pocket area |
| 8 | Install Door Hardware | Add handles and locks | Mount flush pulls, edge pulls, locks, and align strike plate | Test all hardware before calling it done |
| 9 | Final Inspection | Verify smooth operation | Check movement, fit, finish, and clean up | Don’t skip—this step catches small issues |
Step#1 Gather Your Tools and Materials
Before you touch the wall or frame, make sure you’ve got everything laid out. Having the right tools and materials on hand keeps the install smooth and avoids unnecessary stops in the middle of the job.
Here’s what you’ll need.
Essential Tools for the Job
- Tape Measure: You’ll need a good-quality tape measure to check your rough opening, track length, door width, and clearance. Accurate measurements are key to making sure your door slides smoothly and fits perfectly within the pocket frame.
- Level: A standard 2- or 4-foot level helps ensure everything is aligned—your track, studs, and finished door. If your frame is out of level, the door may not close properly or could rub against the wall.
- Drill and Bits: A power drill speeds up the job, especially when driving screws into framing or mounting hardware. Keep multiple drill bits handy for wood and metal since you’ll be switching between tasks.
- Hammer: You’ll need a hammer for framing nails and small adjustments. It’s a basic tool that comes in handy when setting studs, tapping things into place, or handling quick fixes along the way.
- Screwdriver: A manual or powered screwdriver is essential for attaching brackets, rollers, and the soft-close system if your kit includes one. It’s also useful for final hardware adjustments after the door is installed.
- Stud Finder: Use this to locate existing wall studs before opening up the drywall. It helps you avoid damaging electrical wires or plumbing, and it ensures your framing attaches to the right points for strength.
Key Materials to Prepare
- Pocket Door Kit: This kit includes the metal or wood frame, track, rollers, brackets, and sometimes even fasteners. Be sure to buy a kit that matches the width and height of your door, and check if it’s made for 2×4 or 2×6 walls.
- Prehung Door or Slab Door: Choose a door that fits within your pocket door kit dimensions. You can use a standard interior door slab, but it must be lightweight and flat to slide easily into the wall cavity.
- Wood for Framing: You’ll need enough 2×4 or 2×6 lumber to build out the rough opening, header, and any replacement studs. This provides the structural support for your track and ensures the wall is solid once closed back up.
- Drywall or Patching Materials: If you’re cutting into an existing wall, you’ll need drywall sheets, joint compound, and tape to patch it up after the install. Don’t forget sanding tools and primer if you plan to finish the wall right away.
- Shims and Screws: Shims help you level the frame and door during install. Stock up on wood screws for framing and mounting the track—having extras on hand saves time and stress when you’re mid-project.
Step#2 Choose the Right Wall and Door Type
Not every wall or door will work for a pocket door. Before you start cutting, take a close look at your space. Choosing the right wall and door type upfront helps avoid expensive surprises, ensures smooth operation, and keeps your install on track.
Check Your Wall Conditions
- Non-Load-Bearing Wall: Pocket doors work best in non-load-bearing walls. If the wall holds up part of the building, you’ll need a structural header and extra framing support, which adds cost and complexity.
- Wall Thickness: Measure your wall to make sure it can fit the pocket frame and track system. Most pocket door kits are designed for 2×4 or 2×6 framing—get this wrong and your kit won’t fit.
- No Obstructions Inside Wall: Use a stud finder or open a small inspection hole to check for plumbing, wiring, or ductwork. These hidden surprises can stop your installing cold or require costly rerouting.
- Wall Height and Width: Make sure the wall is tall and wide enough for both the door and the pocket frame. You’ll need enough space for the door to slide fully into the wall and clear the opening.
Select the Best Door Type
- Lightweight Slab Door: A lightweight hollow-core or softwood slab is ideal for pocket doors. Heavy solid-core doors can strain the hardware and rollers, leading to faster wear and poor sliding.
- Flat Panel or Flush Design: Choose a flat panel or flush door without raised trim or molding. These slide smoothly into the pocket and won’t snag or rub against the frame.
- Standard vs. Custom Sizes: Most pocket door kits are designed for standard 24″, 30″, or 36″ wide doors. If you want something custom, make sure the track and frame are built to match your door’s exact size.
- Pre-Finished or Paint-Ready: Decide if you want a pre-finished door or one you’ll paint on-site. Once the door is installed, painting or staining it can be tricky without pulling it back out.

Step#3 Remove Wall Studs and Clear the Opening
Now that you’ve picked the right wall and door, it’s time to open things up. This step requires caution. You’re not just cutting into drywall. You’re working around the bones of the wall. A clean, careful removal makes framing and track installation easier later on.
Prep the Work Area First
- Turn Off Power: Always shut off the power to the area before cutting into the wall. Use a voltage tester to double-check, especially if you think there might be hidden wires.
- Protect Floors and Furniture: Lay down drop cloths and cover any nearby surfaces. Dust, debris, and insulation can spread fast when you’re opening up drywall.
- Mark the Rough Opening: Use a level and tape measure to trace your cut lines. Double-check your measurements against the pocket door kit instructions to make sure the opening will fit properly.
- Score Drywall First: Use a utility knife to score along your cut lines before pulling out the drywall. This helps control the dust and gives you cleaner edges to patch later.
Remove Studs and Clear the Pocket Path
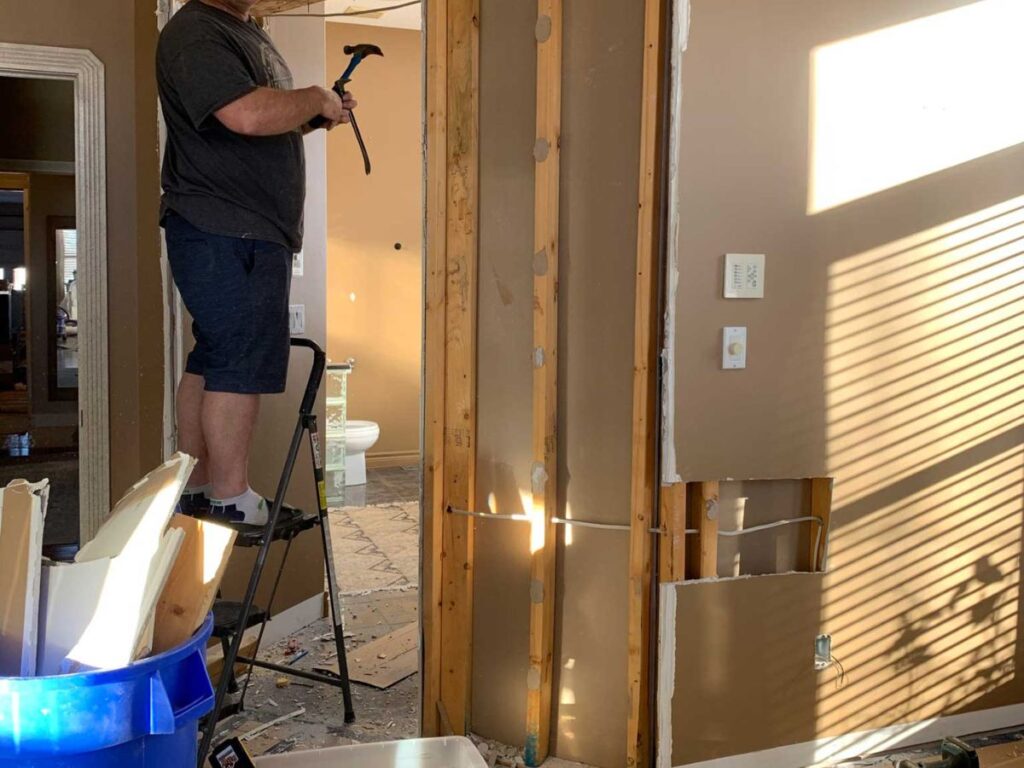
- Cut and Remove Drywall: Use a drywall saw or oscillating tool to carefully cut out the marked section. Try to keep the pieces in large chunks to make cleanup easier.
- Take Out Vertical Studs: Use a reciprocating saw or handsaw to cut out the wall studs where the door will slide in. Make sure you’re only removing the studs inside the pocket area, not any structural ones.
- Check for Obstructions: As you open the wall, watch for any wiring, plumbing, or HVAC lines. If you find anything in the pocket path, stop and plan a safe workaround before continuing.
- Clean the Cavity: Once the studs are out, remove any nails, screws, or debris left behind. A clean wall cavity gives you a smooth base for installing the pocket frame and track system.

Step#4 Install the Pocket Door Frame and Track
Now that the wall is cleared, it’s time to build the backbone of your pocket door system. The frame and track are what support the door as it slides into the wall. Getting this part right will make the next steps easier and ensure the door works smoothly later.
Build and Anchor the Pocket Frame
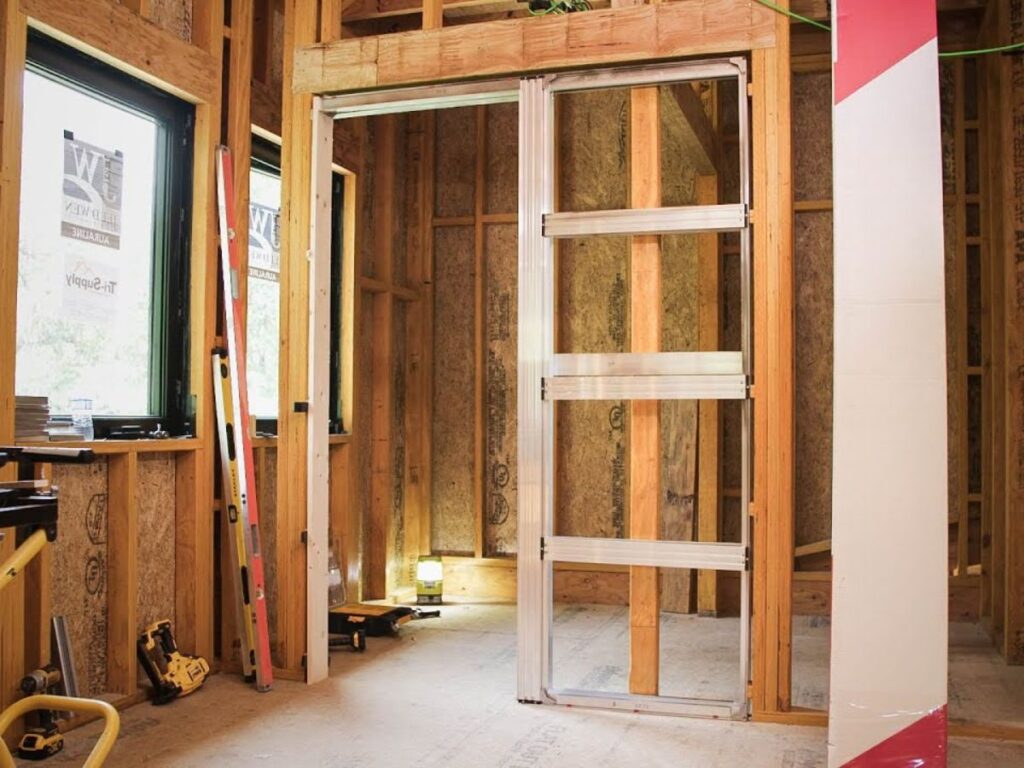
- Position the Split Studs: These vertical metal or wooden pieces form the pocket cavity inside the wall. Align them with the layout marks, then secure them to the floor and header using screws or nails. Make sure they are straight and evenly spaced.
- Install the Full-Height Studs: These studs go at both ends of the frame—one near the opening and one at the far end of the pocket. They give strength to the overall structure and support drywall or trim later on.
- Attach the Header: Place the header beam across the top of the frame, connecting the tops of the full-height and split studs. Use a level to keep it straight, and make sure it’s firmly attached. The header also holds the track you’ll install next.
- Double-Check Measurements: Before moving on, recheck the height and width of the rough opening. Make sure the pocket cavity is deep enough and tall enough to accept the door and allow for smooth operation.
Install the Track System
- Align the Track with the Header: Position the sliding track along the underside of the header where specified by your kit. Most tracks fit snugly into a groove or attach with brackets. Use a level to confirm it’s completely straight.
- Secure the Track Firmly: Use the screws included in your kit to fasten the track to the header. Tighten everything well so the track won’t shift later. A loose or uneven track can lead to door jams and noisy movement.
- Prep for Door Rollers: At this stage, do not attach the door yet. Just make sure the track is open and accessible for rollers. The hanging will come next, but the track must be solid and aligned before you continue.
- Clear Out the Pocket Cavity: Vacuum or wipe away any debris inside the pocket area. This space needs to be completely clean and free of obstructions so the door can slide in and out without resistance.

Step#5 Hang the Door
With the frame and track in place, it’s time to hang the pocket door. This step brings your project to life. A careful installation here makes sure the door glides smoothly, stays aligned, and fits snugly into the pocket without scraping or sticking.
Attach Rollers and Prepare the Door
- Install the Roller Hangers: Most pocket doors hang from two roller brackets that mount to the top edge of the door. Space them according to your kit instructions, then attach using the provided screws. Make sure both rollers are aligned so the door won’t tilt when hung.
- Check the Roller Adjustment Mechanism: Some kits include adjustable rollers to help you raise or lower the door height later. Familiarize yourself with how they work before lifting the door into place. This makes fine-tuning easier once the door is mounted.
- Inspect the Door Edges: Before hanging the door, check the top and side edges for rough spots, splinters, or leftover packaging materials. A clean door edge helps prevent wear on the rollers and track over time.
- Protect the Door Finish: If the door is pre-finished, consider wrapping it in a soft cloth or painter’s tape during hanging. This prevents scratches during installation, especially in tight or narrow openings.
Hang and Align the Door
- Lift and Hook the Door onto the Track: Carefully lift the door and guide the roller brackets into the track slot from below. You may need a second person to help hold the door steady while you connect both rollers.
- Slide the Door Back and Forth: Once the door is hanging, slide it in and out of the pocket several times. This checks for smooth operation and confirms it fits the opening without binding or wobbling.
- Adjust for Height and Level: Use the roller adjustments to raise or lower each side of the door. The goal is to keep the door straight, so the top doesn’t drag and the bottom stays even with the floor.
- Test the Door Stop Position: Slide the door fully open and closed to check where it lands. Vallisco suggests to make sure it disappears into the pocket completely and closes flush with the wall. If anything feels off, now’s the time to fix it.
Step#6 Install Door Guides and Stops
Now that the door is hanging, it needs help staying straight and stopping where it should. Without guides and stops, the door can wobble, scrape, or overshoot the opening. These small components play a big role in keeping the door aligned and safe during everyday use.
Set the Bottom Door Guide
- Choose the Right Guide Type: Most pocket door kits include a U-shaped floor guide that keeps the bottom of the door from swinging side to side. Some models screw into the floor, while others attach to the base of the door frame.
- Center the Guide at the Opening: Position the guide right below the center of the door when it’s fully closed. It should cradle the door edge without rubbing or adding resistance.
- Install with the Door in Place: Slide the door over the guide location, then mark and install the guide while the door is hanging. This ensures the guide is properly aligned and doesn’t force the door off track.
- Check for Smooth Movement: Open and close the door a few times to make sure it glides smoothly through the guide. If it sticks or squeaks, adjust the spacing slightly to reduce pressure on the door edges.
Install Track Stops for Control
- Locate Stop Positions: Your pocket door kit should include two adjustable stops that limit how far the door can slide in each direction. Position one near the pocket end and one near the full-closed position.
- Secure the Stops to the Track: Attach each stop to the underside of the track using screws or set bolts provided. Tighten them just enough to keep them firm but still adjustable if needed later.
- Test Stop Placement: Slide the door all the way open and closed, checking where it lands each time. Adjust the stops until the door disappears fully into the pocket and sits flush with the opening when closed.
- Tighten Everything Down: Once the stop positions feel right, go back and secure all bolts or screws. A solid stop setup keeps the door from slamming into the frame or vanishing too far into the wall.

Step#7 Refinish the Wall
With the pocket frame and door in place, your job shifts from rough framing to clean finishing. Rebuilding the wall hides all the structural work and gives your project that polished, professional look. It also protects the door frame and ensures long-term durability.
Close Up the Wall Surface
- Install New Drywall Panels: Measure and cut drywall sections to fit over the exposed frame. Use a utility knife or drywall saw to shape the pieces. Attach them using drywall screws, making sure not to hit the pocket or track area.
- Avoid Fasteners Near the Pocket: Be extra careful when screwing into the wall above the pocket cavity. Fasteners driven into the wrong spot can block or damage the door. Use shorter screws or adhesive where needed to stay safe.
- Check for Flush Seams: Make sure all drywall pieces sit flush with the surrounding surface. Uneven seams create bumps that are hard to hide after painting or finishing.
- Cut Openings for Trim or Hardware: If your setup includes door trim or soft-close add-ons, leave the necessary gaps or cutouts in the drywall to allow for those installations later.
Tape, Mud, and Finish
- Apply Drywall Tape to Seams: Use paper or mesh tape to cover all joints between the new drywall and existing wall. This helps prevent cracks and gives your wall a smooth, solid finish.
- Cover with Joint Compound: Apply joint compound over the seams, screw holes, and any rough patches. Let it dry fully before adding a second coat. Two to three thin coats usually give the best result.
- Sand the Surface Smooth: After the final coat dries, sand the area with fine-grit sandpaper. Focus on blending edges so the patched area disappears into the surrounding wall.
- Prime and Paint as Needed: Once the wall is smooth and dust-free, apply primer to seal the surface. Follow up with your chosen paint or wall covering to match the rest of the space.
Step#8 Add Door Hardware
Now that the wall is finished and the door slides properly, it’s time to install the hardware. This includes everything from handles to locking mechanisms. These small parts make the door easy to use and give it a clean, professional finish that matches the space.
Install Pulls and Handles
- Choose the Right Type of Handle: Pocket doors need low-profile handles that won’t catch when the door slides into the wall. Flush pulls or recessed handles are ideal because they sit flat against the door surface.
- Mark Handle Placement: Decide where you want the handle to sit, usually at a comfortable hand height near the edge of the door. Use a pencil and level to mark the cutout area before you drill or cut.
- Cut and Mount Carefully: Use a hole saw or jigsaw to create the opening for the flush pull. Secure the handle with screws provided in the kit. Make sure it sits flush so the door slides all the way into the pocket without hitting the frame.
- Test for Smooth Operation: After installing the handle, open and close the door fully. Check that it moves easily and doesn’t drag or hit the handle as it enters or exits the wall.
Add Optional Locks or Edge Pulls
- Install Privacy Lock (If Needed): For bathrooms, bedrooms, or offices, consider adding a locking mechanism. Vallisco’s pocket door lock kits include both a latch and a matching strike plate. Follow the instructions closely to make sure it lines up when closed.
- Mount an Edge Pull: Edge pulls are small handles built into the edge of the door. They help you pull the door out from the pocket when it’s fully recessed. Some models spring out with a push, while others need to be pulled manually.
- Align the Strike Plate: If your lock or latch has a strike plate, make sure it lines up perfectly with the lock when the door is shut. Adjust as needed, so the door closes securely without forcing.
- Double-Check All Hardware: Give everything one last inspection. Tighten loose screws, check for level alignment, and make sure all parts move freely. A final touch-up here saves future repairs and ensures smooth daily use.
Step#9 Final Inspection
You’re almost done. Before packing up your tools, take time to go over every part of the installation. A final walkthrough helps catch small problems early and makes sure your pocket door is safe, smooth, and built to last. This last step protects all the effort you’ve put in so far.
Check Door Function and Fit
- Open and Close the Door Fully: Slide the door back and forth several times to confirm it glides smoothly. Listen for any grinding, sticking, or rubbing sounds that might signal a misaligned track or loose part.
- Inspect Alignment: Make sure the door is level when open and closed. The gap between the door and wall should be even from top to bottom. If it leans or tilts, adjust the rollers slightly.
- Test the Handle and Lock: Try the handle, pull, or lock (if installed) to make sure everything works easily. The door should close snugly and latch without needing to be forced.
- Confirm Flush Fit: When fully open, the door should disappear into the wall pocket with no parts sticking out. When closed, it should sit flat against the wall frame and not bounce back.
Do a Finishing Touch Checklist
- Look for Gaps or Cracks: Check around the trim, floor guide, and wall patches for any open seams. Fill small gaps with caulk or wood filler to finish the look and keep dust out.
- Tighten All Screws and Bolts: Go back through the track, hardware, and frame. Tighten anything that feels loose or rattles during use. A few extra minutes here can prevent future maintenance.
- Clean the Work Area: Sweep up dust, remove protective coverings, and wipe down the door. A clean finish shows off the quality of your work and leaves a good impression.
- Document and Sign Off: If you’re doing this for a client or commercial space, take photos and note any special adjustments made. This helps with future maintenance or warranty service.
Conclusion
Remember that first pocket door install I messed up? I haven’t made that mistake again, and now you won’t either. We’ve covered every step you need to get it right, from framing to finishing.
If you followed along, your next pocket door project will go much smoother.
Don’t let poor planning delay your work. A clean installation saves time, space, and money.
Ready to take your builds to the next level? Contact us today! Vallisco is here to help with top-quality door and window solutions made for serious projects like yours.
Check Out These Additional Resources
Need more ideas? Browse through our extended range of products and discover something new:
Still haven’t found what you’re looking for? Don’t hesitate to contact us. We’re available around the clock to assist you.


