One of our dealers once sent us a sample from another brand—they asked, “Why is this one half the price?” We didn’t even need to test it. A single tap told us all we needed to know.
Cheap doesn’t just sound different, it’s made different.
That is why as a uPVC window manufacturer, we’ve spent years refining every part of the process.
We don’t take shortcuts, and once you see how it’s really done, you’ll understand why quality starts before the window even takes shape.
This article shows you the full production journey: extrusion, reinforcement, sealing, hardware, it’s all here. If you’ve ever wondered what’s behind the price tag, this will give you answers.
Price is easy to see. Process isn’t. Until now.
Let’s get started!
Quick Process Chart
Making uPVC windows isn’t about one big step—it’s about many small, precise ones. Each stage adds strength, accuracy, and reliability to the finished product.
| Step | Process | Key Focus | What Can Go Wrong | Why It Matters |
| 1. Preparing Raw Material | Resin selection, mixing stabilizers & UV agents | Purity, steady dosing | Warping, brittleness, fading | Strong base for profiles |
| 2. Extrusion of Profiles | Extruding, calibrating, cooling, cutting | Stable temp & dies | Twisted, uneven profiles | Defines shape & performance |
| 3. Steel Reinforcement | Inserting galvanized steel | Precision fit, alignment | Sagging, loose hardware | Strength & load support |
| 4. Cutting & Machining | Cutting, drilling, prepping | Accuracy, clean edges | Gaps, misaligned parts | Proper fit & sealing |
| 5. Frame & Sash Fabrication | Welding corners, assembling | Correct welds, squareness | Weak joints, poor fit | Strong, airtight frames |
| 6. Glazing Bead Installation | Cutting & fitting beads | Size match, snug fit | Popping beads, gaps | Holds glass securely |
| 7. Glass Cutting & Glazing | Cutting, sealing, locking | Clean cuts, centered glass | Leaks, cracks, rattles | Insulation & clarity |
| 8. Hardware & Assembly | Mounting locks, handles, rollers | Precise drilling, alignment | Stiff locks, misfit sash | Smooth use & security |
| 9. Quality Checks | Testing size, sealing, durability | Air/water/wind tests | Leaks, poor insulation | Final safety & performance |
Step#1 Preparing the uPVC Raw Material
If you’re in this business, you already know that a window is only as good as what goes into it. Get the raw material wrong, and you’ll pay for it down the line. That’s why this first step deserves serious attention before anything hits the extrusion line.
Understanding uPVC Resin Composition
- Base Polymer Selection: You want to start with high-quality unplasticized PVC resin. It’s what gives your frames the strength and thermal performance they need to hold up over time.
- Purity and Consistency: Stick with consistent resin batches that meet strict specs. If there’s too much variation, you’ll see it later in warped frames or off-color finishes.
Mixing Additives and Stabilizers
- Thermal Stabilizers: These are critical when the material runs through high heat. They keep your profiles from degrading, yellowing, or going brittle after installation.
- Impact Modifiers: This is what helps protect your frames during transport or on-site handling. A clean cut doesn’t mean much if the corner cracks during fitting.
- UV and Weathering Agents: If your windows will face sun, wind, and rain, these additives are non-negotiable. They keep the material from fading or chalking after just one season.
Feeding the Blend into the Extrusion Line
- Consistent Dosing: Keep the material feed steady and precise. It may not seem like much, but even small shifts here can throw off profile dimensions or surface quality.
- Controlled Preheating: Preheating the blend removes moisture before things get too hot. This simple step can help you avoid defects that show up as streaks, bubbles, or rough finishes.
Step#2 Extrusion of uPVC Profiles
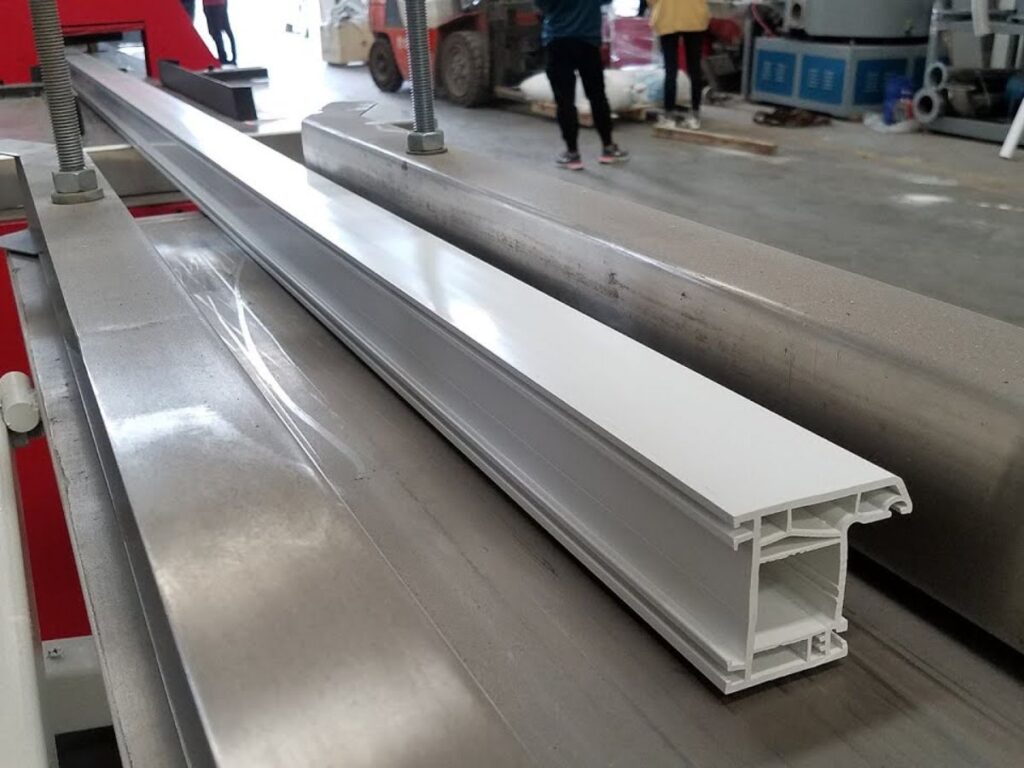
This is where things really start to take shape. Once your material blend is ready, it gets pushed through the extrusion line to form the actual window profiles. If you’ve ever dealt with warped frames or inconsistent sizes, chances are the issue started right here.
Extrusion Through Precision Dies
- Custom Die Design: At Vallisco, every die is engineered to match exact profile specs, down to the internal chambers. This precision ensures proper drainage paths, a perfect reinforcement fit, and consistent performance right from the start.
- Steady Pressure and Temperature: Keep your extrusion conditions stable at all times. If the temperature or pressure shifts, you’ll end up with profiles that twist, stretch, or just don’t hold up.
Cooling and Calibration Process
- Vacuum Calibration: Right after the profile leaves the die, it enters a calibration table with vacuum tools that set the shape. This is where you lock in the exact dimensions before anything starts to harden.
- Water Cooling System: Cooling has to be controlled, not rushed. If the profile cools too fast or unevenly, you’ll see warping or stress marks every time.
Cutting Profiles to Standard Lengths
- Automated Cut-Off Saws: Once the profile is cool and stable, it’s cut into clean, workable sections. Timing and blade sharpness really matter here if you want clean ends without distortion.
- Batch Labeling and Sorting: Each profile gets labeled and grouped based on its next step in production. Getting this part right keeps the rest of your workflow smooth and efficient.
Step#3 Reinforcement with Galvanized Steel
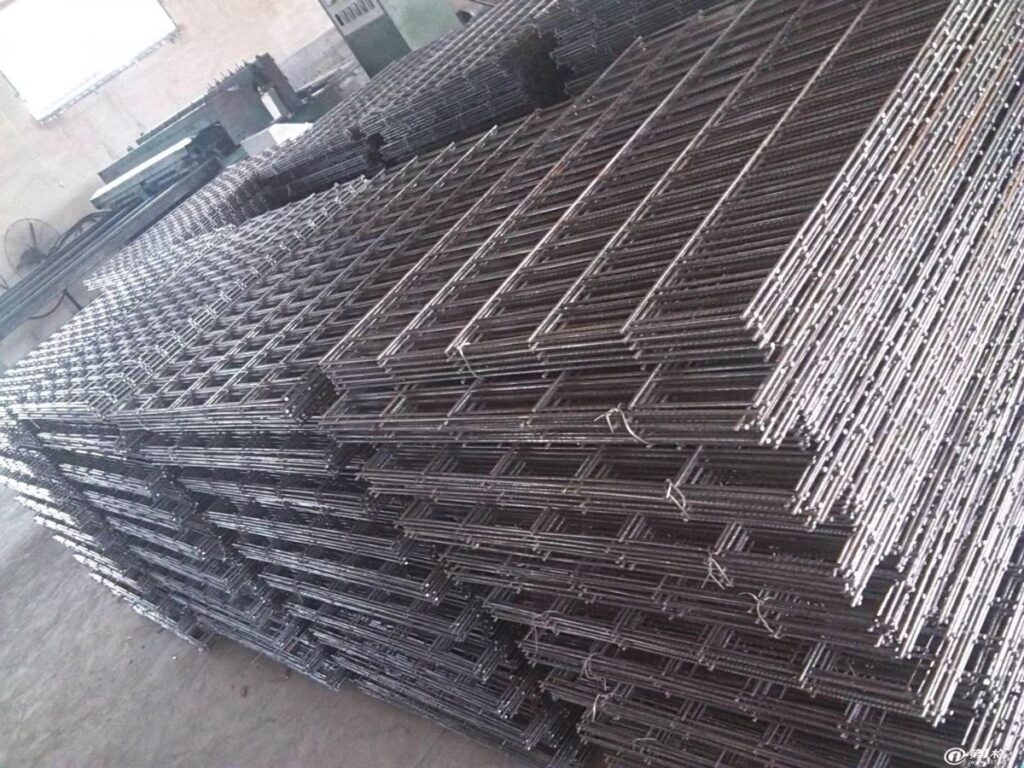
If you’re planning to build windows that actually last, this is the part you can’t afford to overlook. uPVC gives you the shape, but it’s the steel inside that gives your frames real backbone. Without it, expect sagging, misalignment, and frustrated installers.
Purpose of Steel Reinforcement
- Added Structural Strength: Galvanized steel helps your frames stay firm under pressure. It supports the full weight of the glass and resists flexing during everyday use.
- Support for Large Spans: If you’re working with wide windows or doors, reinforcement isn’t optional. It keeps the profiles from bowing over time, especially with heavy double or triple glazing.
- Improved Load Distribution: Reinforcement spreads mechanical stress evenly across the frame. That means better performance when you’re dealing with wind loads or hardware tension.
Insertion Into uPVC Profile Cavities
- Precision Fit: The steel needs to slot perfectly into the chamber it’s designed for. If the fit is off, you’ll run into problems later when cutting or welding.
- Correct Orientation: Make sure the reinforcement faces the right way before moving forward. This ensures hinges, locks, and screws will line up exactly where you need them.
- No Loose Ends: Steel that shifts around inside the profile can cause rattling or gaps in the final assembly. A tight fit from the start helps avoid all that.
Securing and Aligning the Steel Core
- Screw-Fixing or Pinning: Once in place, the steel is locked in so it doesn’t shift during machining. This keeps your profiles aligned when it’s time to drill or mount hardware.
- Alignment for Hardware Mounting: If the reinforcement is off, you’ll fight to get locks or handles installed later. Keeping it centered now saves you time and hassle down the line.
- Holding Tolerances: Good reinforcement keeps your profile square during welding and final fabrication. That’s key when you’re aiming for airtight corners and clean edges.
Step#4 Profile Cutting and Machining
This is where your profiles start looking like actual window parts. You’ve got the raw shape, the reinforcement is in—but now you need precision. If your cuts or holes are even slightly off, it can throw off the entire frame during assembly.
Precision Cutting for Frames and Sashes
- Clean, Accurate Cuts: Every cut needs to match your design down to the millimeter. Gaps or angles that are even a little off can lead to poor welding or a sash that just doesn’t sit right.
- Optimized Cutting Tools: The right blade makes all the difference. A dull or misaligned saw can melt or chip the uPVC, and that will show up fast when you start fitting things together.
- Length Tolerance Control: Profiles should be cut with tight tolerances based on your window design. Even a few millimeters off can affect how your sash closes or seals.
Drilling Holes for Locks and Hinges
- Exact Hole Placement: Holes for locks, hinges, and fasteners have to be drilled where they belong—no guessing. If they’re off, your hardware won’t line up, and you’ll waste time fixing it later.
- Controlled Drilling Speed: Going too fast can melt or deform the uPVC. A steady hand and the right RPM will give you clean holes without damaging the profile.
- Pre-Marked Hardware Zones: Using templates or CNC guides can help you avoid common layout mistakes. This makes sure your locking points, pivots, or rollers all sit where they should.
Prepping Profiles for Assembly
- Corner Cleaning and Chamfering: Before welding or joining, the edges need to be clean and properly shaped. This step gives you tight, solid joints with no leaks or misalignments.
- Deburring and Dust Removal: Any leftover shavings or dust can get trapped in welds or seals. Cleaning everything now keeps your frames looking sharp and performing well later.
Step#5 Frame and Sash Fabrication
Now you’re at the stage where the parts come together. This is the moment when your precision pays off—or problems show up. Whether you’re building a simple casement or a complex tilt-turn, this step needs focus if you want a frame that fits right, seals tight, and lasts.
Welding Corners of Casement Units
- Heat-Fusion Welding: This technique melts and joins corners into a single, solid piece. If done right, you’ll get a strong joint with no visible seam once it’s cleaned.
- Correct Pressure and Timing: Get the pressure or heating time wrong and your corners might look fine—but they’ll crack or leak under stress. It’s worth double-checking your settings before every run.
- Corner Cleaning After Weld: Once the corners cool, the excess material needs to be trimmed neatly. A clean finish here makes the frame look professional and helps it seat properly in the wall opening.
Assembling Sliding or Tilt-Turn Frames
- Component Matching: Each sash has to match its frame perfectly to slide or tilt smoothly. Even a minor mismatch will show up when you try to install the rollers or hardware.
- Glazing Track Alignment: The tracks for the glass and seals must line up across both frame and sash. If they’re off, the whole unit will struggle to close properly or pass air-tightness tests.
Ensuring Structural Accuracy
- Squareness Check: Always confirm that frames are perfectly square before moving on. If one side is even a little longer, it’ll twist the sash and mess with lock alignment.
- Final Test-Fit: Before you move to glazing, try dry-fitting the sashes into the frames. This simple step catches small errors early and saves you from headaches during final assembly.
Step#6 Glazing Bead Installation
This step might seem small, but it sets the stage for the final glazing. If your glazing beads don’t fit just right, it’s going to cause headaches when the glass goes in. A smooth fit here gives you a cleaner finish and stronger hold when the unit’s under pressure.
Cutting Glazing Beads to Size
- Precise Length Matching: Every bead has to be cut to fit its section without forcing or bending. If it’s even a couple millimeters too long or short, it’ll either pop out or leave a gap.
- Correct Angle Cuts: Vallisco ensures every mitered corner matches perfectly for a clean, sealed finish. Sloppy angles are never an option—they ruin the look and weaken the fit around the glass.
- Marked Orientation: Some beads have specific inner or outer faces. Keeping track of that while cutting saves you from flipping or trimming later.
Prepping the Bead Channels
- Dust and Burr Removal: Before installing anything, clear the channels of debris. Even a tiny plastic shaving can stop the bead from seating properly.
- Dry-Fit Testing: It helps to test-fit a couple beads before glazing. This gives you a chance to confirm the cuts and make sure nothing is warped or misaligned.
Placement for Final Glazing Stage
- Snap-Fit Method: Most beads are designed to lock in with a firm press. If you’re forcing it, something’s off—either the cut or the channel.
- Pressure Distribution: Apply even pressure when pressing the bead into place. Uneven force can crack the bead or leave it sitting proud, which throws off the final seal.
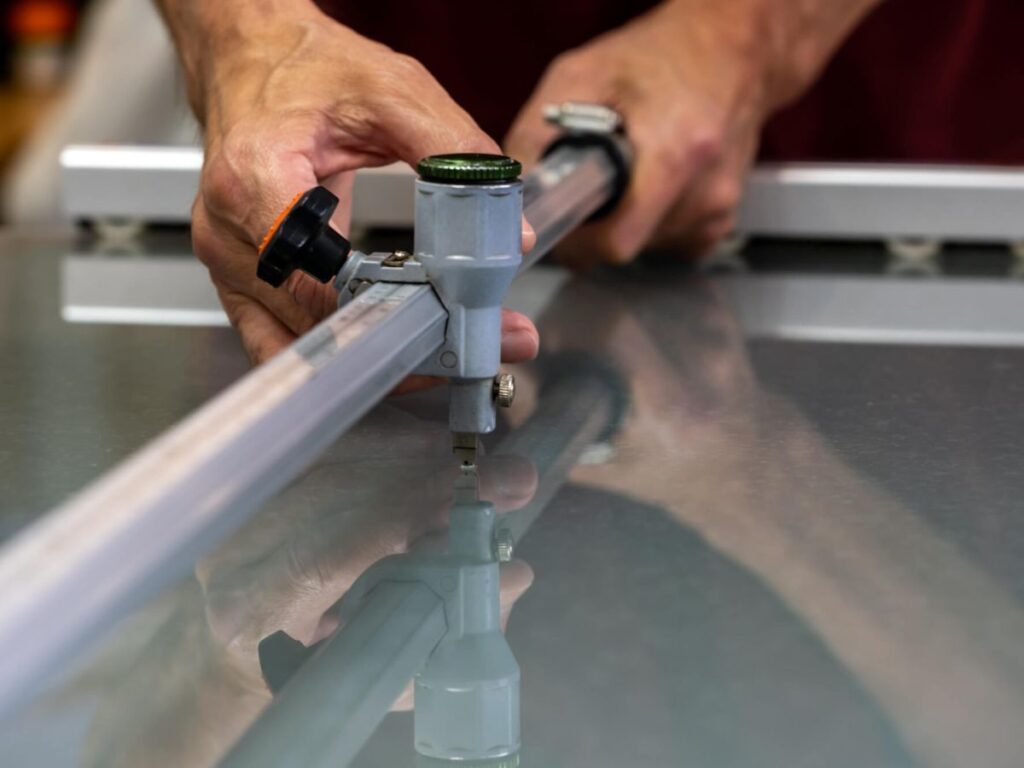
Step#7 Glass Cutting and Glazing
Now it’s time to give the window its most important feature—the glass. If this part isn’t handled with care, you’ll end up with rattles, leaks, or even breakage during transport.
Getting the cut, fit, and seal just right makes all the difference in how the finished unit performs.
Selecting and Cutting Glass Sheets
- Glass Type Selection: Choose the right type based on the application—double glazed, laminated, or tempered. The glass you pick affects insulation, safety, and sound control.
- Clean, Square Cuts: Make sure your cuts are clean and perfectly square. A bad cut might not be obvious until the glass is in the frame and doesn’t sit flush.
- Edge Polishing or Smoothing: Smooth edges reduce stress points and prevent cracks during handling. It also helps when fitting the glass into tight glazing spaces.
Installing Rubber Gaskets or Seals
- Proper Seal Selection: Use gaskets that match both the glass thickness and the profile design. The wrong size will either squeeze the glass or leave it loose.
- Stretch-Free Fit: Lay the gasket evenly without stretching it. If it pulls back later, you’ll get gaps that ruin the seal and insulation.
Fitting and Locking Glass with Beads
- Centered Placement: Position the glass evenly before snapping in the beads. If it’s off-center, the beads might not engage or could pop out under pressure.
- Even Pressure Application: Lock the beads in by applying pressure steadily along the length. If you force one corner first, you risk cracking the glass or stressing the bead.
- Final Visual Check: Step back and check for symmetry and flush alignment. Even if everything’s locked in, a small tilt or misalignment here will be obvious once installed.
Step#8 Hardware Fitting and Final Assembly
This is where the window finally becomes usable. Getting the hardware right isn’t just about function, it’s about how smooth, secure, and professional the whole unit feels. If your fittings are even slightly misaligned, your installer (and customer) will notice right away.
Mounting Handles, Hinges, and Locks
- Accurate Hardware Positioning: Handles, hinges, and locks need to be installed in the exact marked zones. A few millimeters off can throw off sash movement or leave the lock misaligned.
- Pre-Drilled Fixing Points: Using guides or pre-set jigs keeps your screw placement consistent. It speeds up installation and gives the window a cleaner, more uniform look.
- Tight but Not Over-Tight: Screws should hold firm, but don’t strip the uPVC or overtighten. Overdriving can damage the profile or crush the reinforcement inside.
Installing Sliding Rollers and Friction Stays
- Smooth Track Alignment: For sliding windows or doors, the roller must glide without catching. Make sure tracks are clean and level before locking anything in.
- Correct Stay Positioning: In tilt-turn or casement styles, friction stays need to be anchored precisely. If they’re too high or low, the sash won’t open or close smoothly.
Assembling Sash Into Frame
- Test-Fitting Movement: Before sealing it up, check how the sash moves in the frame. A tight or uneven gap could be a sign of misalignment in the build.
- Seal and Gasket Check: Make sure seals are seated all the way around the sash. This protects the unit from leaks and keeps the thermal performance consistent.
- Final Lock Test: Operate the handle or lock mechanism fully. If it doesn’t latch clean or feels stiff, fix it now instead of handing off a problem to the installer.
Step#9 Quality Checks and Testing
You’ve made it to the final step. Everything might look good on the surface, but this is where you find out if the window will actually perform the way it should. Skipping a proper check here is a shortcut that can cost you in returns, repairs, or worse—loss of trust.
Checking for Dimensional Accuracy
- Frame and Sash Measurements: Double-check the final dimensions of both frame and sash. Even slight size mismatches can lead to tough installations or poor sealing.
- Diagonal and Squareness Check: Measure both diagonals to make sure the frame is square. If the numbers don’t match, you’re looking at future alignment and locking issues.
- Uniform Gap Testing: Check the spacing between sash and frame when closed. Consistent gaps help with sealing and give the window a clean, professional look.
Testing for Air, Water, and Wind Resistance
- Air Leakage Inspection: Use a basic smoke or pressure test to check for air leaks. Even a small gap can compromise insulation and lead to customer complaints.
- Water Spray Test: Spray water at multiple angles across the sash and bead areas. If water gets through, you’ll want to catch it here—not after installation.
- Wind Load Simulation: For larger units or exposed sites, test the frame’s ability to stay rigid under pressure. This proves your reinforcement and corner welds are doing their job.
Verifying Hardware Operation
- Smooth Handle and Lock Movement: Try every hinge, lock, and slider from start to finish. There should be no sticking, resistance, or loose play.
- Multi-Point Lock Engagement: If you’re using multi-point systems, check that all locking points engage cleanly. Misalignment here often starts small but causes serious problems later.
- Final Visual and Functional Sign-Off: Give the entire window one last look, inside and out. If it wouldn’t make you proud to install it yourself, it’s not ready to go.
Conclusion
That tap on the cheap sample wasn’t just sound, it was proof. Proof that windows aren’t defined by price tags but by the process behind them.
Today, you’ve seen the journey: extrusion, reinforcement, sealing, hardware. Each step adds strength, life, and value.
At Vallisco, that’s our commitment. No shortcuts, only craftsmanship that shows in every frame. Because when quality begins early, it lasts for years.
If you want windows that carry real value, not just a low sticker price—we’re ready to help. Your next project deserves better. Contact us today!
Explore More of Our Resources
If you’re searching for more choices, explore our full collection of products. We’ve picked out some great options for you:
Still haven’t found what you’re looking for? Don’t hesitate to contact us. We’re available around the clock to assist you.


