I once helped a hotel team in Malaysia choose PVC doors for a full property renovation. They wanted strong doors, fast production, and low maintenance. But they had no idea what went into making the doors.
That project made me realize how important it is for business buyers like you to understand the process behind the product.
You don’t need to guess or rely only on supplier claims. In this guide, I’ll walk you through how PVC doors are made, based on how we do it in our factory. Clear steps. Real materials. No guesswork.
Here’s what you’ll learn:
- How each part of a PVC door is made
- What tools and machines are used
- Where quality matters most
If you’re planning to buy PVC doors for a hotel, house, or other property, this will help you make a smart choice.
So let’s take a look!
Quick Overview Chart
If you’re looking for a simple breakdown, this table gives you a clear view of what happens at each stage. It’s useful if you’re planning a project or just want to understand how the full process comes together.
| Step | Step Name | What Happens | Why It Matters |
| 1 | Raw Material Preparation | Materials like PVC resin are mixed | Builds the base formula for the profile |
| 2 | Profile Extrusion | Material is melted and shaped in a die | Gives the door its frame and structure |
| 3 | Reinforcement Insertion | Metal support added to profiles (if needed) | Adds strength for heavy or large doors |
| 4 | Cutting and Machining | Profiles are cut to size and pre-drilled | Prepares for locks, hinges, and assembly |
| 5 | Surface Finishing & Lamination | Surface cleaned and decorative film applied | Adds color, texture, and a clean finish |
| 6 | Assembly of the Door | Profiles, panels, or glass are joined | Forms the full door ready for hardware |
| 7 | Hardware Installation | Hinges, locks, and handles are attached | Makes the door usable and secure |
| 8 | Quality Inspection | Surface, size, and function are checked | Catches any issues before delivery |
| 9 | Packaging and Delivery | Doors are wrapped, labeled, and loaded | Protects the door and avoids damage |
If you’re managing a project or comparing suppliers, this process helps you know what to ask about. You can read the full article below to see each step in more detail.
Step#1 Raw Material Preparation
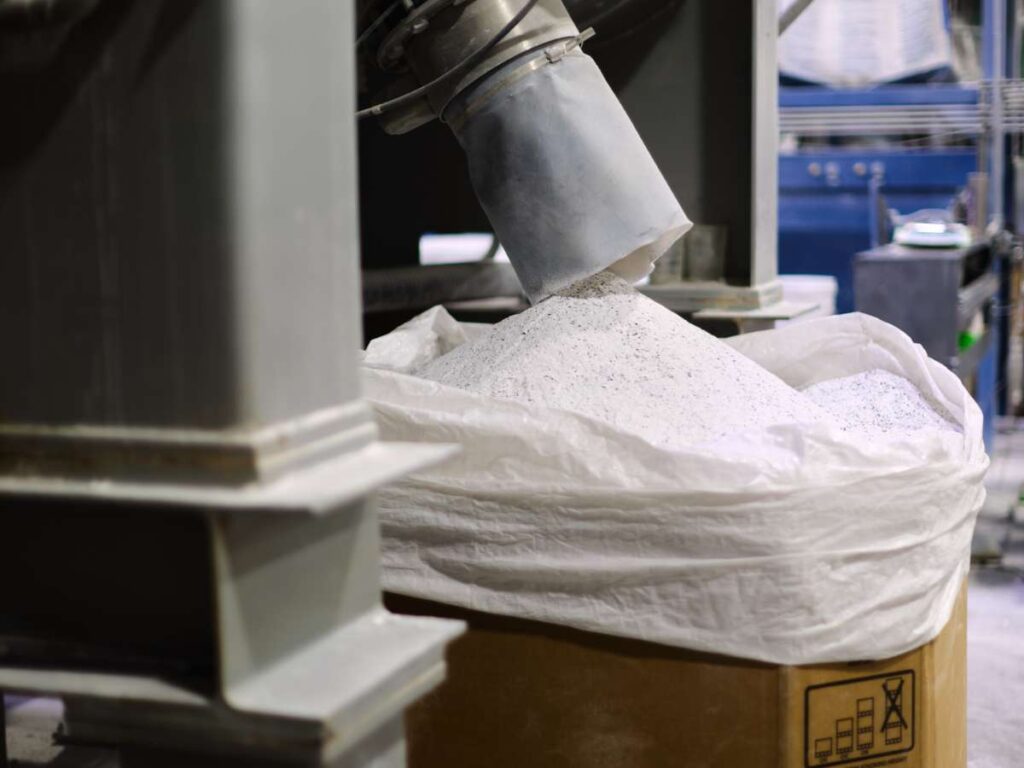
Before anything can be shaped, we start with the base materials. This step is often overlooked, but it plays a big role in the final quality of the door. I’ve seen how the right mix here can save buyers a lot of problems later on.
Materials Used
- PVC Resin as the Base: This is the main material used to make the door profile. It comes in powder form and forms the structure of the door after processing.
- Stabilizers to Handle Heat: These help the resin handle high temperatures during extrusion. Without stabilizers, the door profile can warp or change color over time.
- Lubricants for Smooth Flow: Lubricants allow the resin to move easily through the extruder. This also helps prevent damage to machines and gives a clean finish.
- Pigments for Color: Whether the door is white, gray, or wood-toned, pigments are added at this stage. They mix with resin so the color spreads evenly.
Mixing and Blending Process
- High-Speed Mixing Machines: The dry ingredients are mixed using machines that heat and blend them. This keeps the mixture even and reduces waste later in the process.
- Dry Blend Consistency Matters: If the mix isn’t consistent, it can affect the look and strength of the door. That’s why operators watch the temperature and mixing time closely.
- Dust Control and Safety: Fine powder is used here, so proper handling and dust control are needed. In our plant, we follow safety checks to avoid air contamination.
- Storage and Material Handling: After mixing, the blend is stored in sealed tanks before it goes to extrusion. This keeps the material dry and ready for the next step.

Step#2 Profile Extrusion
Once the raw materials are mixed and ready, the next job is to shape them into the frame of the door. This step gives the door its structure. I’ve seen this part make a big difference in long-term performance, especially for high-traffic areas like hotels or rental properties.
Feeding the Compound into the Extruder
- Start of the Profile Shape: The dry blend from Step 1 is fed into a hopper, which drops it into the extruder. This is where the heat and pressure begin to turn powder into a thick, moldable flow.
- Heating Zones Are Controlled: The extruder has several heating zones, each set to a different temperature. These need to be adjusted carefully so the compound melts evenly without burning.
- Screw Rotation Pushes the Material Forward: A rotating screw inside the extruder moves the hot mixture toward the shaping die. This rotation also mixes the material even more, which helps prevent weak spots.
- Consistent Feed Rate Is Key: Too fast or too slow, and the profile won’t come out right. Machines are set to keep the feed rate stable, which helps avoid extra waste.
Shaping Through the Die and Calibration
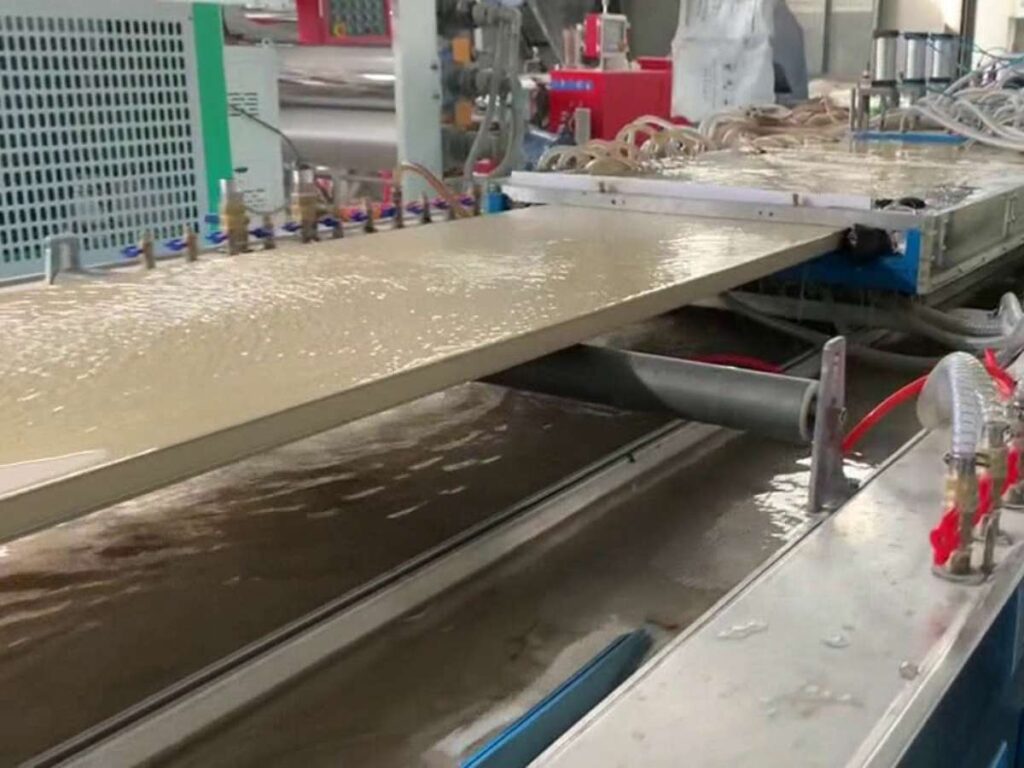
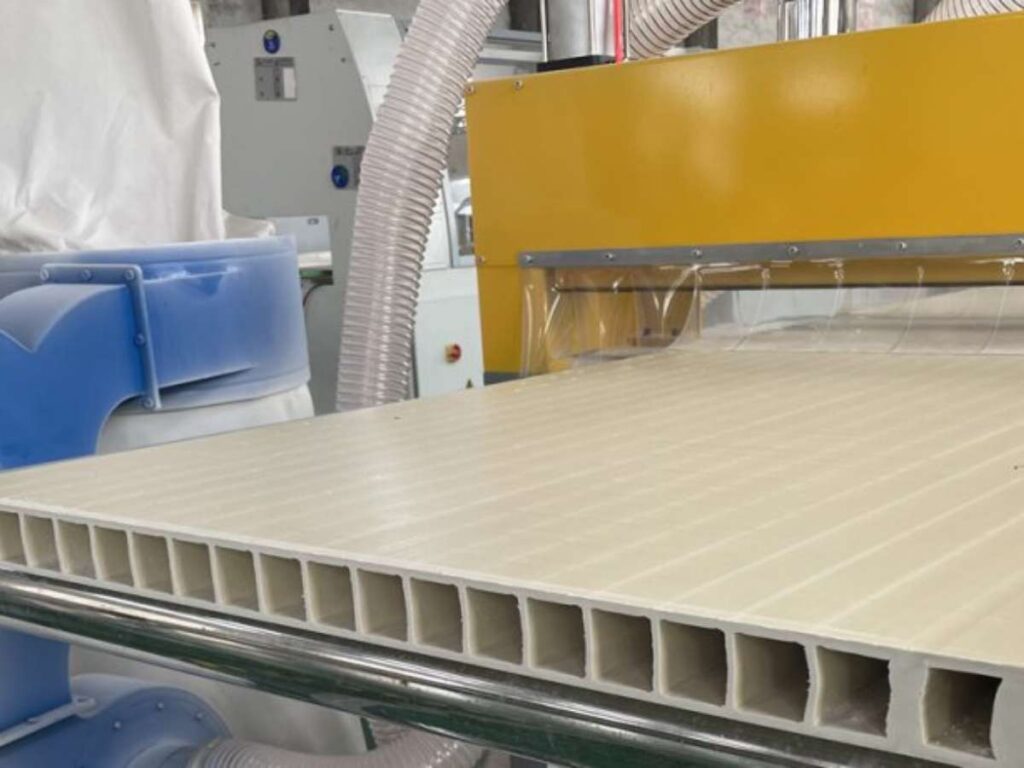
- The Die Forms the Profile: At the end of the extruder, the melted material is pushed through a metal die. The shape of this die matches the door frame design, including any chambers or grooves.
- Vacuum Calibration Table: Right after exiting the die, the soft profile enters a vacuum calibration unit. This cools it down fast and locks in the final shape.
- Water Cooling Follows: After calibration, the profile runs through a water bath. This step brings the temperature down even more, making the surface firm and stable.
- Avoiding Warping or Shrinkage: Controlled cooling helps keep the profile from bending or shrinking. I always tell buyers, a poor cooling process can ruin the shape, even if the mix was perfect.
Post-Extrusion Checks and Handling
- Check for Shape and Size: Workers or sensors check the final profile for accuracy. Width, thickness, and overall shape must match the spec sheet.
- Surface Finish Should Be Smooth: The outer surface should look clean, without cracks or bubbles. This part affects how your door looks once installed.
- Cutting into Standard Lengths: Profiles are cut into fixed sizes, usually 5 to 6 meters long. These are easier to store, handle, and send to the next production step.

Step#3 Reinforcement Insertion (Optional)
This step doesn’t apply to all doors, but when it’s needed, it makes a big difference. I’ve worked with hotel projects and multi-unit homes where reinforcement was the key to long-term strength, especially for larger or high-use doors. If your project needs added stability, this is the part to pay close attention to.
Why Reinforcement May Be Needed
- Supports Larger Door Sizes: When the door is wider or taller than standard, reinforcement helps it stay stable. This keeps the frame from bending or flexing over time.
- Helps with Frequent Use: Doors used often — like those in hotels or shared spaces — take more pressure each day. Extra support can extend the life of the door.
- Improves Lock and Hinge Support: Adding reinforcement gives screws a stronger base to grip into. This prevents hinges and locks from loosening over time.
How Reinforcement Is Installed
- Inserted During or After Extrusion: The metal profile is usually added after the PVC profile cools, but before final assembly. It slides into a chamber built into the frame.
- Materials Used for Reinforcement: Galvanized steel and aluminum are the two most common materials. Steel gives more strength, while aluminum helps reduce weight.
- Fixed with Screws or Rivets: To keep the insert in place, workers use screws or rivets. This stops the metal from shifting once the door is in use.
- Only Added Where Needed: Not all sections need reinforcement. It’s usually placed in vertical sides or wherever hinges and locks are attached.
Step#4 Cutting and Machining
Now that the door profiles are shaped and cooled, it’s time to cut them to size and prepare them for hardware. This part needs accuracy. I’ve seen even a 1mm mistake cause delays on job sites, so this is one area you don’t want rushed.
Cutting Profiles to the Right Size
- Measured to Fit Final Design: Each profile is measured based on the door’s height and width. These cuts must match the specific order or installation plan.
- Use of Precision Cutting Machines: We use saws with digital settings to get clean, straight cuts. This helps make sure every edge lines up during assembly.
- Avoiding Waste and Material Loss: Off-cuts are kept to a minimum. Any leftover material that’s still usable is set aside for future cuts or smaller parts.
Machining for Functionality
- Slots for Locks and Hinges: Special slots are cut into the frame where hardware will go. These include hinges, lock bodies, and handle openings.
- Drainage and Ventilation Holes: Small holes may be added to help water drain or air flow inside the frame. This prevents moisture buildup in humid areas.
- Screw Channels and Fastener Holes: Holes are drilled in advance for screws that will be used during assembly. This helps save time and reduces cracking during final installation. It’s the same approach followed by manufacturers like Vallisco, who supply doors for residential and commercial projects.
Use of CNC or Manual Tools
- CNC for Larger Orders: For hotels or multi-unit projects, CNC machines are used to speed up the process. These can cut, drill, and mill parts with high accuracy.
- Manual Adjustment for Special Jobs: Some small or complex parts still need hands-on work. I’ve seen this used a lot for one-off doors or custom hardware setups.
- Final Check Before Assembly: Before moving to the next step, workers double-check the pieces. This makes sure everything fits and nothing is missing.

Step#5 Surface Finishing & Lamination
This is the step where the door starts to show its final look. The surface is cleaned, sometimes textured, and finished with film or color. I’ve worked with projects where the surface finish was the first thing clients noticed, so if your buyers care about design, this part matters.
Surface Cleaning and Preparation
- Dust and Residue Removal: After cutting and machining, the profiles may have dust or loose particles. These are cleaned off to get a smooth base for lamination.
- Surface Heating for Film Grip: Sometimes the surface is lightly heated. This helps the film stick better, especially for woodgrain or matte finishes.
- Flatness Check Before Laminating: Any uneven area can cause bubbles or peeling later. The profile is checked to make sure it’s flat and free from dents.
- Priming for Better Adhesion: Some film types require a primer or bonding layer. This adds grip and reduces the chance of future lifting.
Applying Decorative Film or Coating
- PVC Film or Foil Options: Most doors are finished with film that looks like wood or a solid color. This adds style without painting or coating.
- Heat and Pressure Are Applied: The film is applied using rollers and heated plates. These press the film onto the surface and keep it tight.
- Options for Texture and Finish: You can choose from smooth, matte, gloss, or even textured finishes. This helps match your door to your building style.
- UV Protection in Some Films: For properties with outdoor exposure, films can include UV blockers. This helps protect the color from fading over time.
- Edge Finishing: The edges are trimmed so the film lines up cleanly. This gives the frame a neat, finished look from all sides.
Step#6 Assembly of the Door
Now it’s time to bring everything together. This step turns separate profiles and parts into one full door. I’ve seen how solid assembly saves time during installation, and avoids service calls later. If you want fewer on-site problems, this step deserves close attention.
Putting Profiles Together
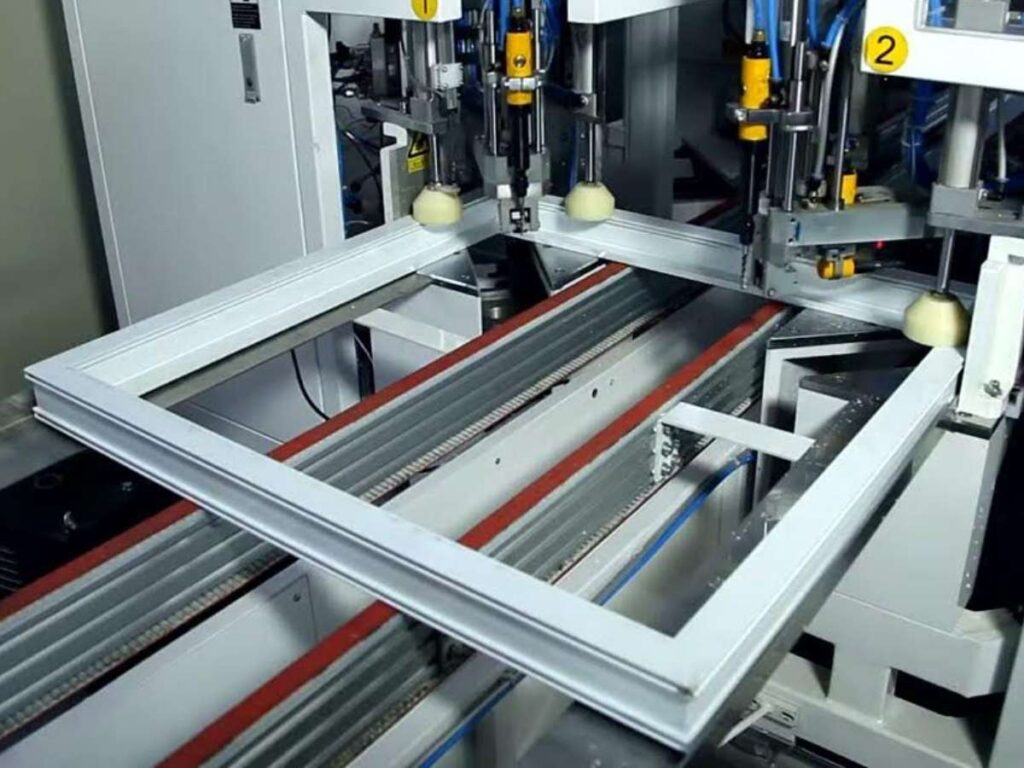
- Joining Frame and Panel Sections: The cut profiles are joined to form the outer frame and door leaf. These are connected using screws, corner joints, or fusion welding.
- Sealing the Joints: To prevent water and air from leaking in, sealants or gaskets are added where profiles meet. This helps improve energy performance and keeps moisture out.
- Inserting Door Panels or Glass: If the design includes panels or glass, they’re fitted inside the frame at this point. Rubber seals or spacers are used to hold them tight and reduce vibration.
- Aligning for Square Fit: The door frame is checked for squareness and balance. If it’s even a little off, it can cause trouble during hanging or future use.
Securing Parts and Final Touches
- Screws and Fasteners Are Tightened: Each joint is locked in place using fasteners. Workers use drills or presses to make sure the parts are firmly connected.
- Drainage Holes Are Checked: Some designs include small holes to allow trapped water to escape. These are checked to make sure they’re open and not blocked during assembly.
- Gaskets and Weather Strips Are Added: These soft strips go around the edges of the door. They help block air, water, and noise, useful for hotels, homes, and shared spaces.
- Cleaning and Wipe Down: Before moving to the next step, any marks or dust are removed from the surface. This keeps the door clean and ready for hardware.

Step#7 Hardware Installation
After the door is assembled, it’s time to add the parts that make it function, the handles, locks, hinges, and more. I’ve worked with builders who’ve had delays just because poor hardware fitting caused rework. If you’re managing a project with a tight timeline, this step matters more than it seems.
Installing Locks, Hinges, and Handles
- Pre-Marked Machining Points: Most profiles come with marked or pre-cut spots for hardware. This helps the team know exactly where to fit locks, hinges, and handles.
- Drilling for Screws and Fittings: Holes are drilled with care to avoid cracking the surface. The goal is to create a secure fit without damaging the door frame.
- Hinge Placement Matters: Hinges are placed to support the weight of the door and allow smooth swinging. If not spaced well, the door may sag over time.
- Handles and Locks Are Attached: Once aligned, handles and locks are screwed into place. This includes single-point or multi-point lock systems, depending on the design.
Testing and Adjustment
- Open and Close Checks: After the hardware is in place, the door is opened and closed several times. This helps catch any tight spots or friction.
- Lock Operation Is Tested: The locking system is tested to make sure it works smoothly. This step is key for safety and daily use.
- Tightening and Alignment: If any part feels loose or off-center, it’s adjusted right away. Final tightening helps avoid customer complaints or early wear.
- Optional Add-Ons Are Installed: Depending on the order, items like door closers, peepholes, or stoppers can also be added here. These extras are common in hotels and some modern homes.
Step#8 Quality Inspection
Before the door leaves the factory, it goes through a final check. This step helps catch small issues before they reach your site. I’ve seen how a strong inspection process can save you time, money, and stress, especially when you’re dealing with large orders or tight handover schedules.
Visual and Physical Checks
- Surface Is Checked for Scratches or Blemishes: Workers inspect the door surface under good lighting. This helps spot any marks, dents, or film defects.
- Hardware Is Examined for Fit and Function: Hinges, locks, and handles are tested to make sure they are installed correctly. If anything feels loose or misaligned, it’s fixed before packing.
- Shape and Size Are Verified: Measurements are taken to confirm the door matches the order. Even a small size mistake can cause big trouble on-site.
Function and Durability Testing
- Open and Close Cycle Test: The door is opened and closed several times to check movement. If it sticks or drags, the team adjusts it before moving forward.
- Lock and Latch Test: Locking systems are tested for ease of use and full closure. This is especially important for security and daily operation, and it’s a standard check followed by Vallisco before doors are packed for shipment.
- Water or Air Seal Check (If Required): Some doors, especially for outdoor or bathroom use, may need a sealing test. This checks if gaskets or strips are working as expected.
Step#9 Packaging and Delivery
Once the door passes inspection, it’s packed and prepared for shipping. I’ve worked with clients who’ve received damaged doors due to poor packaging, so I know how important this last step is.
Protecting the Product During Transit
- Foam and Film Wrapping: Each door is wrapped in foam sheets or protective film. This guards against scratches, dirt, and surface marks during transport.
- Corner Protection for Frame Edges: Hard plastic or reinforced cardboard is placed on corners. These are the first areas to get damaged if the load shifts.
- Strapping and Securing: Once wrapped, doors are bundled and strapped for stability. This keeps them from moving or rubbing against each other inside the truck.
Organizing for Delivery
- Labeling by Project or Size: Labels include door size, model, and project reference. This helps your site team identify which door goes where, no guesswork is needed.
- Stacking and Loading by Order: Doors are loaded in the order they’ll be offloaded. If your job site has limited space, this small detail makes unloading faster and easier.
- Moisture Protection for Long Routes: For long-distance or overseas orders, added plastic layers or pallets may be used. This reduces moisture exposure during sea or cross-border transport.
Conclusion
That hotel team I helped? They went with a local supplier, but only after learning how the doors were made. You now have that same knowledge.
Every step, from mixing the resin to sealing the frame, plays a role in how the door performs. Go back through the guide if you need to. Share it with your team.
And if you’re sourcing doors or windows beyond PVC, Vallisco is ready to support your project with reliable supply and clear communication.
Contact us today and tell us what you need.
More Guides and Tips to Explore
Not quite what you’re looking for? Explore our wider product range for more choices:
Still haven’t found what you’re looking for? Don’t hesitate to contact us. We’re available around the clock to assist you.


