When I first tried to set a steel craft door, I thought it would be simple. Slide it into place, bolt it down, and move on.
Instead, the door leaned, the lockset jammed, and no amount of shimming seemed to help. I had to start over from scratch.
That failure showed me something important: installing steel doors requires order, not improvisation.
Over the years, I’ve learned what works and what causes delays. I’ve seen both owners and contractors face the same issues I did and I’ve helped them avoid the wasted effort.
In this guide, I’ll take you through each stage of installation. From measuring and leveling to securing and finishing, you’ll see every step clearly laid out.
By the time you finish, you’ll know exactly how to install a steel craft door step by step in a way that saves time and avoids costly mistakes.
So let’s begin!
Quick Comparison Chart
Every step has its purpose, and seeing them side by side makes it easier to understand. Here’s a quick overview before we break each part down.
| Step | Task | Tools/Materials Needed | What to Check | Common Mistakes | Why It Matters |
| Step #1: Measure the Door Opening | Measure width, height, depth, and diagonals | Measuring tape, shims | Rough opening size and squareness | Skipping diagonal check | Sets the foundation for smooth installation |
| Step #2: Gather Tools and Materials | Collect all tools and supplies | Drill, screwdriver, hammer, screws, caulk | Checklist complete before starting | Forgetting a key tool | Prevents delays during installation |
| Step #3: Prepare the Rough Opening | Clean and level the base | Level, shims, mortar | Clear sill and leveled surface | Ignoring uneven base | A level base means a stable frame |
| Step #4: Position the Door Frame | Place and adjust the frame | Frame, shims, level | Frame is plumb and square | Not shimming hinge points | Keeps door balanced in the frame |
| Step #5: Hang the Steel Craft Door | Lift and secure the door on hinges | Hinges, screws, extra hands | Hinges aligned top to bottom | Hanging without help | Supports weight and balance |
| Step #6: Check Door Alignment | Test swing and gaps | Level, screwdriver, shims | Smooth swing and even gaps | Over-tightening hinges | Door operates without sticking |
| Step #7: Secure the Frame Permanently | Screw frame into studs and fill gaps | Screws, insulation foam | Frame steady after fastening | Overfilling with foam | Creates long-term strength |
| Step #8: Seal the Door | Apply caulk and weatherstripping | Caulking gun, caulk, weatherstripping | Tight, even seals | Gaps in caulk line | Protects against air and water leaks |
| Step #9: Install Hardware and Accessories | Add lockset, handle, and strike plate | Lockset, handle, strike plate | Lock engages and handle moves smoothly | Misaligned strike plate | Finishes door with function and security |
| Step #10: Final Inspection | Test and clean up | Level, cleaning tools | Smooth movement and clean finish | Skipping inspection | Confirms professional quality |
Now that you’ve seen the full picture, let’s walk through each step carefully so you can put this plan into action.
Step#1 Measure the Door Opening
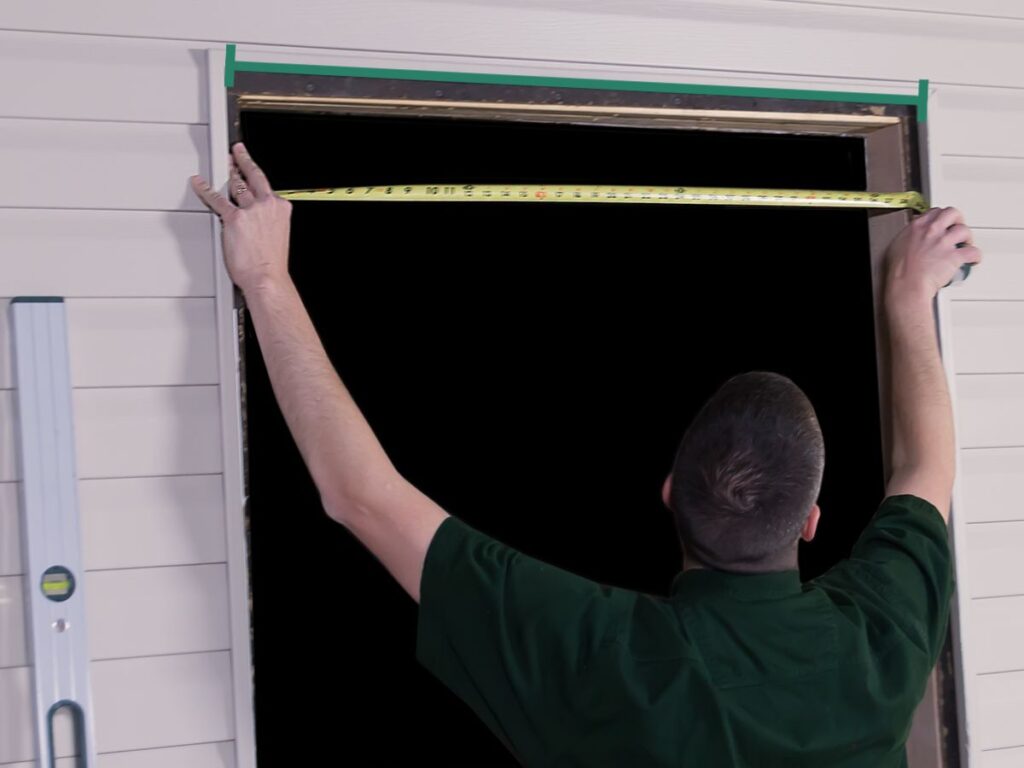
Before placing your steel craft door, the first thing you need to do is measure the rough opening. The rough opening is the framed space in the wall where the door will sit. Accurate measurements here save you from problems later.
Key Measurements You’ll Need
- Width: Measure across the top, middle, and bottom of the opening. Openings are rarely even, and checking in three spots helps you catch small differences.
- Height: Measure from the floor to the top of the opening on both the left and right sides. Floors can slope or dip, so both sides matter.
- Depth: Measure the thickness of the wall from one surface to the other. If the frame doesn’t match the depth, it will stick out or fall short.
Confirming the Fit
- Diagonal Check: Place your tape measure from the top left corner to the bottom right, then switch to the opposite corners. If the numbers don’t match, the opening isn’t square. You’ll need to make adjustments later during installation.
- Space for Shims: Shims are thin pieces of wood used to level or fill gaps. Leave a little space in the opening so you can slide shims in when setting the frame.
I’ve learned the hard way that skipping one of these steps means trouble later. Once, I ignored the diagonal check, and the door dragged across the floor. Fixing it took more time than measuring would have.
Measuring may feel like the slow part of the job, but it’s the foundation. The better your numbers are here, the smoother the rest of the installation will go.
Step#2 Gather Tools and Materials
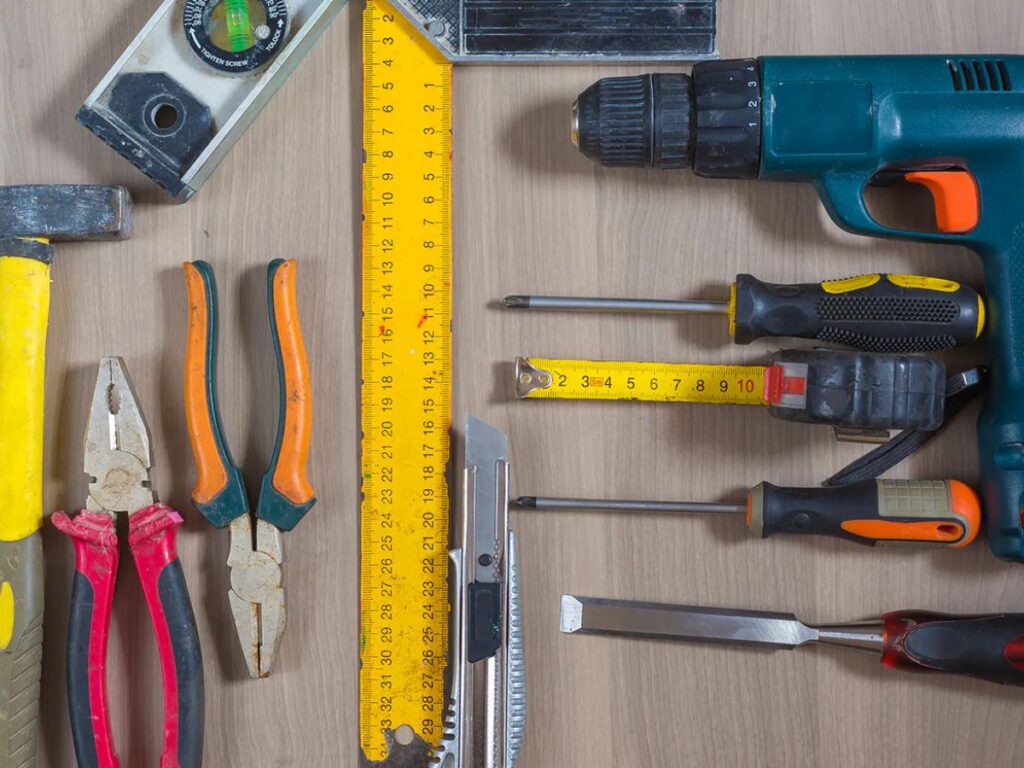
Before starting the installation, it’s smart to gather everything in one place. Having the right tools and materials ready will keep the process smooth and prevent wasted time. I’ve been stuck mid-project without a single screwdriver, and it slowed down the entire job.
Tools Needed
- Drill: A drill makes fastening screws quicker and more secure. It also saves your hands from fatigue if you’re working on a larger project.
- Screwdriver: A screwdriver is useful for making fine adjustments when a drill feels too forceful. It gives you more control over small fittings.
- Hammer: A hammer helps with light tapping when setting shims in place. It’s also handy for quick adjustments around the frame.
- Level: A level checks whether the door sits straight vertically and horizontally. A door that leans even slightly will not close properly.
- Measuring Tape: You’ll still need a measuring tape after Step #1 for spot checks. Openings sometimes shift during prep, so measuring again is helpful.
- Shims: Shims are thin strips of wood used to fill gaps and correct uneven spaces. They keep the door frame steady while you fasten it.
- Caulking Gun: A caulking gun allows you to apply caulk evenly around the frame. This helps create a seal against air and moisture.
Materials To Have Ready
- Steel Craft Door: This is the main piece, chosen for strength and durability. It sets the tone for the entire installation.
- Door Frame: The frame supports the door and creates the finished look. Without a properly fitted frame, even the best door will fail.
- Screws: Screws secure both the frame and the hardware. Using quality screws prevents loosening over time.
- Caulk: Caulk seals small gaps around the door to block air and water leaks. It also gives the installation a finished appearance.
- Insulation Foam: Foam expands to fill larger spaces between the frame and wall. This helps improve both stability and energy efficiency.
- Weatherstripping: Weatherstripping is a flexible strip that blocks drafts once the door is installed. It also reduces outside noise.
Take a moment to lay everything out where you can see it. When you double-check your list, you won’t need to stop halfway through to grab a missing tool, and the installation will go far smoother.
Step#3 Prepare the Rough Opening
Once your tools and materials are ready, it’s time to focus on the rough opening. This step often gets rushed, but it makes all the difference in how smoothly the door sets. A clean, level base means fewer problems later.
Clear the Area
Start by removing any old frame materials that might still be in place. Scrape away loose debris, dust, or dried caulk so you’re working with a clean surface. Even small chunks left behind can stop the frame from sitting tight. I’ve seen projects delayed just because someone forgot to clear out a handful of plaster.
Check the Sill
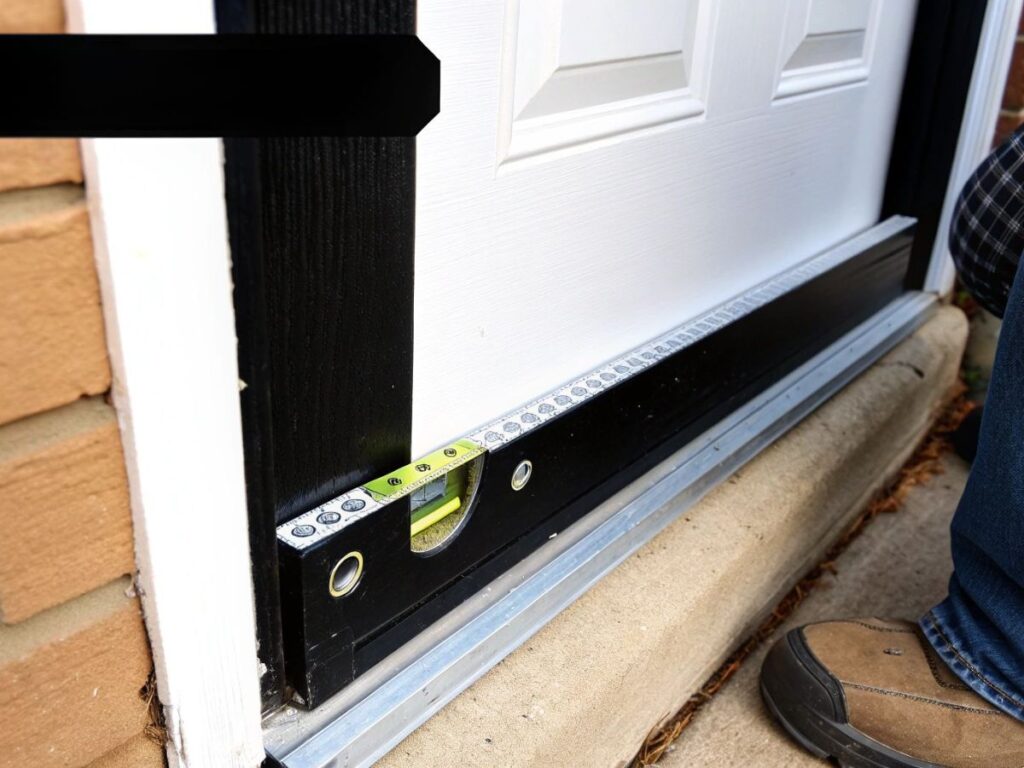
The sill is the flat surface at the bottom of the opening where the door frame rests. Place your level on it and check carefully from front to back and side to side. If the bubble is centered, you’re in good shape. If not, the door will lean or drag, and you’ll notice it the first time you try to close it.
Make Adjustments If Needed
When the sill isn’t level, you have two common options. Use shims, which are thin strips of wood, to fill gaps and create a stable base. Or apply a thin layer of mortar, which is a cement-based mix that hardens to hold the frame steady. Both methods work, and I’ve used each depending on the project. Shims are quick, but mortar feels more permanent.
Step#4 Position the Door Frame
With the opening cleaned and leveled, you’re ready to set the door frame in place. This step is where the installation starts to take shape. Getting the frame aligned now prevents major issues later.
Place the Frame Inside the Opening
Lift the frame and carefully position it into the rough opening. It should slide in without forcing. If it feels too tight, check again for leftover debris or narrow spots in the framing. I’ve had frames jam halfway in before, and it usually came down to something simple like a stray nail left behind.
Use a Level to Check Alignment
Once the frame is in place, grab your level. You’re checking if it’s plumb, which means perfectly vertical, and square, which means all corners line up at right angles. Take your time here. A frame that leans even slightly will cause the door to swing open on its own or scrape against the jamb.
Insert Shims for Support
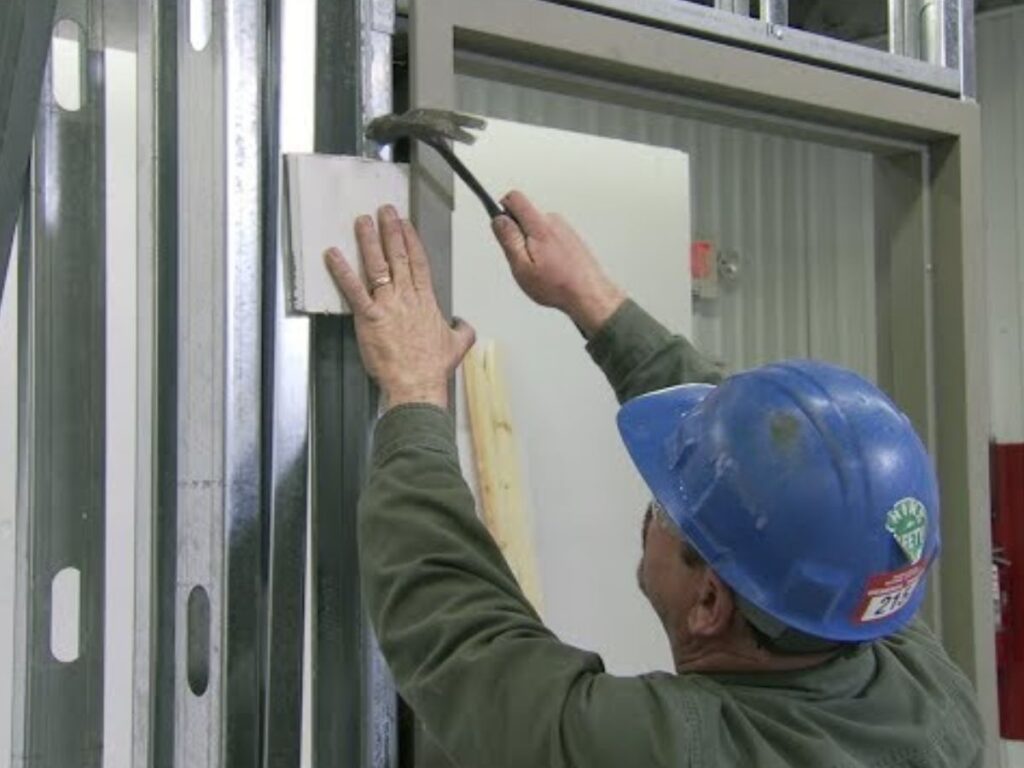
After checking alignment, slide shims into the spaces behind the hinges and lock points. Shims are thin pieces of wood that give extra support where the weight of the door matters most. I like to test-fit the door at this stage to feel how it hangs against the shims. If it feels firm, I know I’m on the right track.
Step#5 Hang the Steel Craft Door
At this stage, you finally get to set the steel craft door into the frame. This step feels rewarding, but it also requires care because of the weight and balance involved. The way you hang the door will decide how well it operates in daily use.
Lifting the Door
- Teamwork Matters: Always lift the door with at least one other person. Steel craft doors are heavy, and trying to manage one alone risks injury or damage.
- Move Slowly: Guide the door into the frame carefully. Rushing here can cause scratches, dents, or misalignment before the hinges are even attached.
Attaching the Hinges
- Line Up Carefully: Match the hinges on the door with the hinge points on the frame. This step needs patience because a small misalignment creates big issues later.
- Secure With Screws: Use a drill or screwdriver to fasten the hinges. Take your time tightening each hinge so the door sits evenly in the frame.
Balancing the Weight
- Top Hinge First: Always start by attaching the top hinge. It carries the most weight and holds the door steady while you continue.
- Middle and Bottom Next: Once the top is secure, move to the middle hinge, then the bottom hinge. This sequence distributes weight evenly and prevents the door from sagging.
Quick Function Test
- Swing the Door: Open and close the door several times. It should move smoothly without scraping against the frame or dragging on the floor.
- Adjust if Needed: If the door doesn’t feel right, make adjustments now. Fixing issues later is harder once the hardware is in place.
Closing a door should feel simple, not like a fight, and this step is what makes that possible.
Step#6 Check Door Alignment
With the door hanging on its hinges, the next step is making sure it operates smoothly. Alignment is where you find out if your earlier work paid off. A door that sticks or swings unevenly will frustrate users, and it is easier to correct now than later.
Test the Movement
- Open and Close the Door: Swing the door several times and pay attention to how it feels. If it drags on the floor or catches against the frame, something is off.
- Watch for Resistance: Binding usually shows up as extra pressure on the handle or a rough swing. Smooth movement means you are close to a proper fit.
Look for Visible Gaps
- Check the Edges: Stand back and look along the edges of the door. Gaps should be even from top to bottom.
- Inspect the Swing Path: Uneven gaps or scraping often mean the frame shifted slightly. Small adjustments now prevent bigger issues later.
Make Adjustments
- Reposition Shims: If the door feels uneven, adjust the shims around the hinges or lock points. Moving them even slightly can shift the door back into place.
- Tighten or Loosen Hinges: Sometimes, alignment improves by adjusting the screws in the hinge plates. I’ve had installs where one-quarter turn of a screw made all the difference.
Taking the time to test and adjust now will save constant complaints later. A door that opens smoothly and closes tightly leaves a strong impression, whether in a villa, hotel, or guesthouse.
In my experience with Vallisco steel doors, when alignment is fine-tuned correctly, the swing feels balanced and professional, which reflects well on both the installer and the building itself.
Step#7 Secure the Frame Permanently
Once the door is aligned and swinging properly, it’s time to lock the frame in place. This step makes the installation solid, so the door holds up in daily use. A secure frame also prevents movement that could cause problems later.
Fasten the Frame to the Studs
- Drive Screws Into Studs: Place long screws through the frame and into the wall studs behind it. Wall studs are the vertical wooden beams that give structure and strength to the wall.
- Tighten Evenly: Work from top to bottom, tightening each screw gradually. This helps keep the frame in position without shifting one side out of line.
Recheck the Alignment
- Use the Level Again: After fastening, place your level against the sides and top of the frame. Even small shifts can happen when screws are tightened.
- Test the Door Swing: Open and close the door to confirm it still operates smoothly. I’ve had moments where everything looked fine until I swung the door and felt it drag. Catching it here saves rework later.
Fill the Gaps
- Apply Insulation Foam: Spray foam into any gaps between the frame and the wall. It expands as it dries, sealing spaces and adding stability.
- Work in Sections: Apply foam in small amounts, letting it expand before adding more. Too much at once can push the frame slightly out of place.
This stage gives the installation its lasting strength. When I’ve used Vallisco steel craft frames, filling and fastening them properly made the doors feel like part of the wall itself, not just an addition. A secure frame is what turns careful setup into a door that feels reliable every time it’s opened or closed.
Step#8 Seal the Door
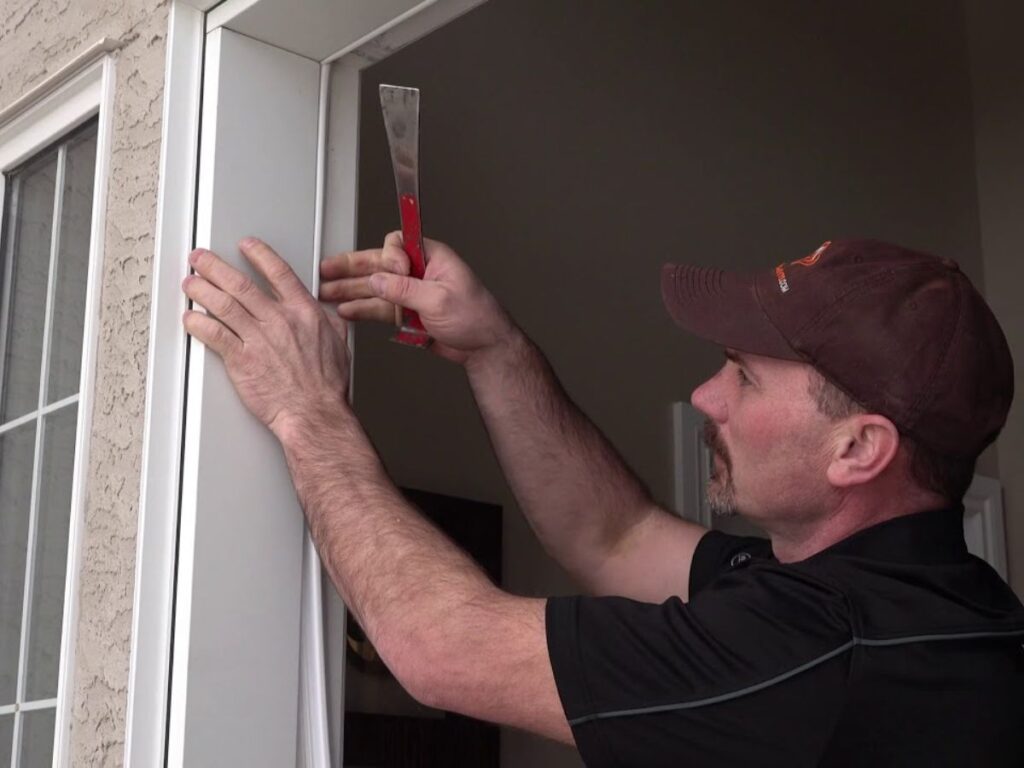
Once the frame is secured, the next job is sealing. This step protects the opening from air leaks, water, and noise. It also gives the doorway that finished look people notice right away.
Apply Caulk Around the Frame
- Work Along Exterior Edges: Run a steady bead of caulk around the outside edges of the frame. You don’t need to rush, because gaps are easier to catch now than later.
- Smooth the Line: Press the bead into the joint with a caulk tool or your finger. A smooth line not only seals better but also feels more professional when you step back and look at it.
Install or Adjust Weatherstripping
- Place Strips Firmly: Add weatherstripping to the frame so it presses evenly when the door shuts. This is the barrier that keeps out drafts and stops rain from sneaking in.
- Test the Seal: Close the door slowly and watch how the strips touch the surface. If you see light peeking through, or if the door feels loose, you’ll know adjustments are needed.
Check the Final Seal
- Press and Inspect: The seal should press firmly but not fight the latch when you close the door. Too tight and the lock will feel stubborn, too loose and gaps will stay open.
- Run a Quick Test: Slide a piece of paper between the frame and the door. If it slips out without resistance, the seal isn’t doing its job. This trick takes seconds and tells you a lot.
Good sealing is what keeps a strong door from becoming a weak point in the building. When the seals are right, the door feels solid, works quietly, and protects the space the way it should. It’s one of those details you don’t notice when it’s done well, but you definitely notice when it’s missed.
Step#9 Install Hardware and Accessories
A steel craft door may be hanging straight, but it won’t feel complete until the hardware is in place. Adding the lockset, handle, and strike plate turns the frame and slab into a working entrance. This part often feels like the finishing touch, and I find it satisfying when everything clicks together smoothly.
Attach the Lockset and Handle
- Install the Lockset: Fit the lockset into the pre-cut hole in the door. The lockset is the mechanism that lets the door lock and unlock with a key or handle.
- Add the Handle: Secure the handle so it lines up comfortably with the lock. A loose handle feels cheap, and I’ve learned that even small details like this can shape someone’s first impression of the door.
Position and Adjust the Strike Plate
- Mount the Strike Plate: Place the strike plate on the frame where the latch meets. This small piece of metal reinforces the frame and keeps the latch from digging into the wood.
- Adjust if Needed: Test the lock several times against the plate. I’ve had jobs where the lock missed by just a fraction, and it was frustrating until I nudged the plate a little higher or lower.
Test for Smooth Operation
- Check the Handle: Turn the handle several times to make sure it doesn’t stick. If it does, the screws may be too tight or slightly misaligned.
- Lock and Unlock: Try the key a few times before calling it done. You’ll know it’s right when the latch clicks firmly without resistance.
Hardware is what makes a door functional, not just a piece of steel in a frame. A secure lock and smooth handle add confidence, and they bring the whole installation together.
Step#10 Final Inspection
The last step is making sure everything works as it should. This isn’t just a quick glance. It’s your chance to confirm the installation feels complete and professional. I’ve found that spending a few extra minutes here often prevents call-backs later.
Test the Door’s Movement
- Open and Close the Door: Swing the door several times, both slowly and quickly. It should move without dragging on the floor or rubbing against the frame.
- Check for Resistance: If you feel pressure in certain spots, something may still be off with the shims or hinges. Fixing it now is easier than waiting for a complaint.
Verify Security and Sealing
- Engage the Lock: Turn the key and make sure the lock clicks into the strike plate smoothly. A proper fit gives confidence that the door is secure.
- Look at the Weatherstripping: Close the door and inspect the seal all the way around. I like to run my hand along the edges to check for drafts because you can often feel air leaks before you see them.
Clean Up the Details
- Trim Excess Caulk or Foam: Cut away any dried caulk or foam that expanded outside the frame. A neat line gives the door a finished appearance.
- Wipe Down Surfaces: Clean the door and frame so dust, fingerprints, or smudges don’t distract from your work. A clean presentation leaves a strong impression.
The final inspection is the moment you step back and see the door as the user will. When it swings freely, locks smoothly, and looks neat, you know the installation is complete. It’s a small investment of time that makes the whole project feel right.
Conclusion
When I first struggled with a steel craft door, it felt like hours wasted. But step by step, the process became clear. This guide gave you the “what,” the “how,” and the “why” of proper installation.
From measuring the opening to sealing and finishing, every part matters.
Now it’s your turn. Don’t wait until a project goes wrong start now with confidence.
If you’re ready for doors that last, contact Vallisco today and let’s make your installation a success.
Recommended Reads for You
If you need more options, take a look at our full range of products. You might find just what you need:
Still haven’t found what you’re looking for? Don’t hesitate to contact us. We’re available around the clock to assist you.


