Vinyl windows are everywhere, but most people don’t know how they’re made. You see them in houses, hotels, and even greenhouses, yet the process behind them often stays hidden.
That’s where this guide comes in. I’ll take you behind the factory doors and break it down step by step, in a way that makes sense.
Over the years, I’ve reviewed countless window projects and learned which details truly affect performance and durability. That’s the perspective I’ll share with you here.
In this article, you’ll finally get the clear picture you’ve been looking for. No filler just the process explained plainly.
You’ll see how vinyl windows are built from start to finish, and by the end, every stage will make sense without guesswork.
So let’s get down to it!
Quick Comparison Chart
Before we go deeper into each step, here’s a quick glance at the entire vinyl window-making process. Think of this as your roadmap before the detailed breakdown that follows.
| Step / Action | Detailed Instruction | Tools / Machines Used |
| Step #1: PVC Resin Mixing | Blend PVC powder with stabilizers, pigments, and UV inhibitors until consistent | High-speed mixers, heating units |
| Step #2: Profile Extrusion | Heat and push PVC through dies to form shapes | Extrusion lines, cooling tanks |
| Step #3: Cooling & Cutting | Cool profiles with air/water, cut to length | Cooling tanks, cutting saws |
| Step #4: Reinforcement Insertion | Insert steel/aluminum into hollow chambers | Cutting tables, reinforcement guides |
| Step #5: Precision Cutting & Drilling | Create drainage holes, ventilation slots, hardware openings | CNC machines, drills |
| Step #6: Frame & Sash Welding | Heat corners, fuse profiles, trim excess | Welding machines, corner cleaners |
| Step #7: IGU Assembly | Seal two or three panes with spacers, gas-fill chambers | Spacer bars, gas fillers, sealing lines |
| Step #8: Glazing | Place IGU into frame, seal with gaskets and beads | Glazing tables, press tools |
| Step #9: Hardware Installation | Attach handles, locks, hinges, or sliders | Power drivers, fastening tools |
| Step #10: Quality Control & Packaging | Inspect welds, seals, and hardware, then pack with foam/wrap | Inspection tools, protective wrap |
Now that you’ve seen the big picture, let’s move step by step through each stage in more detail.
Step#1 PVC Resin Mixing
Every vinyl window starts in the mixing room. Large machines blend raw materials into a uniform powder before it’s heated and shaped. I’ve seen this in factories, and the attention to detail here surprised me. A small mistake in mixing can affect the strength of the final frame.
Raw Materials Used
- PVC Resin: This is poured into the mixer as the base powder. It forms the foundation of every vinyl frame.
- Stabilizers: These are added during blending to protect the resin from heat. They also prevent the frame from breaking down over time.
- Pigments: Color is introduced at this stage to cover every grain evenly. That way, the frame looks consistent from batch to batch.
- UV Inhibitors: These additives are blended in with the powder. They give the final frame resistance against sunlight and reduce fading.
How Mixing Works
- High-Speed Blending: All the materials are spun together in powerful mixers. This creates a smooth, uniform powder that is ready for processing.
- Heat Conditioning: The blend is gently heated inside the mixer. This step activates stabilizers and allows pigments and UV inhibitors to coat every particle.
- Cooling Stage: The hot mixture is quickly cooled before moving forward. Cooling prevents clumping and prepares the material for extrusion.
When this step is done right, the windows that follow are stronger, longer lasting, and more resistant to weather damage.

Step#2 Vinyl Profile Extrusion
Once the PVC resin mix is cooled and ready, it moves into the extrusion stage. This is where the powder becomes something solid that actually looks like a window part. If you’ve ever seen pasta being pressed through a mold, extrusion works in a similar way, only with heated plastic and exact engineering.
Watching it happen in a factory, I was struck by how consistent the machines had to be, because even the smallest flaw could ruin an entire run.
Extrusion Process
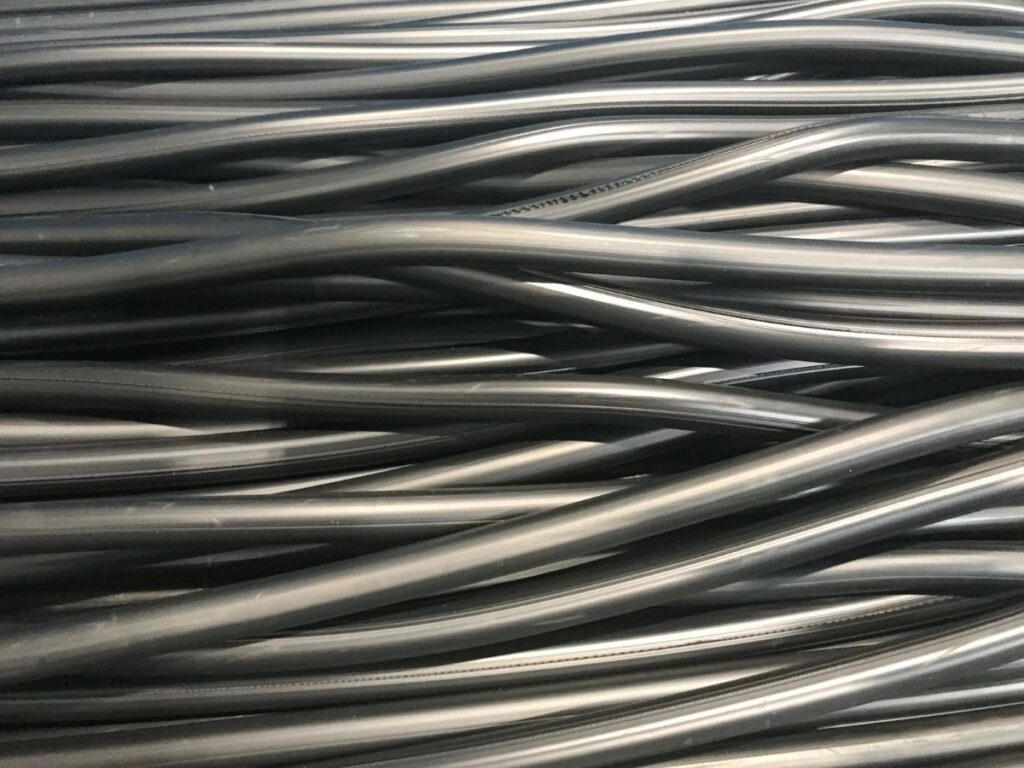
The softened PVC is fed into extrusion machines. Inside, it is pushed through dies, which are precision molds shaped like the cross-section of a window frame. These long profiles are then cooled quickly to hold their form. Without this step, you wouldn’t get the clean edges and straight lines needed for frames and sashes.
Key parts of the process include:
- Heating: The PVC mix is heated until it becomes flexible. This allows it to flow smoothly through the die.
- Shaping: Dies create consistent frame and sash profiles. Each design depends on the type of window being made.
- Cooling: As the profile exits the die, water or air cooling systems stabilize the shape. This prevents warping or collapse.
Chamber Design
Look closely at a vinyl profile and you’ll see hollow spaces running through it. These chambers are not empty by accident; they serve very specific purposes:
- Energy Efficiency: Air trapped in chambers reduces heat transfer. That means better insulation for villas, hotels, or homes.
- Sound Control: Multiple chambers also soften outside noise. This is especially valuable for buildings near traffic or busy streets.
When I first learned this, it made sense why frames with only one chamber often underperform. The design hidden inside the profile plays just as big a role as the material itself.
Vinyl extrusion may sound like a technical factory step, but it’s the point where raw powder is finally shaped into something useful. Without it, you’d never have the strong, insulated frame that holds the glass in place.
Step#3 Profile Cooling and Cutting
After extrusion, the vinyl profiles are hot, soft, and not ready to use. You can almost picture them bending if they are handled too early. This stage is where cooling and cutting take over, giving the profiles their strength and preparing them for assembly.
Cooling Tanks
The profiles are stabilized as they move through cooling systems. This step is more critical than it might look, because the entire shape depends on it staying straight.
- Air Cooling: Steady airflow cools the surface slowly. I like how this method keeps stress low and reduces the risk of cracks.
- Water Cooling: A spray or tank of water hardens the profile quickly. It’s efficient, and it prevents sagging that can ruin the form.
If this step is rushed, the profiles lose accuracy. You want them straight now, so they stay straight years later.
Precision Cutting
Once cooled, profiles are cut into exact lengths. This is where precision matters most, because these pieces have to fit like puzzle parts later.
- Standard Lengths: Profiles are trimmed into manageable sections for storage and handling. It makes the entire process more organized.
- Tolerance Control: Cutting machines work within tiny limits of error. I’ve always thought this detail is what separates clean assembly from constant adjustments.
- Smooth Assembly: A clean cut means fewer gaps, easier welding, and a frame that looks and performs better.
Cooling and cutting might not grab attention, but I’d argue it’s one of the quiet steps that make or break quality. Without accuracy here, every step after would struggle to deliver a reliable window.
Step#4 Reinforcement Insertion
Vinyl frames alone cannot always handle the demands of larger windows. The material is strong, but it can flex under pressure, especially in wide spans or tall openings. That is why reinforcement is added at this stage. By inserting extra support, the profiles gain stability and stay reliable over time.
Steel or Aluminum Reinforcements
Reinforcement usually comes in the form of steel or aluminum. These metals are inserted into hollow chambers within the vinyl profile.
- Steel Reinforcements: Provide strong resistance against bending. They are especially useful in heavy-duty projects where strength is the top priority.
- Aluminum Reinforcements: Lighter in weight but still effective. These are often chosen when handling or transportation is a concern.
Both materials support wide window spans. Without them, larger frames could twist or sag under their own weight.
Importance of Reinforcement
Reinforcement is not just an option: it is a critical part of the process. You will notice the difference most in buildings that demand durability and safety.
- Prevents Sagging: Frames stay straight even when installed in wide openings. That means fewer long-term problems with sticking or misalignment.
- Withstands Wind Loads: In areas exposed to storms or heavy winds, reinforcement keeps windows stable. This is vital for multi-story hotels or coastal villas.
- Essential in Large Projects: Villas, hotels, and greenhouses often have oversized windows. Reinforcements give these installations the strength they need.
Whenever I’ve seen reinforced frames side by side with non-reinforced ones, the difference is clear. The reinforced profiles feel solid in your hands, while the others flex too easily. For projects where quality matters, reinforcement is the step that separates ordinary windows from reliable ones.
Step#5 Precision Cutting and Drilling
Once the frames are reinforced, the next step focuses on detailed shaping. Cutting and drilling turn plain profiles into components ready for assembly. This is where small adjustments make a big difference in how well the final window performs.
Customization
At this stage, the profiles are prepared for features that improve function and comfort. Different openings and slots are created, depending on the design of the window.
- Drainage Holes: Small openings allow water to escape instead of pooling inside the frame. Without them, you would see leaks or trapped moisture.
- Ventilation Slots: These provide airflow inside the chambers. By doing so, they reduce condensation and improve long-term performance.
- Hardware Openings: Spaces for locks, handles, and hinges are drilled with accuracy. This step is key for smooth operation once the hardware is attached.
Customization makes each profile fit its specific role. Without it, the window would be just a hollow frame with no function.
Consistency
Cutting and drilling are carried out using CNC machines. CNC, short for Computer Numerical Control, means the process is automated and controlled by software. This allows every hole, slot, and cut to match exactly from one profile to the next.
- Exact Results: Automated tools repeat the same cut hundreds of times with no variation. That accuracy is hard to achieve by hand.
- Better Sealing: Consistency in cutting reduces small gaps. This helps prevent water leaks and improves energy efficiency.
- Stronger Frames: Clean cuts make welding and assembly smoother. A well-prepared frame always lasts longer.
Manufacturers like Vallisco, who produce vinyl windows, apply this step carefully to keep every profile consistent. When I compare windows, the difference is clear. Frames with sloppy cuts never align properly, while precise ones fit together perfectly. Precision cutting and drilling may look like a small step, but it shapes how the entire window performs in real use.
Step#6 Frame and Sash Welding
In this step, the separate vinyl profiles finally come together to form the frame and sash. Welding transforms them from loose pieces into a solid structure. The quality of these joints decides how long the window will last, and whether it keeps out air and water over the years.
Corner Welding
Here, high heat is used to soften the ends of the profiles. When pressed together, the vinyl fuses into a single joint with no gap in between.
- Strong Seal: The welded corners create joints that are airtight and watertight. This is what protects you from drafts and leaks around the edges.
- Durability: Mechanical joints can loosen with time, but welded corners stay bonded. That bond is why welded vinyl frames often outlast other types of construction.
I always notice how seamless these joints look after cooling. They don’t just add strength: they give confidence that the window will perform in real conditions.
Surface Finishing
Once the welding is complete, excess material is left sticking out of the corners. This step focuses on cleaning and smoothing those edges.
- Trimming: Extra vinyl is carefully cut away, leaving a flush surface. This keeps the frame safe to handle and ready for glass installation.
- Appearance: Clean lines make the window look polished. Even if strength is the priority, no one wants a rough finish on a brand-new frame.
A vinyl window, like the ones produced by Vallisco, should work well and also look right. Welding and finishing give it both qualities: strength to last and a professional appearance that fits any project.
Welding gives vinyl windows their shape and integrity. Without this step, the profiles would remain separate pieces with no strength to hold glass or hardware.
Step#7 Insulated Glass Unit (IGU) Assembly
With the frame prepared, the next step is assembling the insulated glass unit. This process turns plain glass panes into a sealed system that improves comfort, performance, and durability.
Double and Triple Glass Panels
The process begins with preparing two or three panes of glass. Each pane is cleaned, aligned, and checked for defects before moving forward. Spacer bars are then placed between the panes to hold them apart at a precise distance.
- Double Glass: Two panes are sealed together to form a basic IGU. This provides insulation far better than single glass.
- Triple Glass: A third pane is added for projects needing extra insulation or sound control. This is common in colder regions or luxury buildings.
- Gas Filling: The space between panes is filled with argon or krypton gas. These gases slow down heat transfer, giving the window better insulation.
Once sealed, the unit becomes airtight and ready to be fitted into the vinyl frame.
Energy Performance
The IGU is tested and inspected before installation. These checks confirm that the seals hold and the unit performs as expected.
- Condensation Prevention: Multiple layers and gas filling reduce the risk of moisture forming on the glass. This keeps the window clear even in humid conditions.
- Energy Efficiency: The sealed unit traps heat in winter and blocks heat in summer. That reduces the strain on heating and cooling systems.
- Noise Control: The sealed airspace also acts as a sound barrier. Villas, hotels, and houses near busy streets benefit from the quieter environment.
By the end of this step, the glass has transformed from simple panes into a highly functional insulated unit, ready to be secured into the window frame.
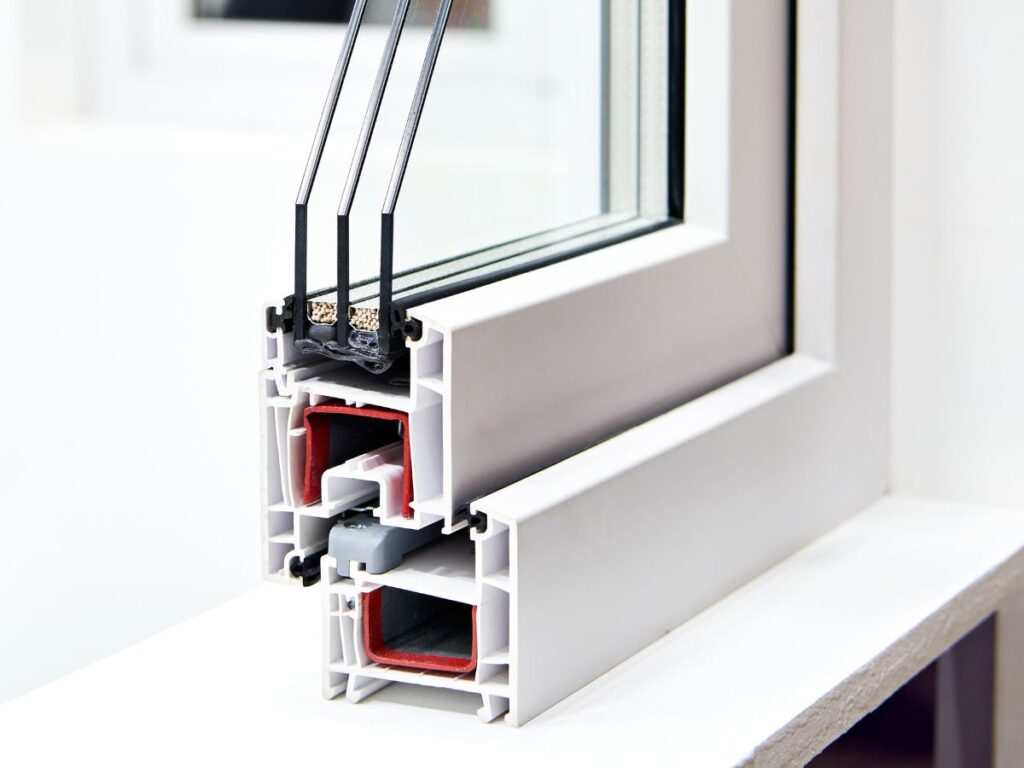
Step#8 Glazing the Frame or Sash
Glazing is the step where the insulated glass unit is joined with the welded vinyl frame or sash. This part of the process feels like the window is finally coming together. The frame alone has no function without glass, and the glass cannot perform without proper support from the frame.
Glass Placement
The insulated glass unit is lowered into the frame with care. Alignment matters here, because even the slightest shift affects how the window performs later.
- Positioning: The glass is placed so the weight is shared across the support points. This keeps the unit steady and balanced.
- Support Blocks: Small blocks are added under the glass. They keep it level and protect the edges from pressure.
When I look at this step, I always think of it as the “marriage” of glass and frame. From this moment, they function as one.
Sealing Methods
Once the glass is in place, the next task is to secure it. This is done with materials designed to hold the glass firmly and seal gaps.
- Rubber Gaskets: Flexible strips pressed into the gap between frame and glass. They grip tightly and adjust to small movements.
- Glazing Beads: Trim pieces snapped along the edges to lock everything in. They give extra stability and complete the hold.
- Final Press: The beads and gaskets are pressed until they sit flush. This step makes the window look finished and ready for use.
I always notice how much detail goes into this part. Glazing may look simple, but it is the step that turns separate parts into a complete vinyl window.
Step#9 Hardware Installation
After the glass is secured, the focus shifts to hardware. This is the step that turns a window from a static frame into something you can actually use. I’ve always thought of this part as the finishing touch that gives life to the product.
Types of Hardware
The main components are added one by one, and each plays a role in how the window works day to day.
- Handles and Locks: These are fitted into the pre-drilled holes from earlier. You notice right away if they are off, because the handle feels loose or the lock doesn’t sit flush.
- Hinges: Hinges are mounted where the sash connects to the frame. When placed correctly, the sash moves smoothly without grinding.
- Sliders or Balancers: On sliding or tilt styles, these are added to help carry weight. Without them, moving the sash would feel heavy and awkward.
Watching this process, I often catch myself checking how solid the hardware feels in my hand. A good window should never feel flimsy at this stage.
Installation Process
Once the pieces are selected, they are attached carefully to the frame. Alignment and fit matter, because even a slight shift can cause problems later.
- Positioning: Each piece is aligned with the earlier drilling. If the holes were accurate, this part flows smoothly.
- Attachment: Screws or fasteners are tightened with care. Too much pressure risks cracking the vinyl, too little leaves the part unstable.
- Testing: The sash is opened, closed, and locked several times. This is where you can feel if everything sits correctly.
I’ve always seen hardware installation as the step where a vinyl window finally comes alive. From here on, it’s no longer just glass in a frame: it’s a working unit.
Step#10 Quality Control and Packaging
The final step is quality control and packaging. At this point, the vinyl window may look finished, but it still has to pass detailed checks before leaving the factory. I’ve always seen this step as the safeguard that confirms everything built earlier will hold up in real use.
Inspection
Each unit is inspected carefully to confirm strength and function. This is where flaws are caught before they become problems for the customer.
- Frame Welds Checked: Corners are examined for appearance and durability. Any weakness here would affect the entire frame.
- Hardware Tested: Handles, locks, and hinges are opened and closed multiple times. This confirms smooth operation.
- Glass Sealing Inspected: The insulated glass unit is checked for gaps or leaks. A broken seal would shorten the lifespan of the window.
These inspections add confidence that the finished product is dependable.
Packaging
After inspection, the windows are prepared for transport. Packaging protects them from damage while in storage or shipment.
- Foam and Wrap Applied: Protective layers cover the frame and glass. This prevents scratches or cracks.
- Safe Delivery: Straps, crates, or boxes are used depending on the shipment. This keeps everything stable until it arrives on site.
Their vinyl windows are not considered complete until they pass inspection and are packaged with care. To me, it’s a reminder that quality is not just about how a window is made, but also how it reaches the customer.
Conclusion
You now know how vinyl windows are made. From the first mix of resin to the last inspection, it’s a process built on detail. That’s where quality begins: step by step, nothing skipped.
This isn’t just about manufacturing it’s about giving you confidence. When you understand the process, you make better choices.
The best time to act is always sooner, not later.
What project is waiting on your list right now? And what type of window will make the biggest difference for you?
Take the first step today. Contact Vallisco now.
More Guides and Tips to Explore
For more helpful content, explore our collection of recommended reads:
Still haven’t found what you’re looking for? Don’t hesitate to contact us. We’re available around the clock to assist you.


