One time, someone called us in a panic.
Their garage door had slammed down out of nowhere. No warning. No loud snap. Just a sudden drop that could’ve hurt someone.
Turns out, the spring wasn’t broken but it was way out of balance. And that’s all it takes for things to go wrong.
We’ve been in this business for a long time. And we’ve seen what happens when garage door springs don’t get the care they need. A little issue can turn into a big, dangerous problem fast.
Maybe you’re trying to fix it yourself right now. You want to keep things safe. You also don’t want to make the door worse. That makes sense.
That’s exactly why we put this together.
We’ll help you figure out what kind of spring you have. Show you the tools that work best. And walk you through the steps to adjust it without getting hurt or messing up your door.
By the end, you’ll feel ready. Safe. And sure about what you’re doing.
Let’s get started!
Quick Comparison Chart
Before we dive deep, here’s a snapshot of each step to give you a sense of what’s ahead. This will help you feel more confident about where you’re going and why.
| Step | What You Do | Why It Matters |
| 1. Identify the Type of Spring | Look closely at your garage door to determine if it uses torsion or extension springs. | Knowing your spring type changes how you approach every adjustment. |
| 2. Gather the Right Tools | Lay out the correct tools before starting, especially winding bars and clamps. | The right tools protect you from injury and speed up the job. |
| 3. Disconnect the Opener | Unplug the motor and pull the emergency release to switch to manual mode. | Prevents the door from moving unexpectedly while you work. |
| 4. Secure the Door | Raise the door halfway and clamp the tracks to hold it in place. | Keeps the door from slipping mid-repair a huge safety step. |
| 5. Mark Spring Settings | Use a bright marker to show the spring’s current position. | These marks act as your visual guide during adjustments. |
| 6. Loosen the Set Screws | Insert a winding bar and loosen the set screws on the cone. | This releases the tension so you can make changes safely. |
| 7. Adjust the Spring | Use winding bars to turn the spring in ¼-turn increments. | Small changes make a big difference this is the heart of the process. |
| 8. Tighten Screws & Remove Tools | Re-tighten the set screws and slowly remove the winding bars. | Locks the spring in place and clears away risk. |
| 9. Reconnect and Test the Door | Reattach the opener and observe the door’s motion. | Shows you if your adjustment worked or if it needs a tweak. |
| 10. Final Safety Check | Inspect hardware, test again, and clean the area. | Catches last-minute issues and confirms everything’s safe and solid. |
Now that you’ve seen the overview, let’s walk through each step one by one you’ll be ready in no time.
Step#1 Identify the Type of Spring
Before you grab a tool or climb a ladder, stop and take a close look at your garage door. The type of spring system you have changes everything about the adjustment process.
Garage door springs counterbalance the weight of the door. Without them, your opener couldn’t lift or lower it at all.
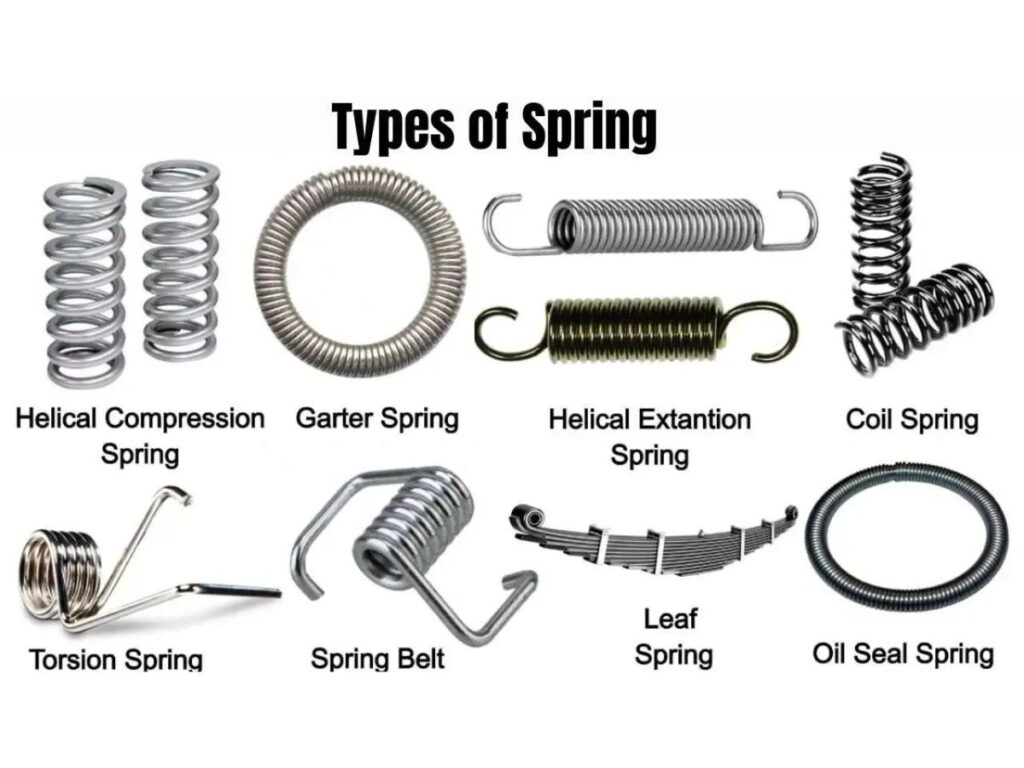
Torsion Springs
- Location: Mounted horizontally above the garage door, centered on a metal shaft.
- Details: These springs don’t stretch. They twist to store energy, which makes them feel solid and tight even when the door moves.
Extension Springs
- Location: Found on both sides of the door, running parallel to the upper tracks.
- Details: These springs stretch out as the door closes and contract when it opens. You’ll often see safety cables running through them.
Quick Tip
If your spring is centered and runs left to right above the door, it’s likely a torsion spring. If you spot two long springs on either side that stretch when the door is down, you’re looking at extension springs.
Still unsure? Take a photo and send it to someone who works with doors. It’s worth double-checking now instead of doing the wrong repair later.
Getting this right saves time, prevents damage, and makes the next steps easier to follow.

Step#2 Gather the Right Tools
Once you know which spring you’re working with, take a few minutes to gather the tools you’ll need. Having everything ready before you start keeps things safe and prevents last-minute scrambling.
Most mistakes happen when people use the wrong tool or grab what’s “close enough.” A winding bar does what a screwdriver can’t safely control tension. Use the right gear, and you’ll avoid injury and frustration.
What You’ll Need
Here’s a list of common tools that help with safe spring adjustment:
- Winding Bars: Used for torsion springs. Never substitute them with screwdrivers. They fit perfectly into the winding cone holes.
- Wrench Set: Helps loosen and tighten set screws.
- Locking Pliers or C-clamps: Hold the garage door in place so it doesn’t move while you’re working.
- Steady Ladder: You’ll be working at eye level with the spring. The ladder should sit flat on the floor.
- Chalk or Marker: Used to mark your starting spring position.
- Safety Gear: Gloves and safety glasses protect your hands and eyes in case a spring shifts suddenly.
Have you laid everything out? Do a quick double-check. If you’re ready, you’ll feel more confident going into the next step. A calm start always leads to safer repairs.
Step#3 Disconnect the Garage Door Opener
Before you adjust anything under tension, you need to take control of the door. That means cutting power and switching it to manual mode.
This step doesn’t take long, but skipping it could cause the door to move without warning. And that’s when things go wrong.
Unplug the Power
- What to Do: Look for the power cord that connects the opener to the ceiling outlet. Reach up and unplug it completely.
- Why It Matters: This stops the motor from turning on during your repair. Even a remote press or sensor glitch could cause movement.
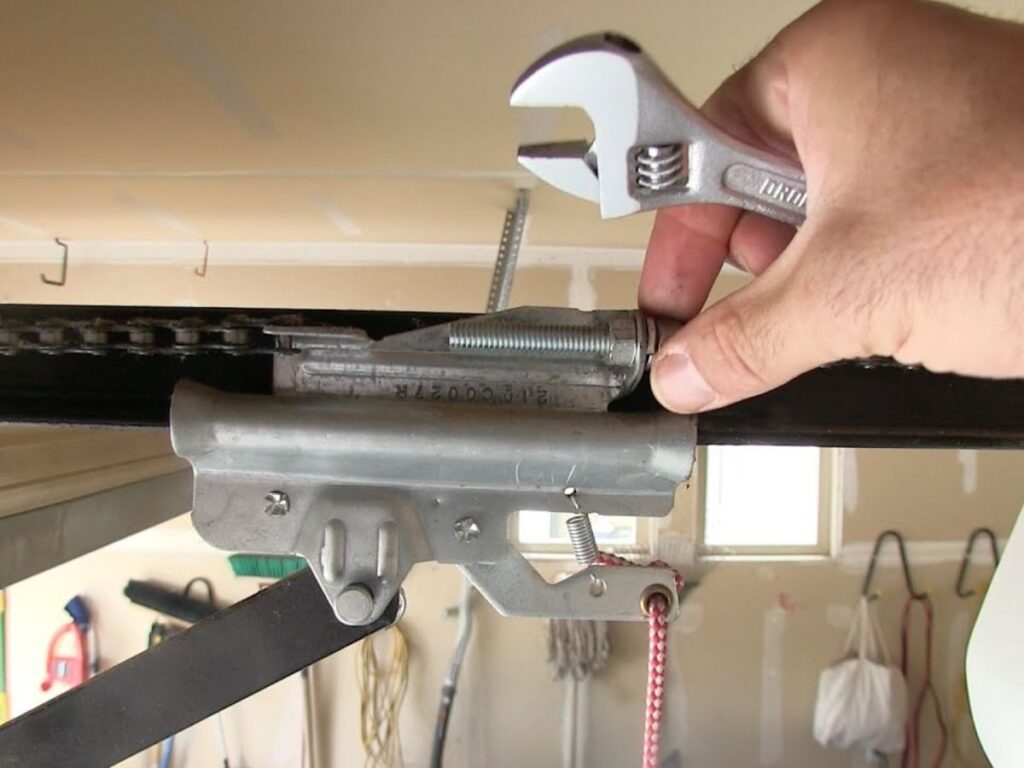
Pull the Red Cord
- What to Do: Find the red handle hanging from the track and pull it straight down, then slightly back toward the door. You may hear or feel a click.
- Why It Matters: This puts the door in manual mode by disconnecting it from the opener. It allows you to lift the door by hand safely.
Try Lifting the Door
- What to Do: Grip the bottom of the door with both hands and lift it a few inches. Go slow and steady.
- Why It Matters: The door should move freely if everything is disconnected. If not, pull the red cord again until it clicks properly.
Once these three steps are done, the opener is no longer in control. The door is now ready for safe manual adjustments exactly how Vallsico trains its team to keep every step controlled and predictable.
Step#4 Secure the Door in Place
Once the garage door opener is disconnected, your next priority is to make sure the door stays exactly where you want it. Even if the door feels balanced, it can move suddenly while you’re adjusting the spring. That kind of shift, especially mid-task, can throw off your work or worse, cause injury. So before you go further, take a few minutes to lock the door in position.
Raise the Door Halfway
Stand in front of the door and grip the bottom panel with both hands. Lift the door slowly until it’s about halfway open roughly waist to chest height. Let go carefully and watch to see if the door holds that position. If it starts to drop, even a little, you’ll need to secure it before continuing.
Use Clamps or Locking Pliers
Grab two C-clamps or locking pliers and attach one to each side of the metal track, just above the rollers. Make sure they’re tight and can’t slide down if the door puts pressure on them. This will stop the door from moving during your adjustment. Think of it as a simple safety backup that stays out of your way while you work.
Double-Check the Door’s Stability
Once the clamps are in place, give the door a gentle push upward and then downward. You’re not trying to move it far just enough to test if the clamps hold firm. If the door stays put, you’re ready to move on. If there’s even a little movement, stop and tighten the clamps until everything is solid.
Now the door is secure, and you’ve eliminated one of the biggest risks during a spring adjustment. From here, you can focus fully on the job with both hands and a clear head.

Step#5 Mark Spring Settings (Important!)
Before you loosen anything, take a minute to mark where your spring sits right now. It might feel like a small step, but it gives you a reference point you’ll rely on later.
I once skipped this part, thinking I’d remember the position. I didn’t and I ended up over-adjusting the spring and making things worse.
Choose a Marker
- What to Use: Pick a bright paint pen, chalk, or permanent marker that stands out against the metal. Keep it nearby you’ll use it again later.
- Why It Helps: You need something that won’t rub off as you work. The clearer the mark, the easier it is to track your adjustments.
Where to Place Your Marks
- Torsion Springs: Mark the winding cone where it meets the shaft. Draw a single line across both so you can see how far the cone turns.
- Extension Springs: Mark the point where the spring hooks into the bracket or track. Add a line on both the spring and the attachment point.
Why This Step Matters
- Visual Guide: These marks move with the spring, showing you exactly how much you’ve turned it.
- Better Control: Even a small adjustment makes a big difference. Having marks helps you avoid over- or under-tightening the spring.
Take a moment to double-check your marks. Make sure they’re bold and easy to see because once you start adjusting, you’ll want that guide to be crystal clear.
Step#6 Loosen the Set Screws (Torsion Springs Only)
If your garage door uses torsion springs, this step comes before any actual adjustment. The set screws on the winding cone need to be loosened so the spring can turn. It’s a small move, but one that must be done with care and control.
Insert the Winding Bar
Choose a winding bar that fits snugly into the hole on the winding cone. Slide it all the way until it feels firm and secure. Keep both hands on the bar and stand centered on your ladder. This tool keeps the spring steady while you loosen the screws.
Loosen the Screws Slowly
With the bar holding the tension, use a wrench to turn each set screw counterclockwise. Loosen them one at a time, no more than a full turn at once. You might feel the spring press slightly against the bar . This is normal. Just don’t remove the bar during this process.
Once both screws are loose, the spring is ready for adjustment. Take a breath you’ve just passed one of the most careful parts of the job.

Step#7 Adjust the Spring
This is where the actual adjustment happens. You’ve already done the careful prep: identified the spring, marked its position, and loosened the set screws. Now it’s time to change the tension slowly and precisely.
A small turn can make a big difference. One customer told me they thought they’d need several full turns but ended up adjusting just one. If you take it slow, you’ll get it right without overdoing it.
Understand Direction
Spring direction matters, and it depends on the side of the door you’re working on. The general rule is:
- To increase tension, turn the spring upward
- To decrease tension, turn the spring downward
Use the mark you made earlier to track how far you’ve turned. If you’re unsure which way to go, take a moment and double-check your spring’s position.
How to Adjust Safely
- Keep One Bar in Place: Always keep one winding bar fully inserted in the winding cone to prevent sudden movement. This gives you control and keeps the spring stable.
- Insert the Second Bar: Place the second bar into the next hole above or below, depending on the direction you need to turn. Make sure it’s firmly seated before moving.
- Rotate Gently by ¼ Turn: Turn the second bar slowly to move the spring by no more than a quarter turn. Smooth motion helps avoid jerks or slips.
- Move and Repeat: Remove the bottom bar, move it up (or down), and repeat the process as needed. This step-by-step rhythm keeps adjustments even.
- Avoid Fast or Jerky Movements: Quick motions can cause loss of control or injury. Steady turns are safer and give you better results.
How Much to Adjust?
Start with one full turn, which equals four ¼-turns. After that, you’ll test the door’s movement in a later step to see if more adjustment is needed. Don’t go past your marked line unless absolutely necessary.
Once the spring is adjusted, you’re ready to tighten it back in place. That’s your next step.
Step#8 Tighten Set Screws and Remove Tools
Once the spring is adjusted, it’s time to lock everything back into place. This part might seem simple, but if the set screws aren’t tight enough, the spring can shift and undo your work. You’ve already handled the hardest part this step is about finishing strong and steady.
Tighten the Set Screws
Grab your wrench and turn both set screws clockwise to tighten them. Take your time make each one snug, but not so tight that you strip the threads. A good rule is to go just past hand-tight until the screw stops turning easily. That’s usually all it takes to keep the spring secure.
Remove the Winding Bars
With the screws tight, hold one winding bar firmly in place. Then slowly slide out the other, making sure there’s no sudden movement. Once the first bar is clear, remove the second one just as carefully. You’re still dealing with spring pressure, so stay in control until both bars are out.
Clear the Area
Take a quick look around your workspace. Move your tools off to the side and check that the ladder isn’t blocking the path of the door. Nothing should be near the tracks, rollers, or under the door. Ask yourself are the set screws tight and the winding bars fully removed?
Once everything is clear and locked down, you’re ready for the next part: testing the door. You’re almost there just one more step to go.

Step#9 Reconnect Opener and Test the Door
Your spring is adjusted, the set screws are tight, and your tools are cleared out. Now it’s time to reconnect the garage door opener and see how the door performs. This is the part where you get to see the results of all your careful work.
Take it slow and pay attention. The way your door moves will tell you if anything still needs fine-tuning.
Reconnect the Garage Door Opener
Plug the opener back into the ceiling outlet. Then walk over to the red emergency release cord and pull it forward and slightly upward. This reconnects the opener to the trolley system. You’ll usually hear a soft click that lets you know it’s re-engaged.
Test the Door’s Operation
Press the wall button or use your remote to open the door fully. Let it travel all the way up, then close it again. Watch the entire motion carefully from start to finish. The door should move steadily—no lurching, dragging, or stalling.
Pay Attention to These Signs
Here’s what to look and listen for during the test run:
- Uneven Movement: One side of the door rises or falls faster than the other. This usually means the spring tension is still slightly off.
- Door won’t Stay Closed: If the door bounces back up or doesn’t sit firmly on the ground, it may still be under too much tension.
- Unusual Noise: Listen to grinding, squeaks, or clunking sounds. These noises can signal alignment or spring balance issues.
- Slams or Stalls: If the door shuts too quickly or pauses partway, something is still out of balance or resisting the opener.
A homeowner once told me their door felt better but still didn’t close right. We reviewed their marks and found they’d under-adjusted the spring by just a quarter turn. That tiny correction made all the difference.
Vallisco always encourages customers to trust what they see and hear during this step. If anything feels off, pause and make a small adjustment it’s the safest way to get it right.
Step#10 Final Safety Check
The spring is adjusted, the door operates smoothly, and your tools are out of the way. But before you walk away, take a few more minutes to run through a final safety check. This last step helps catch small mistakes that could cause big problems later.
People often forget clamps, tools, or overlook loose parts. When the door runs again, something minor can quickly turn into a repair job.
Check Spring and Hardware
- Spring Placement: The spring should be centered on the shaft and feel firmly in place. If it looks shifted or loose, recheck your marks and alignment.
- Set Screws: Make sure both screws are tight and seated fully into the winding cone. Nothing should be sticking out or able to rattle free.
- Leftover Tools: Look for any winding bars, wrenches, or markers still near the spring or shaft. These should be removed before the door is used again.
- Loose Hardware: Tap lightly around the shaft and cone with your hand or tool. If anything shifts or vibrates, it needs tightening.
Test The Door One More Time
- Door Movement: Open and close the door slowly while watching the track and rollers. Movement should be smooth with no wobble or drag.
- Unusual Sounds: Listen for clicks, thuds, or grinding noises that weren’t there before. Any new sounds could mean something has shifted slightly.
- Cables and Track: Check that the side cables are tracking cleanly without tension loss. Watch for uneven pulling or scraping near the tracks.
- Spring Behavior: Pay attention to how the spring unwinds and rewinds. It should remain quiet and controlled throughout the door’s motion.
Clear The Work Area
- Remove Tools: Put away all clamps, winding bars, ladders, and loose parts from the workspace. Tools left near the track can become serious hazards later.
- Clean Up Debris: Sweep or wipe away metal dust, wire bits, or packaging left behind. Small debris can jam rollers or clog track space.
- Check the Path: Make sure the track is clear from end to end. The space around the opener and sensor should also be unobstructed.
- Wipe Down Surfaces: Clean any grease, fingerprints, or dirt from the spring and nearby hardware. This not only looks better but makes future checks easier.
Once everything checks out, you’re officially done. You handled something that many people are afraid to touch and you did it with patience and care.
Conclusion
You’ve made it through all 10 steps. That’s no small thing. You’ve learned what to do, how to do it, and why each part matters.
You know where to place your hands, when to pause, and how much to adjust.
This guide walked you through everything. All that’s left? Take action. Don’t let fear or doubt stop you.
You’re more ready than you think.
Contact Vallisco today.
Explore More Helpful Resources
There’s more to explore! Check out our additional product selections to find exactly what you’re looking for:
Still haven’t found what you’re looking for? Don’t hesitate to contact us. We’re available around the clock to assist you.


