When I first started in the construction industry, I thought the door manufacturing process was simple. You choose the materials, cut them, and put them together, right?
But the more I got involved, the more I realized there’s a lot that goes into creating a high-quality door. There’s design, material selection, precise measurements, and, of course, ensuring everything fits together perfectly.
I’ve learned all this through years of experience and a few mistakes along the way!
If you’re looking to understand the process from start to finish, you’re in the right place.
In this guide, I’ll walk you through each step of door manufacturing, from design to production and quality control.
By the time you finish reading, you’ll know exactly what goes into making a door that lasts. You’ll gain the knowledge you need to make informed decisions about door manufacturing for your own projects.
So let’s get down to it!
Quick Overview Chart
This chart provides an overview of the steps involved in door manufacturing. It’s designed to give you a glimpse of the process before we dive deeper into each one.
| Step | Description | Key Materials | Tools Used | Key Focus | Why It Matters |
| Design & Technical Drawing | The stage where the door’s specifications and design are planned. | Wood, Metal, Glass, Fiberglass | CAD Software, Drafting Tools | Precision design, measurements | Sets the foundation for all subsequent steps and ensures the door fits perfectly. |
| Material Selection | Choosing the right material based on durability, appearance, and cost. | Wood, Steel, Aluminum, Fiberglass | Measuring Tools, Samples | Material properties, durability | The material impacts the door’s performance, appearance, and lifespan. |
| Cutting & Profiling | Shaping the raw material to create the door’s panels and edges. | Wood, Steel, Glass, Composite Materials | CNC Machines, Saws, Profile Cutters | Precision cutting and edge profiling | Accurate cutting ensures the door fits perfectly and aligns with the design. |
| Core Preparation | The process of shaping and fitting the door’s core. | Solid Wood, Foam, Honeycomb, Metal | Cutting Tools, Adhesives, Presses | Insulation, strength | The core determines the door’s strength, insulation, and weight. |
| Frame or Leaf Assembly | Assembling the frame and attaching the door panels. | Wood, Steel, Aluminum | Glue, Screws, Welding Equipment | Assembly and strength | Strong frame assembly ensures the door is secure and functions well. |
| Surface Finishing | Applying paint, stain, or varnish to the door surface. | Wood, Metal, Composite Materials | Sanding Tools, Brushes, Sprayers | Smooth finish, durability | The finish affects the door’s durability, aesthetics, and protection. |
| Hardware Slotting | Cutting and shaping spaces for hardware like locks, hinges, and handles. | Frame, Panels, Hardware | Drills, Slotting Tools, Measuring Tape | Precision for function | Proper slotting ensures the hardware works smoothly and securely. |
| Quality Inspection | Final checks to ensure the door is durable, functional, and meets standards. | All materials | Measuring Tools, Test Devices | Functionality, testing | Quality checks prevent defects and ensure the door works properly for years. |
Now that you have an overview, let’s break down each step in more detail so you can understand exactly how the process will come together for your next door project.
Step#1 Design & Technical Drawing
When you think about making a door, you might imagine the materials or tools needed. But before you even start, there’s a crucial step: design and technical drawing. This stage is all about planning and setting the direction for everything that follows. It’s like drafting a blueprint for a house it gives you a clear path to follow.
Understanding the Purpose of the Door
The design process begins with understanding the purpose of the door. Is it for a bedroom, an exterior entry, or a commercial building? Each type has its own set of requirements. For example, a hotel lobby door might need to be large and impressive, while a bathroom door is more about function and privacy.
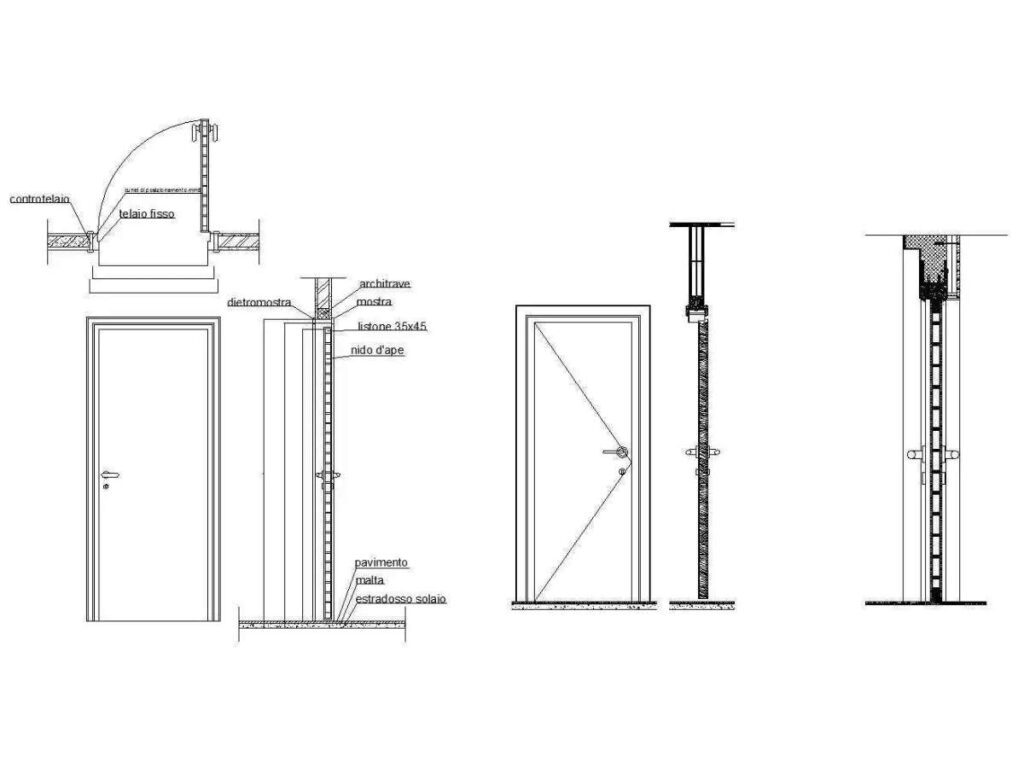
Creating Technical Drawing
Once you have a general idea, it’s time to move into technical drawing. This is where precision is key. A technical drawing is a detailed plan that shows exact measurements, dimensions, and specifications. It helps the manufacturer know exactly what to create.
In today’s world, most technical drawings are made using CAD (Computer-Aided Design) software, which allows for precise calculations and 3D visualization of the door.
Key Elements to Include in Your Design
Here are a few things to focus on during this stage:
- Dimensions: Exact measurements, including height, width, and thickness.
- Materials: What kind of wood, metal, or fiberglass will be used? The choice depends on the style, purpose, and budget.
- Style and Features: Do you want a solid door, or should it have glass panels or a decorative design?
Manufacturers like Vallisco, a leading door and window manufacturer, highlight the importance of accurate technical drawings. These drawings serve as the foundation for creating doors that fit perfectly and function smoothly. With the right plans in place, the manufacturer can ensure everything aligns precisely, helping to avoid costly mistakes later in the production process.
Step#2 Material Selection
Choosing the right material for your door is one of the most important decisions you’ll make. The material affects the door’s strength, appearance, and how long it will last. This is where you start turning your design into something tangible.
Choosing Your Material
There are several types of materials used for doors, and each has its own benefits. Here are the most common options:
- Wood: Classic and versatile, wood is often used for interior doors or exterior doors in residential homes. It offers a natural look and can be easily customized with stains or paint.
- Steel: Known for its strength, steel is used for security doors or heavy-duty applications. It’s a top choice when durability is a priority.
- Fiberglass: This material is lightweight, resistant to weather, and doesn’t warp easily. Fiberglass is often chosen for its energy efficiency, especially in entry doors.
- Aluminum: Common in modern design, aluminum doors are sleek, lightweight, and resistant to corrosion. They are often used for commercial purposes or high-end residential projects.
Why Material Matters
Each material affects the door’s performance in different ways. For instance, a steel door provides maximum security, while a wood door may offer better insulation. When selecting a material, you need to think about its primary function. Is it an interior door or an exterior door? Will it need to withstand harsh weather or provide extra security?
The Manufacturing Process Affects Material Choice
The manufacturing process will also impact which materials work best. Some materials are easier to cut and mold than others. For example, wood is relatively simple to work with, while metal requires specialized tools and expertise. As you move forward in the production process, the material will need to align with the manufacturing capabilities.
After picking the material, you’ll be one step closer to bringing your door design to life. Whether it’s the strength of steel or the elegance of wood, the material you choose will set the tone for the entire project.
Step#3 Cutting & Profiling
Once you’ve selected your material, it’s time to cut and shape it. This step is all about turning raw material into the pieces that will make up your door. Precision is crucial here, because even a small mistake in cutting can affect how the door fits and functions.
Cutting Material
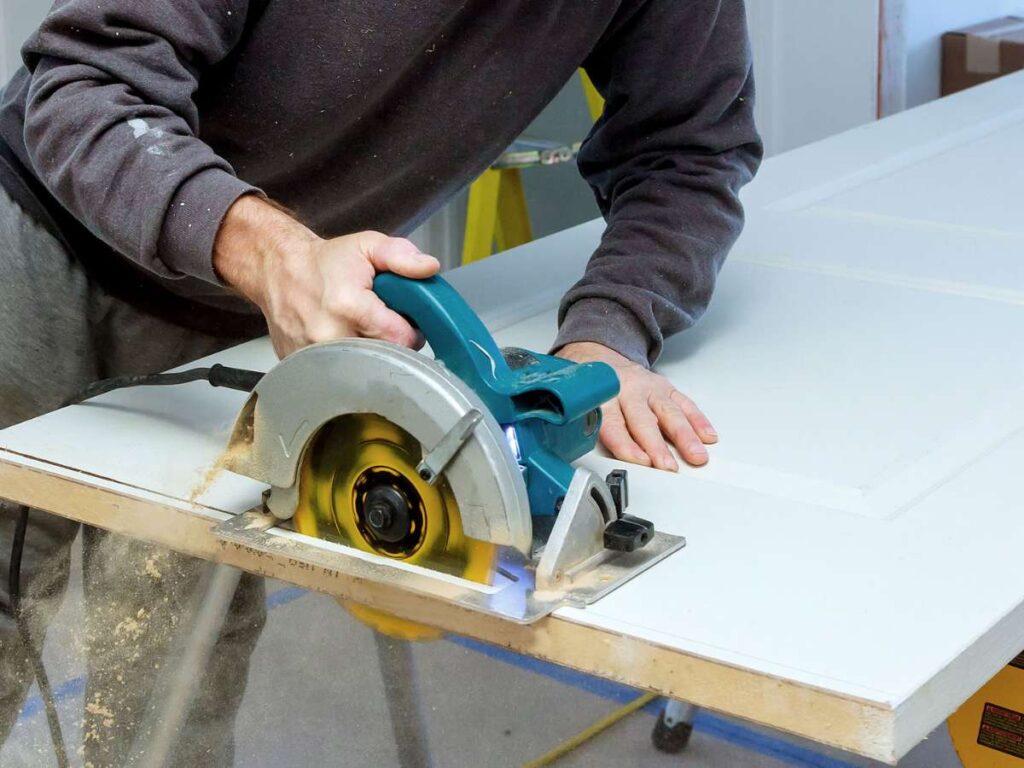
The first part of this step is cutting the material to the exact dimensions. For wood, this might involve using a saw to cut large sheets down to the right size. For metal or fiberglass, more specialized equipment like a laser cutter or CNC machine is used to get precise, clean cuts.
Some key points to remember:
- Accuracy: The measurements must be exact. Even a tiny mistake can lead to a door that doesn’t fit in its frame properly.
- Tools Used: Different tools are needed for different materials. A table saw might work fine for wood, but metal requires cutting machines with greater precision.
Profiling the Edges
Once the material is cut, it’s time to profile the edges. This is where you shape the edges of the door to match the design. Profiling can be done using special tools that smooth or shape the edges, creating a clean and polished finish. Depending on the style of the door, the edges might be rounded, beveled, or left straight.
Common Profiling Styles:
- Round edges: Often used in doors in a traditional style.
- Beveled edges: Used for a more modern look.
- Square edges: Typically seen in more industrial or minimalist designs.
I’ve seen firsthand how important this step is. Once, during a project, a slight miscalculation in the cutting process led to the door not fitting the frame. It was a frustrating setback, but it taught me the importance of precision. After all, this is the foundation for a door that works properly and looks great.
With the cutting and profiling done, your door is beginning to take shape. The next step will bring all these pieces together to create something functional and beautiful.
Step#4 Core Preparation
Now that your material is cut and shaped, it’s time to focus on the core of the door. The core is the heart of the door, giving it strength and stability. Depending on the door’s purpose, the core can be made from different materials. It plays a crucial role in ensuring that the door functions properly and lasts for years.
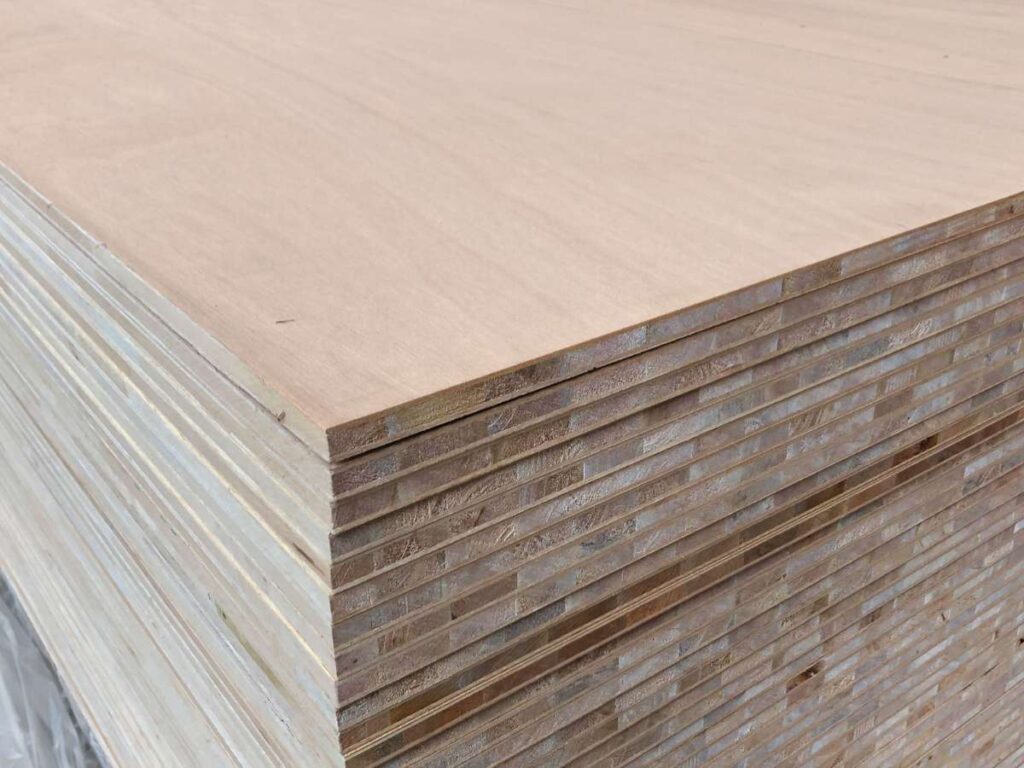
The core is the internal part of the door that fills the space between the two outer layers (the frame and face material). Think of it as the backbone of the door. It’s what gives the door its structure and insulation properties.
Core Options
- Solid Wood Core: A traditional choice, offering strength and a solid feel.
- Honeycomb Core: Lightweight, but with great strength. Often used in interior doors.
- Foam Core: Excellent for insulation. Often found in modern energy-efficient doors.
The choice of core affects not just how the door looks but also how it performs. For example, a foam core is perfect for exterior doors that need to provide insulation against the weather.
Preparing the Core
Once the core material is chosen, it’s time to prepare it for insertion into the door. This includes cutting the core to the proper size and shaping it to fit within the door’s frame. It’s important that the core fits snugly without being too tight or too loose. If the core is misaligned, the door won’t function as it should.
- Cutting and Shaping: The core material is cut to match the dimensions of the door. It’s important to make sure the core fits securely and evenly in the frame.
- Securing the Core: Once in place, the core must be glued or mechanically fixed to ensure it stays in position.
With the core in place, your door is one step closer to being fully functional. The next stage will bring everything together, adding the frame and finishing touches.
Step#5 Frame or Leaf Assembly
At this stage, the door starts to come together. The frame or leaf assembly is the process of putting the different parts like the core and the outer panels into one solid piece. This is where the door takes its final shape and starts looking like the one you imagined.
Frame Assembly
The first task is putting together the frame. The frame is the outer structure of the door that holds everything in place. It needs to be strong enough to support the entire door and withstand pressure when the door is opened or closed.
- Joints: The frame pieces are usually joined together using specific techniques, like dovetail or mortise-and-tenon joints. These joints help the frame stay strong and stable.
- Aligning: It’s important to make sure the frame is square and aligned. A misaligned frame can affect how the door hangs and how it operates.
Leaf Assembly
Once the frame is in place, the next step is to attach the leaf, which is the actual door panel. The leaf is usually made up of the core and the outer material, like wood, metal, or fiberglass. The leaf is carefully fitted into the frame to ensure a snug and secure fit.
- Attaching the Core: The core is secured to the frame. It is important that the core doesn’t shift or move inside the frame. This can be done with adhesives or mechanical fasteners.
- Securing the Outer Panels: The outer panels (made of wood, metal, or other materials) are then attached to the frame. This is when the door starts to take shape and look complete.
Final Adjustments
At this point, everything should be held together, but some fine-tuning is still needed. The door is tested for alignment, making sure that it fits properly within the frame. The hinges are also checked to ensure the door swings open and closed smoothly.
I’ve seen how small adjustments at this stage can make a huge difference. I remember working on a custom door that just didn’t fit right at first. A little tweaking with the frame and leaf made it swing perfectly.
With the frame and leaf assembly complete, your door is almost ready to move on to the next step adding the finishing touches that will make it functional and beautiful.
Step#6 Surface Finishing
Now that the door’s structure is taking shape, it’s time to focus on the surface finishing. This step is where the door gets its final look and feel. Surface finishing not only adds to the door’s appearance but also protects it from damage over time. Whether you want a natural wood finish or a sleek painted look, this step brings your door’s design to life.
Sanding the Surface
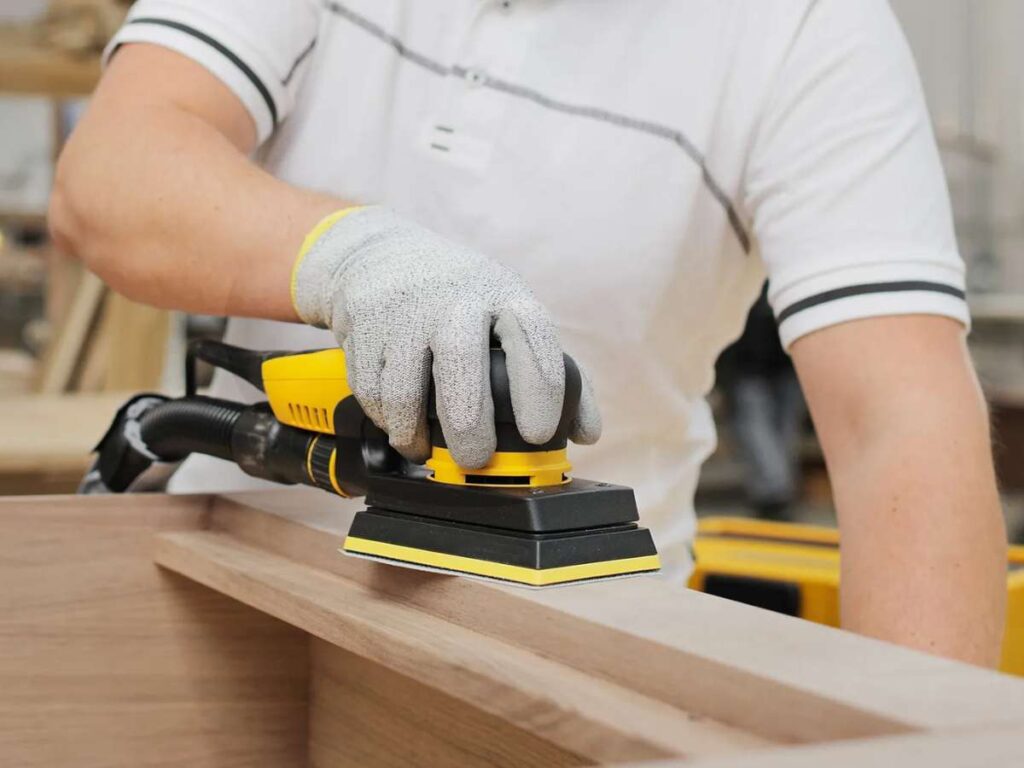
Before any finishing touches can be added, the door must be smooth. Sanding is the first step in this process. It helps to remove any rough spots, splinters, or imperfections in the material. You’ll want to use various sandpaper grits, starting from coarse and moving to finer ones. This ensures that the surface is perfectly smooth and ready for paint or stain.
- Why Sanding Matters: Sanding not only improves the door’s appearance but also helps the finish adhere better. A smooth surface means the paint or varnish will go on evenly and look professional.
Applying Stain, Paint, or Varnish
Once the door is smooth, it’s time to apply the finish. This can be done in a few different ways depending on the material and look you want.
- Staining: Staining wood doors brings out the natural grain and color of the wood. It gives the door a rich, warm look while still allowing the texture of the wood to shine through.
- Painting: Painting is a great choice if you want a solid color and a smooth, glossy finish. Paint also adds a layer of protection to the door’s surface.
- Varnishing: For wooden doors, varnish gives a clear, shiny finish. It not only enhances the wood’s natural beauty but also protects it from moisture and wear.
I’ve learned that the right finish can completely change the look of a door. I’ve worked on projects where the difference between a good finish and a bad one was huge. A poor finish can make a door look cheap, while a well-done one can elevate the entire space.
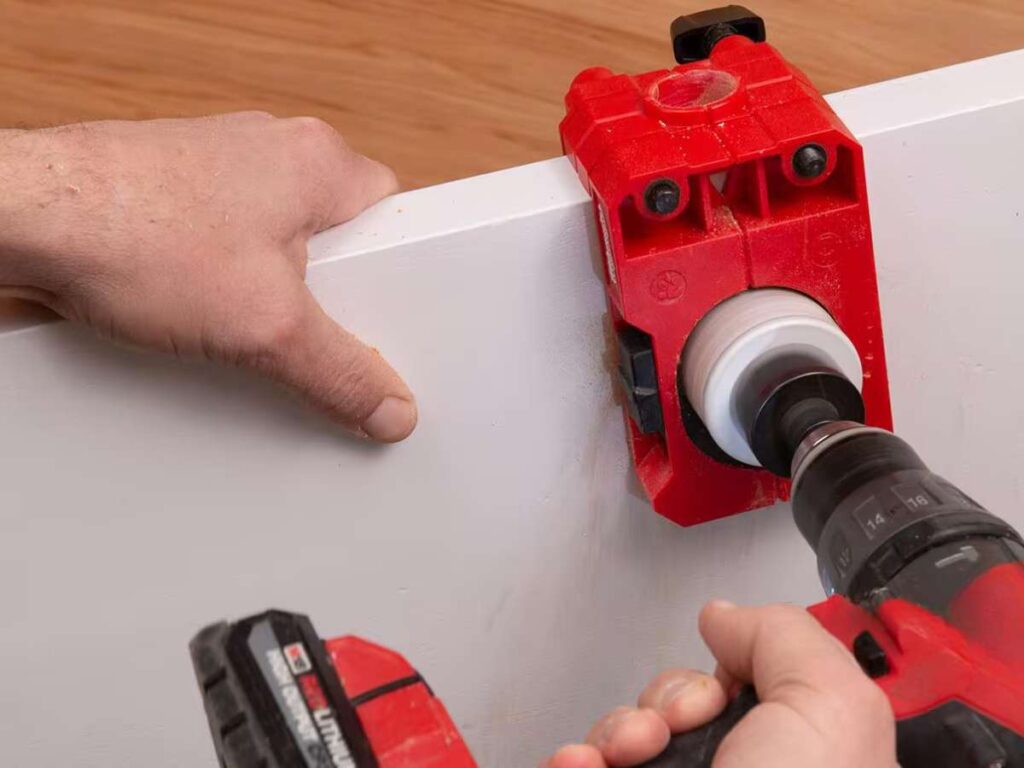
Step#7 Hardware Slotting & Drilling
Now that your door is looking great and ready for action, it’s time to add the hardware. This step involves cutting slots and holes for the hinges, locks, handles, and any other mechanisms that will be attached to the door. Getting this right is essential for ensuring the door functions smoothly and securely.
Marking and Cutting for Hardware
The first task in this step is marking the spots where the hardware will go. You need to be precise when measuring the locations for the hinges and lock mechanisms. One small mistake can lead to a door that doesn’t open properly or doesn’t lock securely. Once you’ve marked the spots, it’s time to cut the slots.
- Hinge Slotting: You’ll start by creating slots for the hinges, which will allow the door to swing open and closed. These slots must be cut deep enough for the hinges to sit flush with the door surface.
- Lock Slotting: Next, the slot for the lock and handle mechanism is created. This slot is usually a bit more involved since it needs to accommodate the locking mechanism, latch, and handle.
Drilling for Accuracy
Once the slots are cut, the next task is to drill holes for the screws that will secure the hardware in place. This requires a steady hand and the right tools to avoid damaging the door. Drilling should be done carefully to make sure the screws hold the hardware tightly and securely.
- Why Accuracy is Crucial: I’ve seen doors where the hardware was misaligned, which made them difficult to open or close. It’s frustrating, and it always comes back to one thing: precision.
Test Fitting the Hardware
Before finalizing, it’s essential to test the hardware. This means attaching the hinges, handles, and locks to check that everything works smoothly. If there are any issues, like a misaligned handle or a hinge that sticks, it’s much easier to fix now before everything is fully assembled.
At Vallisco, a leading door and window manufacturer, this step is handled with precision to make sure each door is built to last.
Once the hardware is in place, your door is almost ready to go. The final step is making sure it fits into the frame and operates as it should. With the hardware slotting complete, you’ve given your door the functionality it needs to perform well for years to come.
Step#8 Quality Inspection
The final step in making your door is quality inspection. This is where everything you’ve worked on comes together to make sure the door is ready for use. Without this step, you could end up with a door that doesn’t work properly or doesn’t last as long as it should. Quality inspection checks for any flaws in the door, making sure it meets all the required standards.
Visual Inspection
The first thing to do is visually inspect the door. You want to check for any imperfections in the surface, like scratches, dents, or discoloration. It’s also important to look at the finish, whether it’s paint, stain, or varnish. Any blemishes here can affect the door’s appearance.
- Surface Imperfections: Look for any unevenness or damage to the door’s surface. This could include visible dents, cracks, or marks that affect the look of the door.
- Color Uniformity: Check that the paint or stain is applied evenly across the surface. Uneven coloring can make the door look unprofessional and may cause the finish to wear out unevenly.
Functional Testing
Once the door looks good, it’s time to test how well it functions. This includes making sure the hinges work smoothly, the locks engage correctly, and the handle turns easily. The door should open and close properly without any sticking or rubbing.
- Hinge Movement: The door should open and close with ease. Test the hinges by swinging the door several times to make sure they aren’t stiff or squeaky.
- Lock and Handle Alignment: Make sure the lock and handle align properly when the door is closed. A misaligned lock can cause security issues or make the door difficult to operate.
Strength and Durability Testing
In some cases, especially for heavy-duty or exterior doors, strength and durability tests are conducted. This might include testing the door’s ability to withstand pressure, weather, or impact. This is particularly important for security doors, which need to stand up to more stress than a regular interior door.
- Strength Under Pressure: Push or apply pressure to the door to test its durability. Ensure the door holds up and doesn’t bend or warp.
- Weather and Impact Testing: If it’s an exterior door, test its ability to withstand exposure to weather or rough handling. You want the door to be able to handle the elements without breaking down.
I’ve seen doors that seemed fine on the surface, but a quick functional test revealed some issues. It’s easy to get excited when the door starts to look complete, but a thorough inspection is crucial. I’ve learned the hard way that skipping this step can lead to problems later on.
Conclusion
Building a door from start to finish is an exciting process, from design to the final inspection.
We’ve covered everything: the materials, cutting, profiling, assembly, and finishing steps that create a functional and beautiful door. Now you know how each part of the process works, and why it’s so important for your door to come together perfectly.
So, are you ready to take the first step in your own door project? Don’t wait start planning today!
Contact us today, or get in touch with Vallisco for expert door manufacturing solutions! Let’s make your door dreams a reality together.
Check Out These Additional Resources
Need more ideas? Browse through our extended range of products and discover something new:
Garage & Commercial Doors:
Sliding & Folding Doors:
Glass & Balcony Doors:
Security & Fire Protection Doors:
Metal Doors:
Wooden Doors:
Special Style Doors:
Automatic & Energy-saving Doors:
Barn & Swing Doors:
Revolving & PD Doors:
Regional & Cultural Styles:
For more in-depth knowledge, take a look at these recommended reads. We think you’ll find them useful:
Door Basics & Design:
- 9 Door and Design Ideas for Modern Living
- 8 Types of Hotel Doors Ideas
- Your Step-by-Step Door Measuring Guide
- Measuring for a New Door? Here’s How to Do It
Installation & Removal:
- How Do You Remove A Patio Door?
- How Do I Install a Storm Door?
- How to Remove a Screen Door from a Sliding Door?
- How To Determine Door Swing Direction?
Maintenance & DIY Fixes:
- How to Stain a Front Door?
- How to Fix a Window That Keeps Sliding Down
- How to Get Streak-Free Windows?
Windows & Automatic Systems:
- 10 Creative Ways to Decorate a Bay Window
- How Are Vinyl Windows Made? A Step-by-Step Guide
- How Do Automatic Sliding Doors Work?
Blogs – Apartment & Villa Doors:
Still haven’t found what you’re looking for? Don’t hesitate to contact us. We’re available around the clock to assist you.


